Time for a quick fight in the Drawbridge system. What were the Alpha Legion up to? And will they too fall to the Great Devourer before their nefarious scheme comes to fruition?
Kraken and Stylus checking in for this Battle Report!
The Mantis Warriors had stumbled over an Alpha Legion cell during their search for the synapse leaders of the Tyranid Swarm on Drawbridge. Swift action ensured the cell's destruction, along with their hidden base in one of the manufacturing centres on the planet.
But the Hydra is many-headed. Even as their main base was obliterated by orbital fire, a second cell emerged from their hiding place and made to leave the planet.
Their escape route lay through the distribution hub of an ammunition factorium, where a couple of cargo lighters had been left behind in their loading bays. Imperial pic-sec cameras caught them making their retreat. They also picked up a tide of chittering horrors lying almost directly in their path. Unaware, the Alpha Legion made for the void-capable craft with apparent haste. Patched in to the feed, Hagan Lamprey commanders sat back and got ready to enjoy the show.
Take Off, Nuke From Orbit - Alpha Legion
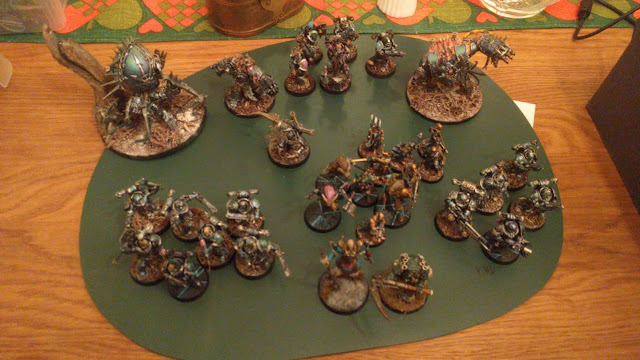
I took little bit of everything for this list, since it's representing a desperate evacuation. The Helbrute and Venomcrawler should give me some hefty punch and shooting, with a sole Obliterator backing them up.
A couple of squads of heretics (I took mismatched numbers since I felt that two squads of six would artificially inflate their Power Level, and that would come into play for scoring) including some Noise Marines (sadly too expensive to take more than five of them) and some Cultists who are just lucky to be here.
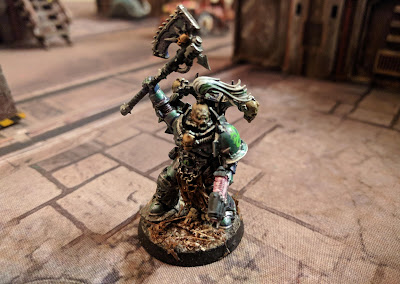
Commanding them is a Lord, packing a daemonic power fist that should be a match for the biggest of bugs, and a Sorcerer whose Warptime I'm relying on to get the units moving.
I'm not really thinking about defending my own lines. The plan is to punch a hole and get the guys out! (except the Cultists, they're just lucky to be here).
Chaos Space Marines - Alpha Legion - Battalion
- Chaos Lord (HQ)(Warlord)
Power fist, Plasma pistol, Frag & Krak grenades, Mark of Nurgle
Trait: Clandestine
Relic: G'holl'ax, Fist of Decay - Chaos Sorcerer (HQ)
Force Stave, bolt pistol, Frag & Krak grenades
Powers: Prescience, Warptime - 11 x Chaos Cultists (Troop)
Brutal assault weapon & autopistol, 9 x Autoguns, 1 Heavy stubber - 7 x Chaos Space Marines (Troop)
Combi-plasma & Chainaxe, 5 x boltguns, 1 x plasma gun - 5 x Chaos Space Marines (Troop)
Combi-melta, 3 x boltguns, 1 x heavy bolter - Greater Possessed (Elite)
Daemonic mutations - Helbrute (Elite)
Helbrute fist, heavy flamer, multi-melta - 5 x Noise Marines (Elite)
Astartes chainsword & Doom siren, 4 x Sonic blaster, 1 x Blastmaster - 1 x Obliterator (Heavy)
Fleshmetal Guns, Crushing fists, Mark of Slaanesh - Venomcrawler (Heavy)
Eviscerating claws, 2 x Excruciator cannon, Soulflayer tendrils
Points: 1,000 | Level: 56 | Battle-forged + Battalion: 6 CPs
Afanc Emergent - Hive Fleet Afanc
Here's a list I wrote just after I painted the Trygon, forgot about, dug up again and decided to use before I checked the mission!
It's a very deep-strikey list, which isn't going to help me much in a game where I can only deep strike into my own deployment zone (see below). But it's also surprisingly decent for this mission, being fast and also thick on the ground so I can block the enemy's movement. The Alpha Legion aren't going to be moving forward if they have to wade through all the Termagants, after all!
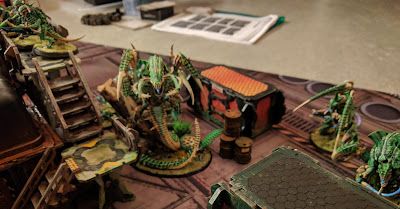
Broadly, it's two groups. A Neurothrope to babysit the backfield, probably with the Rippers and Termagants. Then an armoured column of combat horrors to rush forward and escape, led by the Tyrant and backed up by a Trygon and a Carnifex. Warriors and Raveners to patch whatever holes may develop, and overall that gives me some reasonable light shooting, hefty psychic clout and murderous combat prowess.
Or so I hope!
Tyranids - Hive Fleet Jormungandr - Battalion
- Neurothrope (HQ)(Warlord)
Claws and Teeth
Powers: Psychic Scream - Hive Tyrant (HQ)
Monstrous Rending Claws, Two Devourers with Brainleech Worms
Powers: Catalyst, Power: The Horror
Relic: Resonance Barb - 3 x Ripper Swarms (Troop)
Claws and Teeth - 30 x Termagants (Troop)
20 x Devourers, 10 x Fleshborers - 3 x Tyranid Warriors (Troop)
2 x Boneswords & Deathspitter, 1 x Scything Talons & Venom Cannon, adaptive physiology: Dynamic Camoflage - 3 x Raveners (Fast)
Devourer, Scything Talons
- 1 x Carnifex (Heavy)
Enhanced Senses, Heavy Venom Cannon, Monstrous Crushing Claws, Spine Banks, Thresher Scythe - Trygon (Heavy)
3 x Massive Scything Talons, Adrenal Glands, Toxinspike, adaptive physiology: Murderous Size (Massive Scything Talons)
Mission
We're playing Behind Enemy Lines, an Incursion-scale Crusade mission from which we're ditching the campaign rules.
What does this mean? Well, primarily it means we're trying to escape our units from the opposite board edge, with units within 6" of the other side able to perform an action to leave at the end of the movement phase. Each unit that manages this scores VP equal to their Power Rating at the end of the game.
There's also 5 VPs a turn for Line Breaker (two units entirely within your opponent's deployment zone), and 5 for Hold Them Back (none of the enemy escaped past you this round, can't score this in the last turn).
It also means it's dark, giving -1 to hit at over 18", which is icing on the cake for the Alpha Legion. More use for my 'Nids, in fact - few of my guns can shoot further than that anyway!
Additionally, it means that we are strictly confined to deployment inside our own 14"-deep deployment zones. No deep strikes, no sneaking out with scouting - even late arrivals must deploy in their zones. So it's a long trek to the other side, and we're both going to have to use our legs (or analogous appendages).
Terrain and Deployment
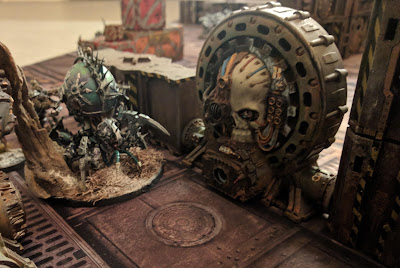
It's the shipyards of Drawbridge tonight, and I've got a fabulous new battle mat for the occasion. Thanks to General Pootle, who generously helped fund this as a birthday gift - it's the Imperial Sector by Deep Cut Studios, and it's great.
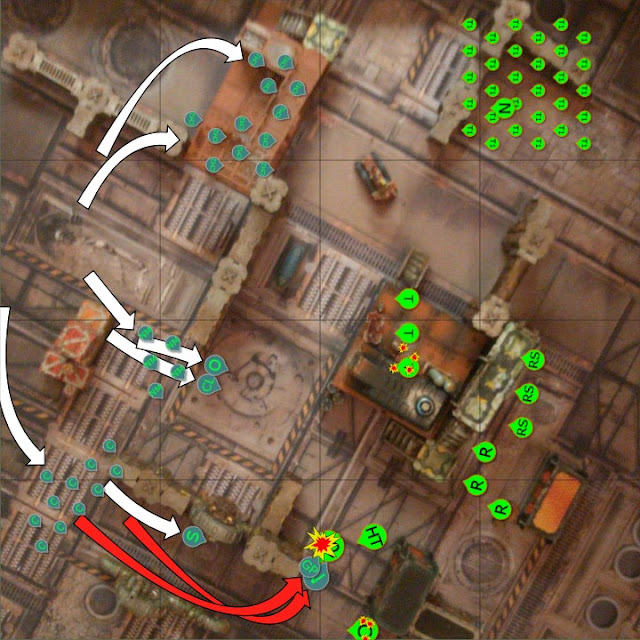
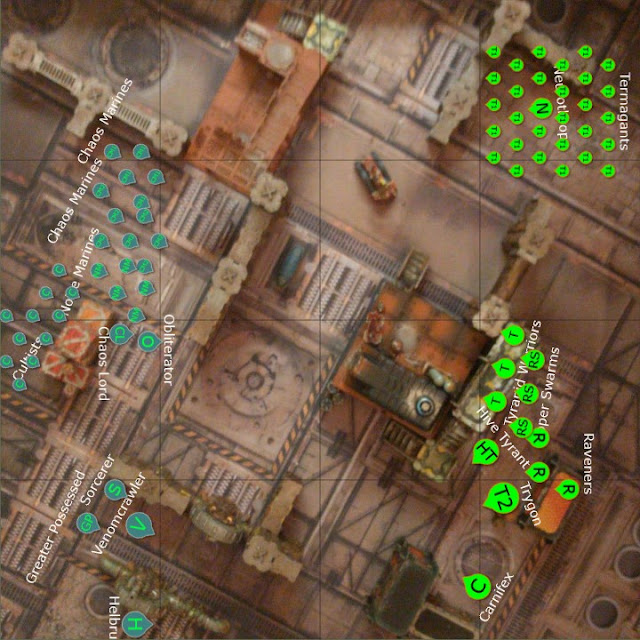
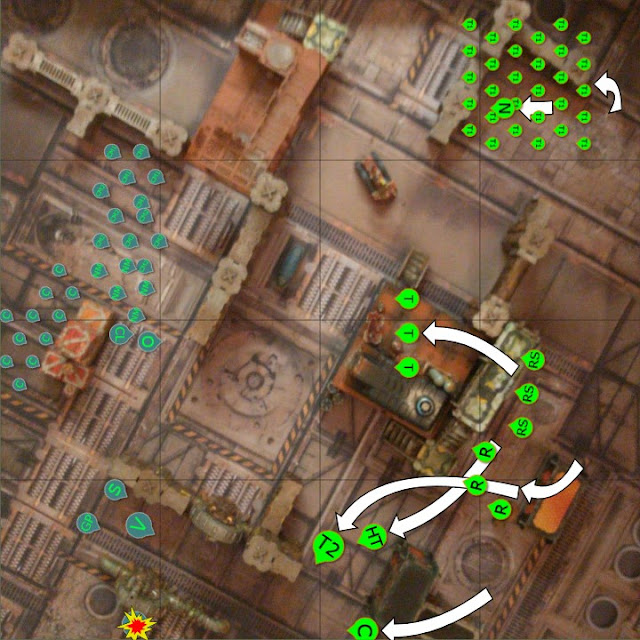
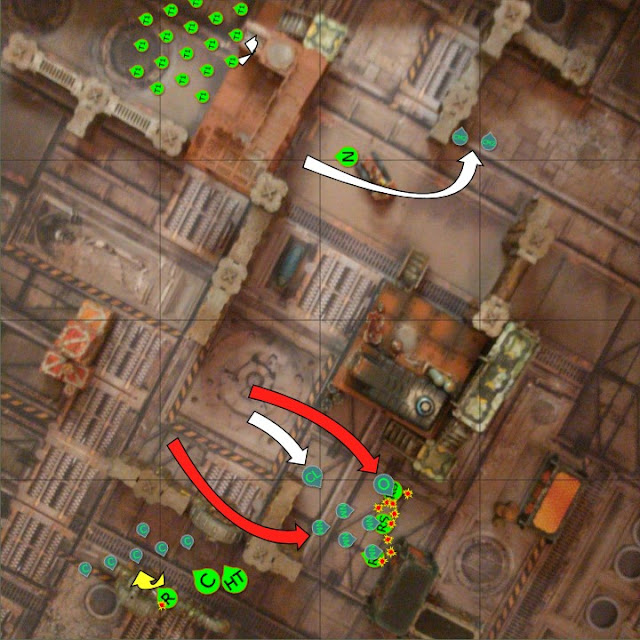
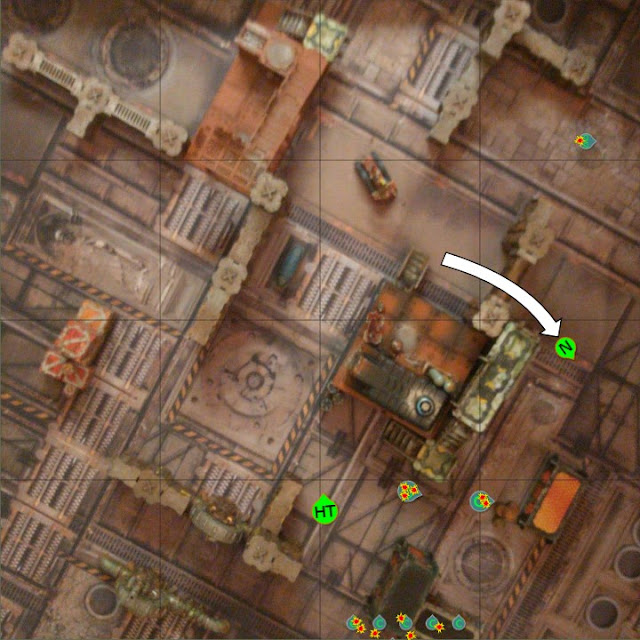
My deployment, across the east of the map, is fairly broad. The Warriors take a central firing point, with the Raveners and Rippers behind.
The North edge has all the big bugs - Tyrant, Trygon and Carnifex, and the South has all the Termagants with the Neurothrope as babysitter. Everyone is hugging cover, just in case we aren't going first!My first deployment shock is that I can't use any of my sneaking Alpha Legion stratagems to get ahead, or around the deployment zone. I have to start in my deployment zone and walk across the board to the other one like some kind of peasant!
Keen to take advantage of whatever cover is available, I divide my forces. The Venomcrawler and Helbrute form a strong left flank behind the haemotrope reactors, backed up by the Sorcerer and Greater Possessed.
The Chaos Lord, Obliterator, Noise Marines, Chaos Space Marines and Cultists all huddle behind the largest curtain wall, ready to break left or right.
Tyranids - Turn 1
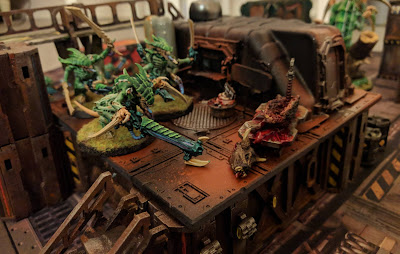
With the chance to steal a march, I actually don't move up as much as I could. The Warriors move centrally over the butcher's shed, although there's still not much they can see from up there.
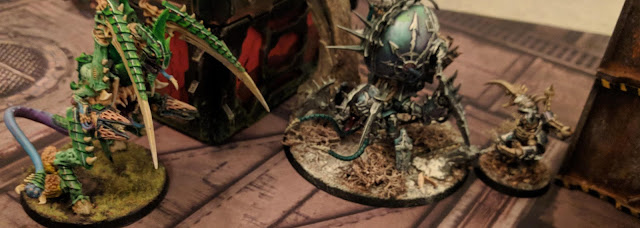
All the big guys scuttle forwards towards their opposite numbers, with the Carnifex squaring up to the Helbrute along a high-noon-style street, as the Trygon advances and prepares for a long charge round the corner to the Venomcrawler, and the Tyrant backs it up. But my north flank packs itself into cover, the small bugs not quite having the targets in sight to make it worth running forward yet.
Not much psychic activity, the range is too long yet. But I can throw The Horror on the Venomcrawler and Catalyst on the Trygon to try and slant that fight in my favourite. And although I say 'I cast Catalyst on the Trygon' out loud, I'm somehow convinced that it's actually Onslaught I'm casting, which will let me bounce ahead with a long-bomb charge.
Shooting, and the Carnifex wildly overperforms! A full spread of hits on the Helbrute, and they all go through for max damage. The Helbrute explodes (luckily too far from his pals to hit any of them), but that's the end of my shooting phase as I can't now see anyone else.
And that's it - the Trygon can't actually charge, because Catalyst has completely different effects, so he stays still and scratches his head.
Objective secured: Hold Them Back (5)
Tyranids 5 : 0 Alpha Legion
Alpha Legion - Turn 1
My Helbrute! That's a painful loss, as I was counting on his multi-melta and mighty fists to clear away some of the big bugs.
Rolling with the punch, I now decide that the Venomcrawler has volunteered to be the distraction, so it scuttles forward to take on the Trygon, while aiming its Excruciator Cannons at the Carnifex (desperation is making me ambitious).
The Sorcerer and Greater Possessed move to back him up. The Greater Possessed is now close enough to boost the daemon engine's strength, although the Sorcerer's subsequent Psychic phase is a complete bust due to Shadow in the Warp (ah, my old nemesis...)
The two squads of Chaos Space Marines advance towards the Termagant swarm - they can't really see enough of them to shoot, so they may as well make some progress downfield.
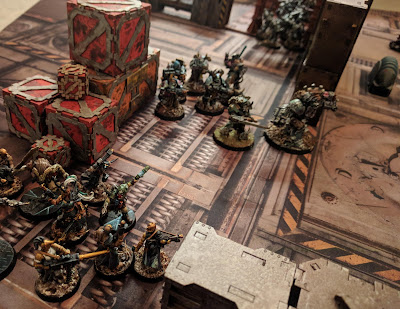
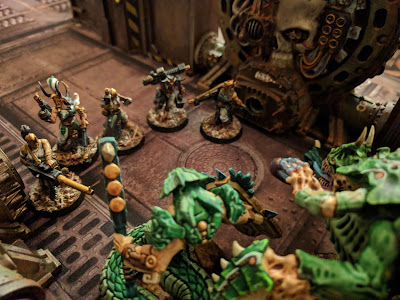
The Chaos Lord leads the rescue attempt on my wavering left flank, heading into open space with the Obliterator and Noise Marines backing him up. It's basically the closest I have to a mobile fire base.
Speaking of which, the Obliterator winds up with Veterans of the Long War and takes aim at the Tyranid Warriors. I roll pretty well for his fleshmetal guns, but Kraken deploys the Unyielding Chitin stratagem to reduce the incoming damage, meaning he only fells on Warrior.
Not wanting to waste any more shots in that direction, I used Endless Cacophony to target the Trygon, along with the Noise Marines. However, the Catalyst power that was erroneously placed on the big beastie saved his bacon, and he hardly took a wound.
The Venomcrawler adds to this inauspicious shooting phase by having his Excruciator Cannons bounce.
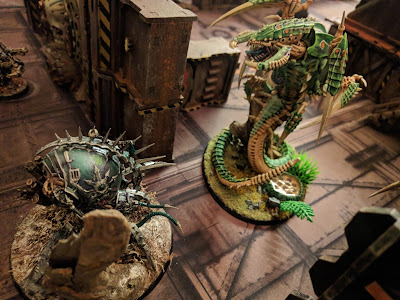
Undaunted, in the Assault Phase, the Venomcrawler pounces on the Trygon, backed up by the Greater Possessed. With Daemonforge played (I'm burning the Command Points here!), it manages to rip it into pieces so small that even Catalyst can't stitch it back together.
So that's my first turn done, and my head's in the lion's jaws now.
Objective secured: Hold Them Back (5)
Tyranids 5 : 5 Alpha Legion
Tyranids - Turn 2

The South flank are all where they need to be, really, but I send the Raveners to join them and put the Rippers in that direction too. They're not going to do much other than be a speed bump, but it's worth getting them there for later.
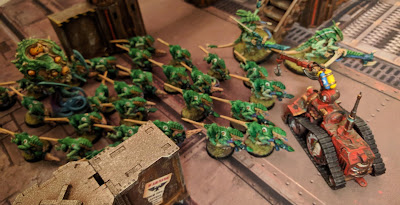
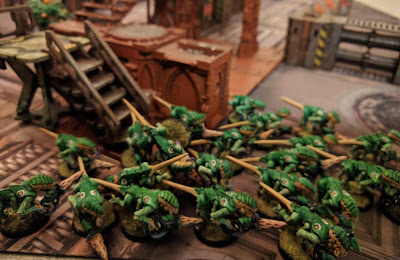
Up in the North, the Termagants roll out of cover, the Warriors coming to spearhead their assault.
The Psychic phase goes very well - more Horror for the Venomthrope and Catalyst for the Carnifex, as well as a few wounds off the Venomcrawler from the Tyrant. The Neurothrope lashes out with both its powers and wipes the smaller Chaos Marine squad out.
Shooting is pretty quiet - the Carnifex misses its shots, the Tyrant sprays the armoured fiends in front of it to no avail and the Warriors and Termagants between them only manage to drop a single Chaos Marine, thanks to their cover and general evasiveness. So it's down to the charge phase to help me out, and the South flank lets me down when none of them manage the 7" charge.
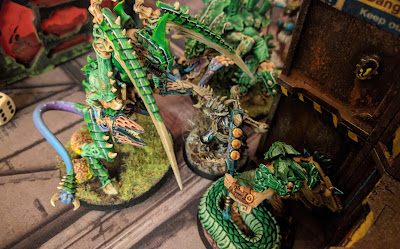
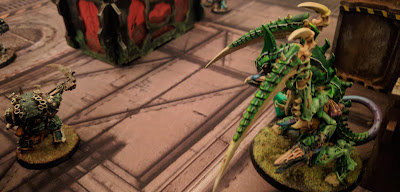
The big guys on the North don't disappoint, however, and the Venomcrawler dies sandwiched between the Carnifex and the Tyrant. The Raveners also make it in but don't really contribute other than to lose two of their number to the Greater Possessed.
However, that leaves the traitor trapped in a triangle of Tyranids! Try escaping that!
And I can! Having remembered the new Desperate Breakout stratagem (and if anything qualifies as desperate...), the Greater Possessed can bust free and open up the big bugs to my firepower...
... or at least he would, if I hadn't just spend 2CP on interrupting combat with an entirely wasted round of combat for my Venomcrawler. So I'm afraid he's stuck there.
Objective secured: Hold Them Back (5)
Tyranids 10 : 5 Alpha Legion
Alpha Legion - Turn 2

All the plum targets are tied up in combat, so I'll have to press ahead and shoot what I can kill.
The surviving squad of Chaos Space Marines emerge from cover to put themselves in front of the oncoming swarm, and the Cultists race down the side alley hoping no-one notices them.
The Chaos Lord and his trusty band move forward, hoping to make a long charge into the Hive Tyrant and Raveners. With the hitting power at my disposal, there's a chance I could box in the biggest xenos and crush them.
If that fails, the Chaos Sorcerer powers up his force stave and takes the questionable decision to take on the Carnifex.
The Sorcerer finally manages to cast Smite (and a super-Smite too - until Shadow in the Warp drops it down, the spoilsport), but does blast three wounds off the Carnifex.
The Chaos Space Marines overcharge their plasma guns (one of which promptly explodes, taking the easy way out) and kill one of the Tyranid Warriors. Supporting fire from the Obliterator and Noise Marines takes out the final Warrior and starts chipping away at the Termagants.
In the Assault Phase, I try and charge everything, but fail miserably, even with a reroll for the Lord. The only one who succeeds is the Sorcerer, who whiffs his chance at killing the Carnifex, and gets chomped down to a single wound for his folly.
A similar story for the Greater Possessed, whose daemon save allows him to somehow survive the claws of the Hive Tyrant on a single wound. I'm breathing a huge sigh of relief at this, since Kraken's monsters are going to be tied up for another turn dealing with him.
... and then Kraken reveals the Implant Attack stratagem, which deals a mortal wound to the Greater Possessed and he expires as a chestburster erupts from his armour.
Objective secured: Hold Them Back (5)
Tyranids 10 : 10 Alpha Legion
Tyranids - Turn 3
Time to get moving. Metabolic Overdrive throws the Termagant pack straight past the Chaos Marines ahead of them, at the remarkably cheap cost of only one of them. The big guys also duck out of combat, speeding past the wounded sorcerer towards the somewhat alarmed cultists, and the Rippers are left to plug the gap.
The Sorcerer promptly dies to a casual smite from the Tyrant, then the Ravener charges the Cultists and starts throwing them about with glee. But it gets wounded in the process, and despite their cowardly nature, the Cultists aren't as broken as I'd hoped.
My best rolling of the game - and it was for the Cultists!
The other flank looks much better, though - I've got a big unit on its way to score, and the Neurothrope is doing good work cleaning up the Chaos Marines. The pressure is on the Alpha Legion here!
That ruddy Neurothrope - invulnerable saves are less fun when you don't have a plethora of Smites in your pocket.
Objective secured: Hold Them Back (5)
Tyranids 15 : 10 Alpha Legion
Alpha Legion - Turn 3
I'm going to need a big swing in my favour to turn this around, so in true Alpha Legion style I try to melt back into the shadows.
The remnants of the Chaos Space Marine squad run away from the Neurothrope as fast as they can and hide behind a corner. I only need one of them to escape to claim their points.
The Cultists disengage from the Ravener, and back up hoping to tempt the Hive Tyrant to chase them.
Meanwhile the Noise Marines and Obliterator follow the Chaos Lord down the centre - but find that most of their targets have disappeared behind corners.
Which means that all my firepower gets thrown at the Neurothrope, who soaks everything on his invulnerable save and laughs through his mandibles.
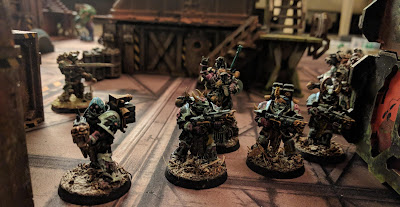
So it's going to be a bad day for the only Tyranid unit within reach - both Noise Marines and Obliterator smash into the Ripper Swarms, stomping them underfoot.
The Noise Marines then consolidate back in the direction of the Hive Tyrant and Carnifex, putting up a screen between them and the Chaos Lord. Maybe I'll get a chance to counter-punch after all.
 |
| It's a wall of sound. |
Objective secured: Hold Them Back (5)
Tyranids 15 : 15 Alpha Legion
Tyranids - Turn 4
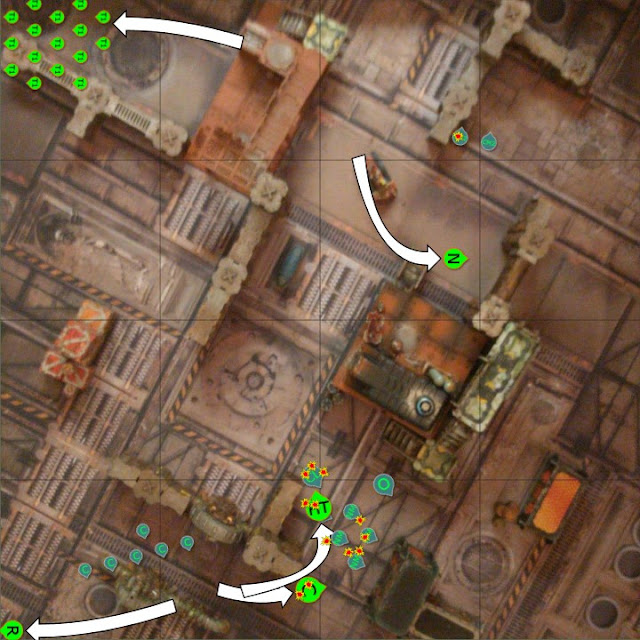
Free from combat, the Ravener can speed forward to the other side of the board and begin the escape action. So do the Termagants, so there's quite a big point swing about to happen there, they're a valuable unit!
This leaves the big guys to pull back and try and wipe out the Alpha push. The Neurothrope is just playing with the remaining Chaos Marines up North, killing one and regenerating its lost wound, but leaving the champion for later.
The Tyrant opens the batting with a big smite on the Noise Marines. But in my haste, I've totally forgotten about their Music of the Apocalypse ability! There's never a good time to kill these buggers.
Although I drop four, I'm at point blank range, and they all start throwing Krak grenades (apart from the Blastmaster guy). This wastes the Carnifex and slaps some retaliation on the Tyrant before I can put Catalyst on him. Even after I do that, shooting and killing the Noise Champion shortly afterwards loses me three more wounds to his Doom Siren. Ouch!
Most. Successful. Shooting. Phase. All. Game.
After that, the Tyrant dives on to the Chaos Lord. They both gamely struggle with each others' ward saves, losing a few wounds each (and Catalyst one again overperforms, saving me from a drubbing from that deadly Daemon Fist), so I repeat the gift of chest-bursting to steal an extra wound at the end of the round. The Lord has one left, the Tyrant has seven, so I'm probably in a good place here.
At the end of the round, both Raveners and Termagants leave the field. Score!
Objective secured: Hold Them Back (5), Behind Enemy Lines (18+8)
Tyranids 45 : 15 Alpha Legion
Alpha Legion - Turn 4
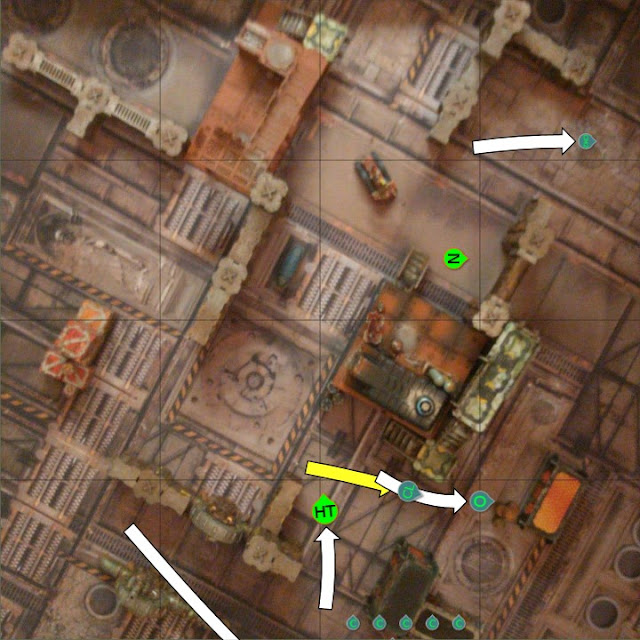
I think it's fair to say I'm at the playing for pride stage here. The surviving Chaos Champion and Cultists both streak towards the escape zone (the Cultists rolling their second 12" advance in a row - they've got some legs!)
The Chaos Lord falls out of combat, allowing the Obliterator to do the honours. However, his fleshmetal guns have finally run out of steam, and he barely scratches the beast.
I'm not going to see Turn 5, am I?
Objective secured: none
Tyranids 45 : 15 Alpha Legion
Tyranids - Turn 5
I'm feeling like I could wipe this platter clean!
The Neurothrope goes full hunting horror, drifting forwards so it can throw its psychic might around again. The last Chaos Marine dies, and the Obliterator takes a couple of wounds too.
The Tyrant smites down his corrupted opposite, then shoots the Cultists apart with ease. But it fails the charge to finish off the Obliterator, so the Alpha Legion survive for a final turn.
Objective secured: none
Tyranids 45 : 15 Alpha Legion
Alpha Legion - Turn 5
The battlefield is looking pretty bare on both sides - although that is because half the bugs have escaped.
The Obliterator does his best to shoot and punch the Hive Tyrant, but it's not his day and he swiftly falls under enemy warlord's claws.
Hey, at least I went the distance!
Objective secured: none
Tyranids 45 : 15 Alpha Legion
Result: Victory to the Tyranids!
Locker Room
Wow, that was a rough day for the bad guys! The dice weren't exactly rolling my way, but if I'm honest, any plan that involves running headlong into a mass of Tyranids deserves to get chewed up and spat out.
My plan was deeply flawed from the start, as I'd gotten it into my head that I needed to clear off as many units as possible from the evacuation zone (without any transports, bikes or jump packs in my army!). It would have been much better to allocate half my army as a fire base backstop
Well, that was decisive!
We realised afterwards that we should have probably adjusted the battlefield. The 4x4 mat is a bit deeper than the suggested size for these games, so we had further to run than we maybe should have. With their faster scuttling, that gave the Tyranids the edge they needed, whereas the Alpha Legion were doubly penalized. Not only were their footsloggers having to go the extra inches, but all their nice sneaky movement strategems were off the board, thanks to the scenario rules.
Compounding this, my dice were going nuts this evening. How many Catalyst saves? See, it's results like this that got Disgusting Resilience nerfed! I've also never seen a Carnifex shoot like that. Dropping the Helbrute and its Multi-melta in a single barrage probably helped swing that flank.
Neurothropes are going to lose their 3++ ward save in the near future, I strongly suspect. No bad thing, they'd be vicious enough with a 4++. This one tore up the the North flank more or less single-handedly. Tentacledly. Whatever.
Campaign Update
For the Lampreys watching the battle over pict-screens, it was a rare moment of grisly sangfroid in the otherwise punishing campaign. The Alpha Legion ran straight into the oncoming Afanc swarm, and the officers rapidly set up a betting pool on which of the traitors might survive.
But their entertainment was cut short when they realised what the Alpha Legion were actually trying to achieve.
As the traitors approached the cargo lighters, they activated the transport ships remotely. The loading machines fell away, engines flared, navigational computers began spooling through courses. Where the Alphas had obtained the codes was irrelevant. There was nothing the Hagan command group could do, the Alphas had locked them out of the systems.
As the Alpha Legion were washed away in a tide of chitin, they triggered a delayed launch. The ships were little more than automatic delivery vessels, programmed to dock with much larger, warp-capable vessels out in deep orbit in the Drawbridge system. The Alpha Legion had led the Tyranids directly to them.
Tyranids poured on to the ships, hiding themselves amongst the stacked crates of las cells and flak armour slated for delivery to Imperial Guard regiments in the Mombassa system. As the lighters took off, the Imperial watchers were dismayed to see the Hive Fleet above actually fall away and allow them passage, clearly aware of the creatures on board.
There was only one Imperial vessel in system with the speed to catch and destroy the lighters before their stowaways could infest the delivery haulers. The Millstone of Guilt dutifully pulled out of orbit, abandoning a drop attempt in support of Scion troops, and gave hot pursuit.
The Alpha Legion had deprived the defenders of another tool in their small arsenal, although it had cost them dear. But were there still more cells still in wait?






















I'm really loving the customised Crusade missions. I've not yet played all the Eternal War missions but the narrative edge that these give is really interesting. It can lead to a mismatch in some games, but I like the variety and the story is great.
ReplyDelete