The dust settled over Kasfunatu Towers, and the battles have all be fought. Hear now the chronicles from WoffBoot XII.
First up: the Vlka Fenryka have their first-ever match. And with their goody two-shoes planted squarely before them are the T'au!
Space Wolves
My rationale for this list was to mostly clear my cupboard of what I had painted and see what worked. I had another squad of Hellblasters available, but they have a reputation for being very god and there's nothing I like more than an uphill struggle.
The basic idea is that the Aggressors, characters and Assault Hellblasters can all race forwards (a moving castle, if you will), while the Intercessors do all the objective grabbing.
That leaves Reivers, Inceptors and (if I use Cunning of the Wolf stratagem) more Aggressors, to deepstrike in and hopefully close the enemy in my jaws.
- Primaris Battle Leader (HQ)
Power axe and bolt carbine
Warlord trait: Saga of the Hunter,
Relic: The Armour of Russ, - Primaris Wolf Lord (HQ)
Master-crafted auto bolt rifle and bolt pistol - Primaris Rune Priest (HQ)
Psychic hood, Runic sword, Bolt Pistol
Powers: Tempest's Wrath, Storm Caller - 5 x Intercessor Squad (Troops)
Auxiliary Grenade Launcher, Bolt rifle. Intercessor Pack Leader, Power fist - 5 x Intercessor Squad (Troops)
Auxiliary Grenade Launcher, Bolt rifle. Intercessor Pack Leader, Power fist - 5 x Intercessor Squad (Troops)
Auxiliary Grenade Launcher, Bolt rifle. Intercessor Pack Leader, Chainsword - 5 x Aggressors (Elite)
Auto Boltstorm Gauntlets/Fragstorm Grenade Launcher - 5 x Aggressors (Elite)
Flamestorm Gauntlets - 5 x Reivers (Elite)
Combat knife, Grapnel Launcher, Grav Chutes, Heavy Bolt Pistol - 3 x Inceptor Squad (Fast)
Plasma Exterminators - 3 x Inceptor Squad (Fast)
Assault Bolters - 5 x Hellblaster Squad (Heavy)
Assault Plasma Incinerator
I don't know much about T'au, other than there's bound to be a lot of guns, a fair bit of mobility from the Commanders and Crisis Suits, and if Kasfunatu is using three different septs in one army, there's bound to be something fishy going on.
Battalion - Bork'an Sept
- Cadre Fireblade (HQ)
Markerlight - Commander in XV85 Enforcer Battlesuit (HQ)
4 x Missile pod, 2 x MV7 Marker Drone - 5 x Breacher Team (Troops)
Shas'ui, Markerlight, Pulse blaster - 5 x Strike Team (Troops)
Shas'ui, Markerlight, Pulse blaster - 5 x Strike Team (Troops)
Shas'ui, Markerlight, Pulse blaster - DX6 'Remora' Stealth Drone w/ Seeker missile (Flyer)
2 x Long-barrelled burst cannon, Seeker missile - DX6 'Remora' Stealth Drone w/ Seeker missile (Flyer)
2 x Long-barrelled burst cannon, Seeker missile
Vanguard: Vior'la Sept
- Commander in XV86 Coldstar Battlesuit (HQ)2 x Fusion blaster, Missile pod, Shield generator
- DX-4 Technical Drones (Elite)
- Firesight Marksman (Elite)
- XV8 Crisis Battlesuits (Elite)
3 x MV1 Gun Drone, 2 x MV4 Shield Drone, MV7 Marker Drone
Shas'ui - Cyclic ion blaster, Flamer, Shield generator
Shas'ui - Flamer, Fusion blaster, Shield generator
Shas'ui - Drone controller, Flamer, Plasma rifle, XV8-02 Crisis Iridium battlesuit
Outrider: T'au Sept
- Commander in XV85 Enforcer Battlesuit (HQ)Advanced targeting system, 2 x Cyclic ion blaster, Fusion blaster, 2 x MV4 Shield Drones, Vectored manoeuvring thrusters
- Darkstrider (HQ)
- 5 x Pathfinder Team (Fast)
Shas'ui, Markerlight - Tactical Drones (Fast)
2 x MV1 Gun Drone, MV4 Shield Drone, MV7 Marker Drone - Tactical Drones (Fast)
2 x MV1 Gun Drone, MV4 Shield Drone, MV7 Marker Drone - XV88 Broadside Battlesuits (Heavy)
3x MV8 Missile Drone
Shas'ui - 2 x Smart missile system, Heavy rail rifle, Seeker missile, Shield generator
Shas'ui - 2 x Smart missile system, Drone controller, Heavy rail rifle
Points: 1500 | Battalion + Vanguard + Outrider: 10 CPs
Game 1: Cleanse and Capture
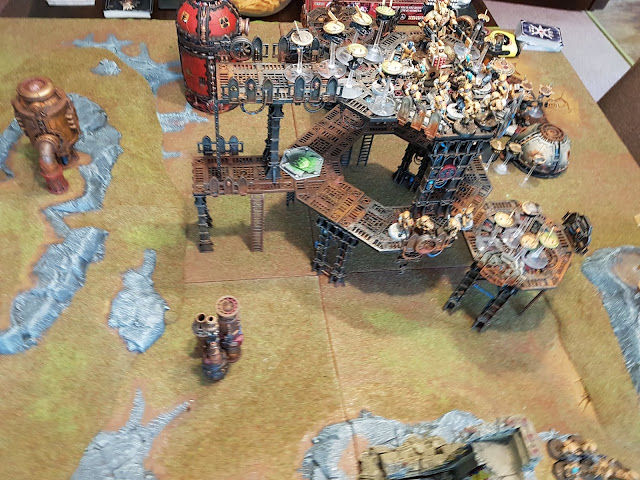
We began the tournament with the most straightforward Maelstrom game, as a warm up. The battlefield had a ruined shrine in the centre, with a bigger mass of ruins on the hill to the right, and a mechanicus structure to the left.
The old Realm of Battle board also proved some elevation, which it not something you get on battle mats, but did provide some 'reverse slope' line of sight blocking.
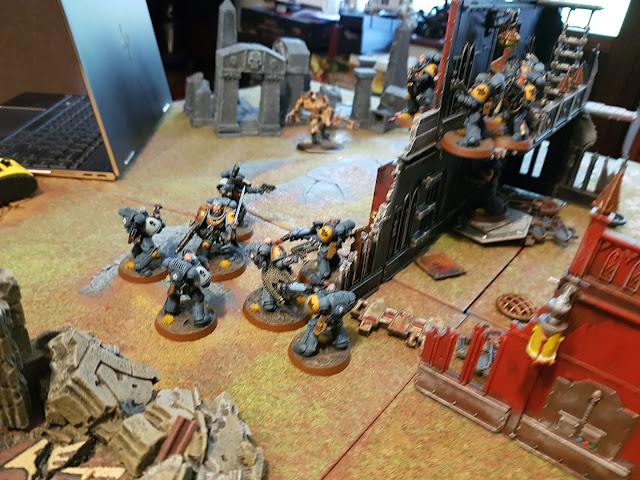
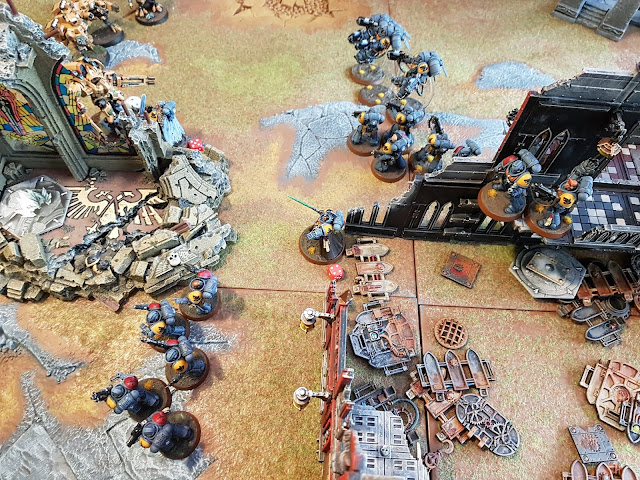
Playing by CA18 rules, I chose the deployment - Search and Destroy (I wanted as narrow a space as possible to cross) and put all my troops inside the big ruin. They would all be in cover and some, like the Hellblasters, were hiding altogether.
Both Inceptors, Reivers and the Boltstorm Aggressors went into deepstrike (or 'On The Hunt' for the Aggressors, which is basically deepstrike but has to be close to the board edge).
The T'au had already deployed first with a castle of their own: filling out every level of the mechanicus rig and plonking the Broadsides in the back. The Bork'an Commander and his Remora Drones take point, and with the Coldstar and the Crisis Suits go into deepstrike.
Because I deployed second, Kasfunatu got to choose who went first and unsurprisingly, decided to open the batting. The Commander and his Remoras flew over to my flank, but everything else stayed still.
The Flamer Aggressors were selected for special attention, but with the cover of the ruins, all the T'au shots were bouncing off their armour. I was feeling pretty confident until the Broadsides opened up and deleted them.
That somewhat shook my plan of charging upfield to pressure the T'au gunlines. For a start, I had just lost my main charging unit, and the cover of these ruins was looking very tempting. Also, I had drawn the Defend Objective that was in the ruins, so that was a third incentive to cower in there.
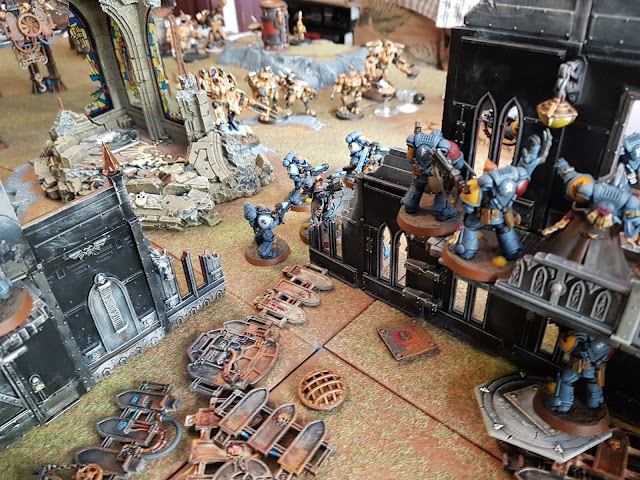
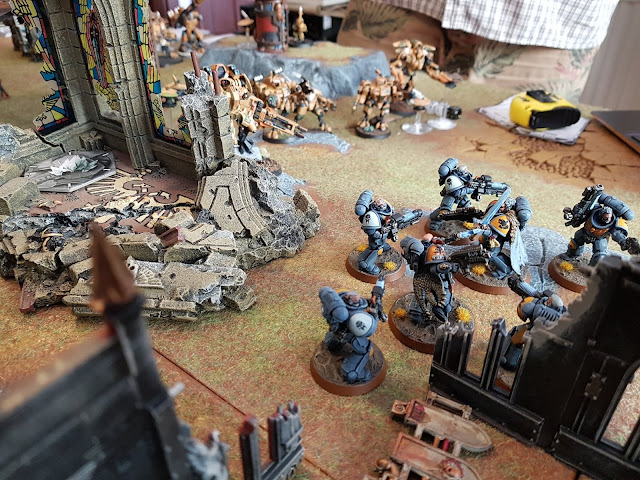
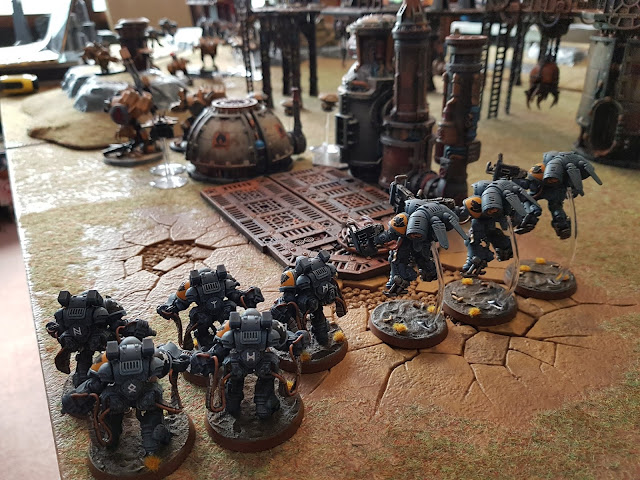
But I was going to have to endure another round of shooting before my forces could hit back, and since the Hellblasters were sure to go the same way as the Aggressors, I piled them out of the ruins, screening my characters and getting eyes on the Bork'an Commander.
My Rune Priest started off the Psychic Phase with a double perils. That was ominous.
If I was to achieve anything, I really wanted to clip the T'au's mobility. So the plan was to remove the Remora Drones with small arms, then hit the Commander with ten overcharged plasma shots. Sadly, I fell just one wound shot of taking out the Remora, and so the plasma shots were spent fruitlessly removing drones.
The T'au responded by dropping in front of my lines with the Crisis Suits and Coldstar, wiping out the Hellblasters and some Intercessors.
But since I scored the Defend objective, and a few secure objectives, and we both had First Strike, we were about level on points. It's just that I was losing a fair bit of material, and hadn't really damaged the enemy yet.
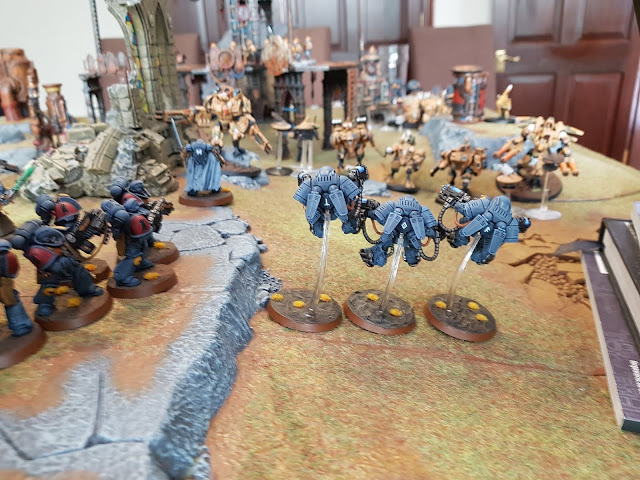
On my second turn, I also deepstruck everything I had. The Reivers hid around the infrastructure, the Boltstorm Inceptors and Aggressors appeared in the backline against the Broadsides, while the Plasma Inceptors faced off against the Crisis Suits and Commanders.
This was my desperate attempt to remove the Broadsides, although screened by drones, they were a long charge away. They were also, as I learned, something of a bugger to charge.
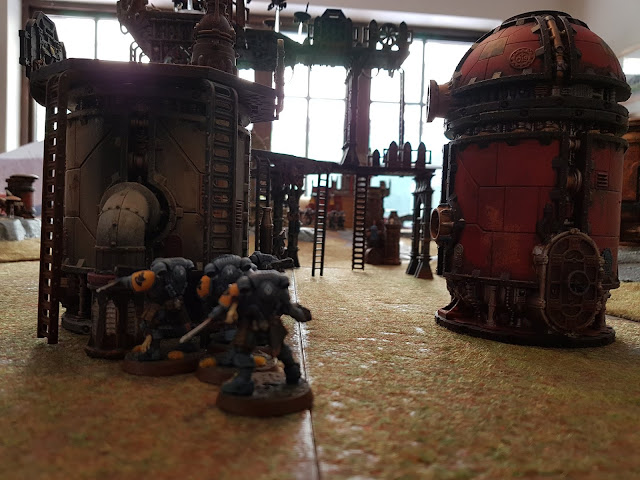
Here are the Reivers, showing good sense in keeping out of view. Although I really out to have thrown them on the gantry and used them to draw fire.
In the shooting phase, I made some mistakes with the order of shots - the smart play with T'au is to clear out the drones with small arms, then hit the big stuff with your stronger weapons. Consequently, the best that my overcharged Plasma Inceptors managed was to remove a single Crisis suit and a handful of drones.
The shots from the Boltstorm Inceptors and Aggressors did even worse, and I threw good money after bad by making a long-bomb charge with both units. I hadn't realised that the T'au Sept hits on 5+ in Overwatch (which is practically normal for T'au) and I lost half my Aggressors on the failed charge. The Inceptors did make it the long charge, and then got wiped out before they reached them.
In terms of successful charges, my Wolf Lord did make it into the Bork'an Commander - his Belt of Russ invulnerable keeping him alive - but his meagre power sword wasn't up to much. My objective required me to make two successful charges, so I sent in a squad of Intercessors too, but they failed to reach.
On the board, the game had decisively T'au cleaned up the remaining Bolter Inceptors, Plasma Inceptors, then started working on the characters and Intercessors.
With very little to punch back with, I was left trying to scamper after objectives to keep the VPs level. But Kasfunatu drew The Greater Good objective card, which gave him D3+3 VPs if he could take three objectives that I held. That proved to be not difficult, and he gained six points in one stroke.
That ended the game there, not least because I was about to be tabled. I finished by running the Reivers into the T'au home lines, trying a sneaky assassination on the T'au commander. But their knives failed on his armour and one of them got killed in return.
Getting bested by T'au in melee is a sure sign from the AllFather that its over, so we called the game there.
Result: 17:6 - major victory to the T'au!
Final thoughts
Ouch. First games of the WoffBoot are usually where my learning curve begins, and this was no different. I think I went at this with all the wrong approach - and having seen how the first turn panned out, I would have been tempted to ignore deepstrike and just dump everything on the table to start with. I needed as many shots as possible to clear those drones asap, and I think it would have been worth exposing my troops to fire to get that,
I also dithered with my plan to pressure the T'au lines. There are a couple of compelling reasons why I should stayed still: 1) cover saves, 2) I gained bolter discipline and 3) it was scary out there. But my plan was to run forward and I shirked from that in favour of more shots from the bolt rifles. That extra -1AP is handy, but I might switch back to assault bolters, just to force my troops to get off their asses.
I should also think about trying to put my deepstrikers in once place to overwhelm one flank, not spread them around and try and do all the jobs at once. Although even by Turn 2, I was up against it, so Hail Mary tactics were very much in play.
The other factor is that Kasfunatu is a good T'au commander who knows how to build a list and get the most from it. I'll get one over on them someday.
Still, you learn more from your defeats than victories, so I shall lick my wounds and take my learning up against the Death Guard!




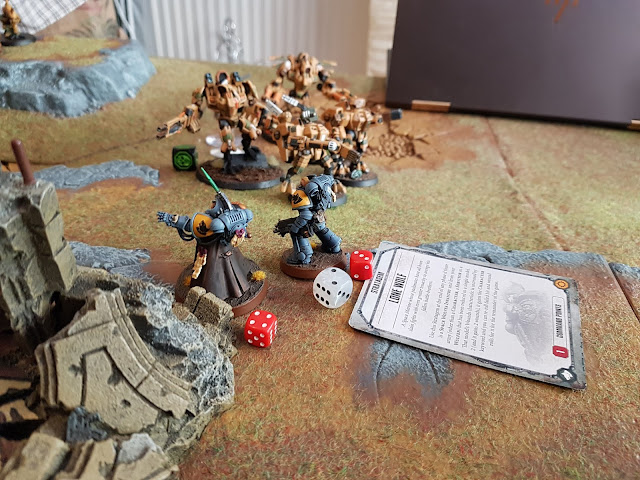
Ouch! Singed fur at the very least.
ReplyDeleteWeight of fire vs. protecting the troops is a tricky balance for me and it seems you had a similar struggle!
My current ploy (with Imperial Fists) is to boldly shoot from open spaces (for dorn & the emperor!), tactically retreat to some ruins when an enemy charge seems imminent, and continue shooting with great heart, whilst continuing to proclaim the emperor's name. 50% of the time, it works a treat!
Ah well, up an' at 'em for the next game!
Yes, I needed to stick to my task and concentrate fire. It's remarkable how getting shot up and throw you off your plans.
DeleteThe other piece of advice I was given (retroactively) against T'au: spend the first two turns killing drones and just take the punishment.
A future opportunity to stick to your guns!
ReplyDeleteFor all their games shooting, the T'au aren't expert marksmen. Shame you didn't manage your psychic screening powers early on, that would have really put a crimpy in their target practice!
ReplyDeleteYes, that was the plan. But the dice had other ideas.
Delete