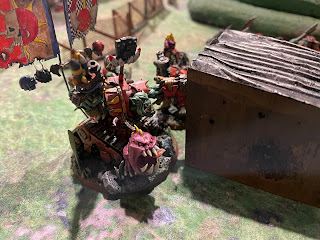
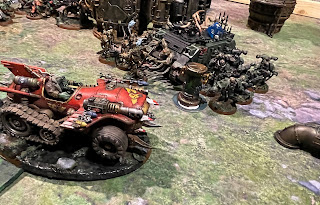
Pootle here in bold! Kraken (in plain text tonight) hosted me last time in a cracking first outing in tenth (see the write-up here), so tonight I'm returning the favour. Kraken chose to try out Chaos Space Marines and I want to give my Orks another spin (I had a trial game with them against my son's Necrons recently and that was brutal).
Pretty Fly for a Blight Guy
The new Chaos rules look hilarious - the opportunity to hurt yourself for short-term gains always appeals to me. So my main choice for today is that all units will always make a Dark Pact as often as they possibly can!
Everybody gets the Mark of Nurgle for two reasons. Firstly, I'm borrowing Pootle's lovely Purge models, even throwing in some Plague Marines, so that Gormenghastly can sample the latest ruleset. The erstwhile Terminator Sorcerer is equipped with the all-new Orbs of Unlife, which he can throw around with continual abandon throughout the game. Fun!
Secondly, it's less rules to learn. Dark Pacts synergise with the Mark of Nurgle to make your shooting even shootier (trigger Sustained Hits on 5+), and I reckon I can remember that well enough that it will stick. This goes even better with the Helbrute, who doubles down on all Dark Pacts nearby to give both bonuses, which then go off on 5+ for Nurgle marks. Tasty!
It's a small army I'm bringing, a couple of characters, a couple of Marine units, some cultists, a Rhino and a Helbrute, plus a terminator bodyguard for the Sorcerer. Small enough to get my head round all the abilities, although possibly also small enough to make a quick amuse bouche for the Orks...
Chaos Space Marine Slaves to Darkness Detachment
- Terminator Sorcerer with Combi-weapon and Force Staff, Warlord, Orbs of Unlife, leading the Terminators
- Exalted Champion with his usual gear, leading the Legionaries
- 5 Chaos Terminators with Combi-Bolters and Accursed Weapons, one with a Heavy Flamer
- 5 Legionaires with Bolters and Pistols, one has a Chain Cannon, the leader has twin Accursed Weapons
- 5 Plague Marines with Plague Bolters and Knives, one has a Spewer, one has a Blight Launcher, the Champion has a Heavy Plague Weapon
- 10 Cultists with Autoguns, Heavy Stubber and Grenade Launcher
- 5 Raptors, two with Plasma Guns
- Chaos Rhino with Combi-bolter and Havoc Launcher
- Helbrute with Twin Lascannon and Hammer
Ork Army
- Warboss with Combi-weapon, Power Klaw, Attack Squig and Supa-Cybork Body enhancement
- Big Mek in Mega Armour with Grot Oiler, Kustom Force Field, Kustom Mega-Blasta and Power Klaw
- 10 Boyz with Sluggas and Choppas (Boss Nob with Power Klaw)
- 10 Boyz with Sluggas and Choppas (Boss Nob with Power Klaw)
- Trukk
- Trukk
- 5 Flash Gitz
- Gretchin (10 plus 1 Runtherd)
- Kustom Boosta Blasta
- Lootas (4 plus 1 Spanner with Kustom Mega Blasta)
- 3 Meganobz with Power Klaw and Kombi-Weapon
- Megatrakk Scrapjet
- 3 Warbikers (Boss Nob with Power Klaw)
Terrain and Mission
Deployment
Orks Turn 1
The Megatrakk Scrapjet and the Lootas all aim (and I use the word loosely) at the Helbrute as well. I roll a lot of dice but don't cause any damage whatsoever! But I'm sure they all enjoy the loud dakka noises.
At the end of the turn I ditch Capture Enemy Outpost (and gain a CP) but keep Overwhelming Force as I suspect that could yet be handy.
CSM Turn 1
The Cultists form a firing line towards the Warbikers, the Raptors huddle in their corrugated cover, the Helbrute and Rhino break northwards for the Omega objective.
The next rule I get wrong is bringing in the Terminators early. They shouldn't be available until turn 2, but I can't for the life of me find where this is explicitly stated in the Leviathan game rules (until the following morning where I find it clearly and sensibly written in an obvious place). So they bamf into the midfield.
Everyone declares Dark Pacts! Even the Rhino, which I guess has some sort of automated daemon-summoning app in the dashboard. With the Helbrute as a central lynchpin, this gives my rather small amount of shooting wings!
The Cultists and Raptors take down a Warbike and badly wound a second, the Rhino and Helbrute savage the Boosta and the Terminators put a fair crimp in the Meganobz, although not enough to actually kill one. I missed a few more rules with them, Terminators give themselves extra boosts with Dark Pacts, but I spotted it too late.
There's a price to pay, of course. The Helbrute manages to pop a blood vessel in all the excitement, and then the Terminators fail their charge despite Warptime rerolls, and the Megatrakk Scrapjet kills one with Overwatch.
Overall, it's not a bad start, but it does leave me flapping in the breeze in front of the Waaagh rather.
Orks Turn 2
Still a good turn overall. I'm quite happy to have traded the Meganobz for the Terminators. My only slight concern is that Bludteef and his unit are quite a long way from the Omega objective - that could be a problem later in the game.
CSM Turn 2
I'm amazed at how many models I've still got, frankly!
The Rhino screeches to a halt and pours chaos marines out onto the Omega Objective, as the Cultists back away from the Warbikers and the Terminator Sorcerer slogs into the midfield, aiming at the Lootaz in their Trukk.
I just can't get enough Dark Pacts - everybody once again starts selling their souls for extra dakka, and once again, the multipliers pay off. The Boosta Burner is taken apart, then the Sorcerer zaps the Trukk hard enough to blow it up completely!
Alas, this also kills him (I should have used that familiar last time!), but leaves the Lootaz in an awkward place. The Plague Marines mow them down cheerfully.
I realise that two of these (the ones with the ridiculously oversized homemade weapons) have just technically fallen foul of New Model Syndrome as although they were built and painted in the early 1990s, I'm pretty sure that I've never actually fielded them in a game until today.
Somehow, the Big Mek is still alive, so the Helbrute charges him. And whiffs with his hammer - only a couple of blows land, and the burly lug takes them on his armour, before gouging the dreadnought for a decent couple of hits in revenge! Bah!
Orks Turn 3
I kept hold of Overwhelming Force because I'm certain that the Warbikers can kill the remaining Cultists this turn. Four of them? How hard can that be? Guess what: harder than I'd thought and one of the pesky Cultists does in fact survive the turn. Gaaah!
Cultists are a sleeper hit for me in this edition!
My second secondary is Deploy Teleport Homers which initially seems problematic as although the Warbikers could do that I need another unit to do nothing in Kraken's deployment zone.
The Gretchin fail to unearth any more CP in my own deployment zone and I score another 10VP for controlling the Alpha and the central objectives (because of the sticky objectives rule we're playing).
CSM Turn 3
With not much left, at least my focus is clear. The Rhino powers off to the middle, where it can move block Bludteef and his Boys as they attempt to get back to the important parts of the battle. The lone Cultist backs away from the Bikers again, confused to still be alive but probably fairly relieved.
My four remaining marines spray a little firepower into the Flash Gitz, inconveniencing one of them, then surround and scrag the Scrapjet. If I can somehow weather the next turns, I reckon I can hold the vital Omega point for some decent points.
Neither of us opt for Gambits, we know where the good stuff's hidden.
Orks Turn 4
CSM Turn 4
This really is clinging desperately on to life, but nil desperandum!
The Rhino backs off, keeping hold of the central objective. That's key, because they've just gone up in value - I score 16, bringing me back towards Pootle's lead. If I can hold the Omega objective for just one turn, I reckon I can overtake.
My secondaries haven't been kind so far (that's why I haven't mentioned them much). It was mostly impossible stuff like trying to get the enemy homeline, breaking through enemy lines, etc. I did pick up 2 points for Bringing Down the Scrapjet last turn, but otherwise I've just been swapping them for command points, most of which have gone on Dark Obscuration.
(Worth mentioning here that I learned later that, aside from your freebie at the start of each turn, you can get a max of one extra command point per round in Leviathan games, regardless of source. So you can't double down with say, Gretchin and swapped out Secondary cards, for example. That feels like a bit of a shame to me, but certainly a good thing in terms of keeping the game balanced. Yes, I spotted that later too. It didn't make any difference here as the Grots only gave me one CP all game and that was in turn two when I didn't burn any secondaries anyway. Worth being aware of though.)
My last efforts here are to send the Plague Marines to try and wipe out a few more Flash Gitz with charges or shooting. If I manage that, the Warbikers will have to take the objective but can't score it, and I can hopefully charge back and kill them in the last turn. A tall order, but I've had worse.
In the event, though, I kill one Git with the Plague Spewer, fail a rerolled charge and sit there, waiting for the end.
Orks Turn 5
We roar very quickly through this turn: Bludteef does now dispatch the Rhino and the Flash Gitz mow down the last two Legionaries. That's a tabling and, just, a victory to Bludteef.
Result: Ork Victory, 43 to 38
Locker Room
Smashing stuff despite my dodgy grasp of the rules! Dark Pacts did not disappoint. It's very characterful and pretty powerful too, and I look forward to never not using it. Even though my army wasted away fairly fast, the extra bonuses from shooting really helped to even things out, and I still felt I had a chance until the bitter end.
More please!
Although by turn 4 things were looking ropey for you, there absolutely was a chance you'd survive, particularly becuase I had to rely on Ork shooting to take you off the Omega objective. Fortunately for me those Flash Gitz are now a really pretty good unit, and that's without the further buffs that adding Kaptin Jewelfang (my version of Kaptin Badrukk) would give them.


No comments:
Post a Comment