

Is your coulrophobia worse than your arachnophobia? What wins in a fight, swarms of carnivorous maggots or a honky nose and a flower that sprays water? As with all exact sciences, there is only one way to find out. Maelstrom of War! Generals Kraken and Hotspur reporting for duty!
Clown Killer Posse

I have never played against a pure Harlequins list, and I have never seen them up against Tyranids, so I've got no idea what to expect! From a cursory glance at their lists and tactics, I think they will struggle hardest against big bugs and large swarms, so this is something of a return to classic form.
A Tyrant with the miasma cannon to kill their jetbikes or mulch them at short range, because they can't dodge an auto-hit gun, then a Tervigon Warlord to hide at the back of a big Termagaunt squad and chuckle as its brood hoses them down with acidic mosquitos. Warriors to hang back on objectives and also provide a bit more fire support, then a full Genestealer pack for snips and giggles.
My ace in the hole is the Sporocyst - another back line camper, I'm hoping that the speedy dancers will have to get in close, and having something spouting out spore mines is going to give them second thoughts about that.
The plan? Wait for them to close, then shred them with weight of fire and bodies. You can't dance if you're buried in outsized fire ants, after all, or at least not with any great degree of artistic finesse.
Hive Fleet Kraken Battalion
- HQ - Hive Tyrant with Miasma Cannon, Monstrous Rending Talons, Adrenal Glands and Toxin Sacs, Catalyst and The Horror powers
- HQ - Tervigon, Monstrous Scything Talons, Paroxysm power, Warlord with Adaptive Biology
- Troops - 20 Genestealers
- Troops - 30 Termagants, 12 Devourers and the rest standard
- Troops - 4 Tyranid Warriors, Deathspitters and Boneswords, Venom Cannon with Bone Sword and Lash Whip
Fortification Network
- Sporocyst with 5 Deathspitters
23 of Diamonds

When I first saw Hotspur's list, I immediately realised I was dreadfully wrong about Harlequins and their anti-armour capabilities. How many fusion pistols? This even before Hotspur threw some CPs into turning his warlord into a Great Harlequin and handing out an extra relic.
Well, at least there weren't many of them. Each of those Harlequins was going to have to kill three or four Tyranids each without sucking down on beetle milkshake, but they'd be looking damn good doing it. Lovely army, and the painting has clearly been going well!
Because I'm not a dance troupe expert, I was going to have to be cagey. I know they're fast, but I don't know their strategems and powers well, let alone the fine distinctions between kisses and caresses (Tyranids don't get hugged a lot as infants).
My new plan would be to use my large swarms as bubble wrap for the now vulnerable looking Synapse beasts, and hope that when they got close, I could someone avoid being killed long enough to tear this tiny army to bits.
Soaring Spite Masque Battalion
- HQ - Shadowseer with Twilight Pathways and Veil of Tears, Coat of Hidden Blades relic
- HQ - Troupe Master with Fusion Pistol and the Storied Sword relic, Warlord with Player of the Light, Great Harlequin from strategems
- HQ - Troupe Master with Fusion Pistol and Harlequin's Kiss
- Troops - 5 x Players with Fusion Pistols, 4 Harlequin's Caresses and 1 Harlequin's Blade
- Troops - 5 x Players as above
- Troops - 5 x Players with Blades and Shuriken Pistols
- Elite - Solitaire
- Fast Attack - 2 Skyweavers with Shuriken Cannons and Zephyrblades
- Transports - 2 x Starweavers with twin Shuriken Cannons
Mission and Terrain

A random roll gave us Contact Lost from the main rulebook. A classic mission - you draw objectives depending on how many you hold on the table, which makes for a straightforward but tactical clash. Harder for the Harlies - can they afford to hold squads back to squat on objectives? But fast though my Kraken gribblies are, I'm going to get outmanouvered here.

Not least because the fences and forests of this icy ruin (the titular Abbey) will slow my infantry blobs and funnel them into kill zones while the Eldar flip and float all over the place! Here's the battlefield, let's see where we start.

Deployment
We're using the CA 2018 deployment rules and replacing First Blood with First Strike, as per Woffboot House Rules. Hotspur wins the roll-off, and I'm once again staring down the barrel of Hammer and Anvil, playing the length of the table. Ah well, at least I have a good idea of how to deal with this now!

The Genestealers wrap the Tyrant, the Termagants wrap their mummy. The Warriors link the two halves of the line and the Sporocyst splats down in the backline, camping over objective 5.

Against this, the Harlequins hang way back, perhaps nervous that I could rush them in the first turn. The two Starweavers are loaded up with Troupe Masters and Troupes, there's the third squad (the runts of the litter with no meltas) hanging way back in the ruins, and then the pair of jetbikes and the mysterious Shadowseer lurking in the bottom left.


The Solitaire is doing star jumps in the midfield, warming up for what is to come, as the Harlequins get the first turn! No point me having it, I decide, I'm miles off.

Harlequins Turn 1

Hotspur's first draw is Blood and Guts. Not likely this early, but a good one to hang on to.

The battlefield erupts into a blaze of colour as the Harlequins wheel all over the place. I have no idea what they're up to or where they're going in the backfield, but my eyes are really on the Solitaire and the Skyweavers.

Thanks to a boost from the Shadowseer, the Diamond Ace whips into the middle of the field as the jetbikes start shooting. It's only a pair of Genestealers, so I'm okay, but I'm not liking how fast they got there or how hard it's going to be to stop them moving on.
Tyranids Turn 1

My first objective isn't much cop either, the Hive Mind wants me to eat a psyker. There's only one and I can't see him right now, so he'll have to wait.

Predictably, I swarm forward, trying my best to keep a decent bubble of infantry round my big leaders. Those Starweavers might look distant, but it's hard to be sure with Harlequins. The Tyrant sticks the Horror on the bikes, everything else fails or is out of range for psychics, so I rely on a blaze of devourers to hurt the bikes. Even with only six of them firing with a penalty to hit, I'm cheered to see a Skyweaver hit the dirt. It's only going to take a low-grade amount of firing to win a battle of attrition here!

I'm also comfortably over three objectives, having spread the Termagants and Genestealers out to cover everything nearby. Here's hoping for a good draw next turn.
Harlequins Turn 2

Defend Objective 3 and Dance of Death ( get a kill in close combat) are the new objectives for Hotspur, who is holding the other half of the field. That seems to indicate I'll be getting some up close attention soon, and sure enough, the Solitaire fires off his blitz and leaps forward.

Into an absolute sea of bugs, so hats off to the bold jester! Backing him up is a single Skyweaver, which shoots down a couple of genestealers before crashing into the rest in close combat.

At the back, the Shadowseer runs back to hold objective 2, then catapults the nearest Starweaver forward to the middle of the board, where it starts defending. The other Starweaver sneaks down my north flank, and the Tervigon is duly alarmed.

18 Genestealers against a single jetbike - you can run those numbers yourself. As it crumples into the ground and catches fire, the Genestealers are already on the move, using Overrun to head for the middle of the board and the defended objective.
The Solitaire considers his options for a bit before sprinting right over the top of the Warrior unit and charging them from behind. Overwatch does, predictably, nothing!

But then neither does he, somehow. It's not the worst fluffed set of hits, although it's not great either. But four wounding strikes with a multi-wound weapon could easily chew through a couple of the big guys. Until I roll a quadruple 6 for saves, which rather settles the fight. The Solitaire takes a couple of hits, slows down and starts really thinking about his life choices as the sea of bugs seethes and chitters around him.
Tyranids Turn 2

I pull Scour the Skies and Psychological Warfare out of the bag for my new objectives, which is pretty cruddy. I can't score the second one really, the Harlequin squads aren't very prone to running off unless they've all died, so that gets discarded at the end of the turn.

The Warriors pull out and camp on objective 4. The Genestealers sneak forward and sink their talons into the Starweaver, but they don't pull it down. Only a couple can actually make it into combat, thanks to the narrow streets. At least I've denied the Defend objective, though.

The Tyrant and some of the Spore Mines that I'm churning out move to deal with the Solitaire, who died to a smite, as the Termagants reshuffle to make a buffer round their mum. (This is another map error, Chronicler can't deal with funky unit formations like the two-foot long chain I'd made out of them at this point. They were holding two objectives and still curling round the Tervigon at the same time. That's a big footprint.)

But that is kind of it - the limited shooting I could get does nothing, and there wasn't that much to do without really leaving my big bugs open to a drive by fusion pistolling. So far, there hasn't been a score and hardly anyone had popped a strategem. Very cagey play!
Objectives scored: none
Harlequins Turn 3

Hotspur is stuck with the objectives he's got. His Starweavers (with psychic help from the Shadowseer) finally pick a side of the battle and fly in tandem into the biggest opening in my lines he can see. He revealed later he'd been trying to kite me into going for one or the other, but it hadn't worked, I'd been too cautious. Now, however, there was a path to the Tyrant and a gap to put his Pierrots in. Zoom!
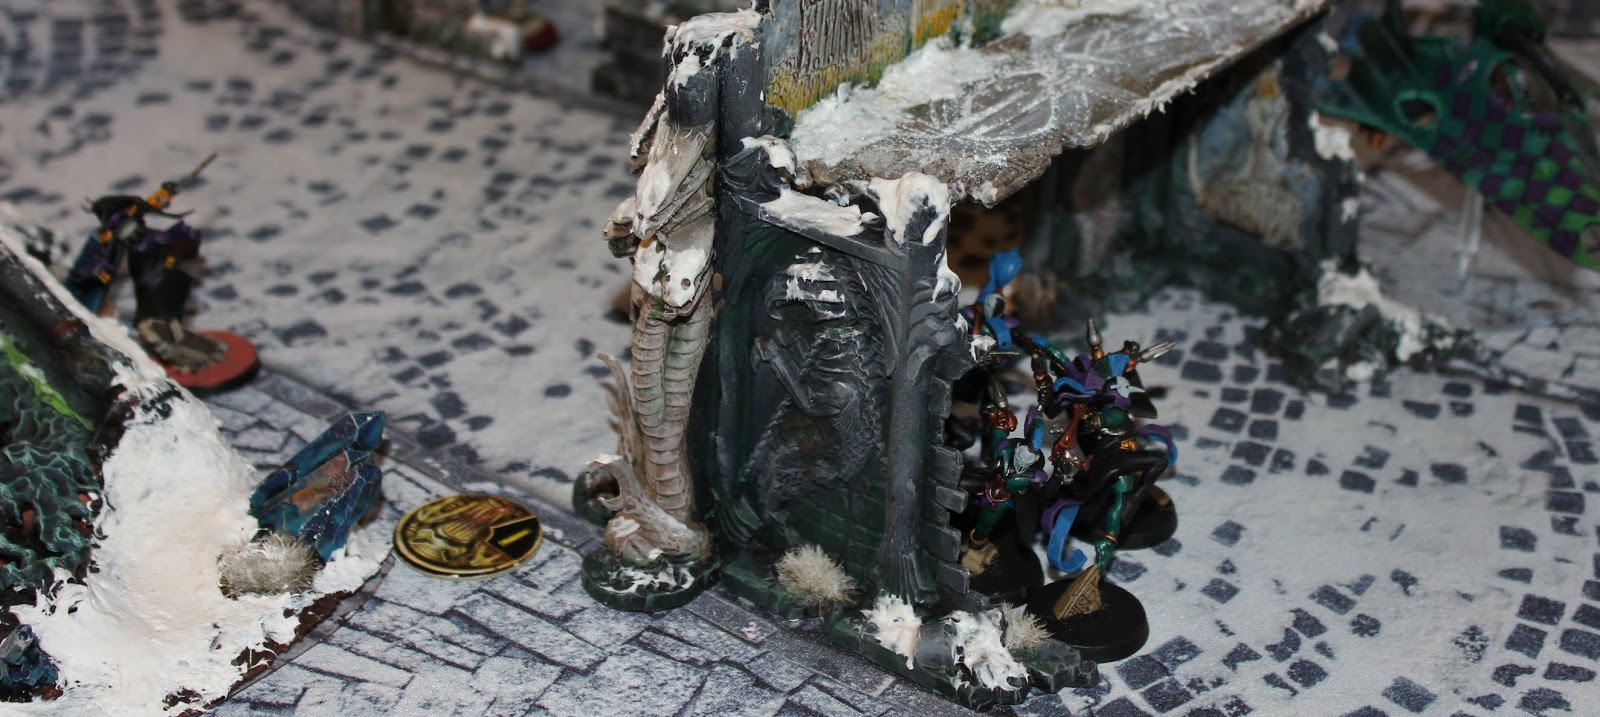
 |
| Not a great photo of the Harlequins in action, but it's hard to see the clouds of prismatic diamonds. You can just see them above the vast horde of Tyranids here. |
The combined fire from these two shreds about a third of the remaining genestealers, but that's about it otherwise. Still no scores, and still very little command point use, so there is a lot to play for.
Tyranids Turn 3

My new draws are Advance and Defend Objective 5, and that last one I am happy with. Advance, not so much - the Sporocyst can't move and thus can't leave my deployment zone, so I discard that at the turn's end.
The Tyrant buffs himself with Catalyst and bounds forward, screening himself with spore mines on the way in. Knowing she's safe for a turn, the Tervigon moves in to the safety of her swarm and the Genestealers camp on Objective 3 - it's just too far to try a long bomb into the back ranks, and they're still very strung out along the alleys.

The Tyrant smites a single wound off the Starweaver, all the shooting I can throw at it does a single wound, then the Tyrant charges in and scrabbles feebly against the shields, failing to kill it. This is bad news - the Spore mines had to advance to get as near as they did, which wasn't near enough to explode, so the Tyrant is staring down the barrels of twelve fusion pistols right now. Hope that Catalyst stays up...
Objectives scored: Still none!
Harlequins Turn 4

Finally, the action starts hotting up. Harlequins spill out of the Starweaver and surround the Tyrant, but the other one pulls back into the middle of the board as the Shadowseer runs backwards (out of the Shadow in the Warp) and flings the Troupe at the back onwards to deal with the Genestealers.

There is a lot of fusion gun shooting.
At the end of it, the Tyrant stands, thanks to Catalyst! But he's down past half wounds, and promptly gets charged by a Troupe Master and his pals. At the same time, half the Genestealers get cut down by shuriken fire before they get twin charged by the Warlord's Starweaver and some more angry clowns.

This leaves Hotspur in a pickle, though. He knows I'm going to interrupt him, I'm still swimming in CPs. So does he try and finish the Tyrant or the Genestealers first, knowing it will probably cost him one effective squad? What would you do?

Yeah, I'd kill the Tyrant too. The Genestealers tear up three of their opponents as their overlord's entrails settle to the floor, and that means there isn't quite enough hitting power to finish them off. The other squad, although happy with themselves, very quickly pile back into their Starweaver with a strategem. Sadly, it can't cover the Troupe Master too, and he's stuck with trying to mime a wall into existence between him and the spore mines.
On Objective 3, Hotspur's reflective assault has faltered, and he still can't quite claim the objective thanks to the Genestealer troops outnumbering him, so he ditches the card.
Tyranids Turn 4

I'm no longer holding three objectives, so I only get one more, and it's decapitate. Excellent! That's going to help a lot. The spore mines swarm round the hapless Troupe Master and his ride.
The Genestealers leg it out of combat - I have a cunning plan! I will use a strategem to fling them deep into the board and perhaps eat the Shadowseer!

Alas, as they run, Hotspur triggers Ceogorach's Jest, and the Starweaver shoots three of the remaining four down. That's not worth throwing at anyone, although it heads back at the Starweaver later for what it's worth and dies to overwatch. Rats.
The Tervigon then smites the last two Harlequins out of the middle of the board. Then the Sporocyst manages to nick the last wound off the damaged Starweaver after the Warriors entirely miss it. It explodes!

This takes a chunk out of the Troupe Master, but also removes a bunch of the spore mines, so it's not entirely helping. One of the Harlequins dies on his way out, and they pile out backwards and out of reach of the mines.
At least they manage to total the Troupe Master, so I'm scoring again!
Objectives scored: Scour the Skies (1), Decapitate (1)
Harlequins Turn 5

The latest dilemma for Hotspur is his new objective, Defend 4. This is currently Anthill Central, and there's probably not enough lead in the Harlequin pencil to put the Termagants down in time. Unless, of course, they murder Momma first.

This proves hilariously easy - the Starweaver just parks next to her and the passengers open up. It's probably like the Grimdark version of the scene in Dumbo with the burning tower act. The Tervigon goes home, the clowns keep laughing. Six of the nearby Termagants die in the backlash too (just not on this map).

Down south, the Warriors are too near the wall. So there's no overwatch to be had, just a Jack-in-the-Box surprise as the Harlequins pop up to play. It's quite rough play, although once again the Warriors do well on saves (Jormungandr hybrids, perhaps), and I manage to keep one just about intact.

This is actually vital! It's now my only source of synapse, and it's only able to stop the Termagants from running by chaining synapse back through the Sporocyst. It also kills a pair of Harlequins in return, but that's icing on the cake.
Tyranids Turn 5

One objective to draw, and this turn's going to be crucial. I have a very slim lead to protect, this might be the last turn, and a couple of easy points would really help me feel calm right now.

Behind Enemy Lines is not the valium I was looking for. The Shadowseer is also too far off to be a plausible target right now, so I pull everything back and camp on 4 as best I can. The remaining Warrior falls back as the Sporocyst sends a Muculid Spore from last drifting in towards the Harlequins.

It doesn't get to explode, the Sporocyst promptly sends off the clowns with Deathspitter shots. If I can just concentrate firepower and bring down the other Starweaver now, I'd feel even happier! For the first time in the game, the full weight of the Termagant Devourers lands.
Without mummy's helping hand, though, they fall well short. Three wounds isn't enough to stop the jetcar. Still, the game could end right now, and I'd have scraped a win! Hotspur reaches for the dice...
...no, of course not. There's another turn, and the Harlequins are still very much capable of stealing this with their own incoming objectives.
Objectives scored: none
Harlequins Turn 6

Oh yeah, they're gunning for me now. Harlequins flit out of the Starweaver as the Shadowseer floats up to boost them forward. Or try to, anyway, he doesn't quite cast it. But he doesn't have to, the Harlequins can advance and still charge, and they're plenty close enough already.

After a quick burst of firing that thins my ranks a little, the Starweaver tanks the Overwatch, taking but a single wound before ramming the Termagant lines. Then the Great Harlequin and his players dash in and start killing.

Luckily, I still have a ton of command points! Caustic Blood is a no-brainer on the Termagants. As the Harlequins blend through twelve of them, they leave a nasty mark. Three of the Harlequins go down, and I'm able to take casualties away so that the Troupe Master Warlord isn't able to hit anyone. The Starweaver slices through a few more, so I'm left with six Termagants. Not great, but actually more than I expected, so I'm calling it a win!
However, the Harlequins now have objective 4. And this is a big problem, because he's just drawn Defend Objective 4. Either I get it back off him next turn, or I lose...
Tyranids Turn 6

Perhaps there's still a chance for an easy score. What do you say, objective cards?
You say Secure Objective 2. Right, well, sorry for asking. This means I have one Mucolid Spore, six Termagants, a Tyranid Warrior with a venom cannon and the Sporocyst to win the game with. That's... that's actually not bad! Maybe I can do this!
The Termagants break off combat with the Starweaver and move towards the crucial ground, with the Warrior backing them at range to keep Synapse up. The Mucolid spore advances until the Troupe Master can see the whites of whatever those dripping pores are. Then we let rip with all we have.
The Sporocyst easily blasts down the last couple of Players, so I try to finish off the Starweaver with venom cannon shots. No luck there, it's very hard to nail them down and their saves are good to boot. So I charge the termagants in (Kraken 'nids can fall back and still fall back in afterwards) and pray for some good mortal wounds off the big spore.

I get them! On a six, it'll be a d6 mortal wounds! Then I won't have to fight him!
It's a two. I will.
Six termagants do diddly-squat on the charge, which is no surprise to anyone. Hotspur has burnt away all his CPs (mostly on rerolls) by this point, although you'd expect a Great Harlequin not to need that many. Nope - he pulls a bit of a squiffy turn and merely kills five of the 'gants. Which I'm fine with, for two reasons. One - I've played Caustic Blood again!

That doesn't help me this time, but reason two is better. That lone troop has objective secured (Extensions of the Hive Mind) and steals the objective!
Errr.... unless I've managed to advance so far forward that I'm now out of synapse. Which I am.
Thankfully, I also still have command points. Two, in fact, an unheard of bounty this late in the game. Insane Bravery keeps the last bug slugging, and I've squeaked a victory by the narrowest of margins! The Shadowseer can only look on in dismay.

Objectives scored: None
Result: Victory to Tyranids, 4-3
Locker Room
Man, that was close! Hotspur has been playing Harlequins a fair bit recently, and says they tend to either go down very hard or win very hard. Getting a last minute nail-biter was an unexpected joy!
Knowing more about them now, I can see that the big bugs plan was totally wrong. Not only were there fusion pistols (so many!), but in fact Harlequins seem to hit generally at a much higher strength and AP than I realised. The large swarms were very much the way forward though, and even if I squandered the Genestealers for little effect, and even if the Termagants didn't manage to get much of their shooting off, even the small bits they chewed away left big dents in the foe.
My MVP would have to be the Sporocyst, frankly. There was a moment when I thought Hotspur was going to vault a Starweaver over the Hive Tyrant and melt it off Objective 5 while I was defending it, something the clowns are frighteningly good at. Luckily, he had other plans.
I was very impressed generally with the Starweavers, actually. Shuriken cannons are pretty effective at culling troops, they're super-fast and actually pretty hard to kill (-1 to hit and a high invuln). Best of all, they're transports that can fight, making them perfect for tanking overwatch, something the Harlequins otherwise really have to watch. Clearly, Starweavers are a must take.
Wait a moment, that last Starweaver didn't die. Which means it was in my deployment zone...
Objectives Scored: Linebreaker
Revised Result: Draw! 4-4
Yes, about twenty minutes after we'd shaken hands, I realised that my smug victory glow was entirely hollow. And really, a draw is what this felt like - we'd taken each other's armies to shreds and fought very hard over the objectives in play. But I still feel the warm glow of victory, although the victory here is once again 8th Ed 40K! |
| And, of course, everybody's nightmares. |
Cracking write-up, and really tactical battle there. Harlequins are no joke (so to speak), so that was good handling of the bugs against them.
ReplyDeleteAnd, by the tears of Isha, that Harlequin army is gorgeous! Kudos to Hotspur.
Great battle (and write-up, as always). And I'm impressed with your foresight to keep 2CP to turn 6...!
ReplyDeleteThat was brilliant! Well played against an unknown enemy and great write up!
ReplyDeleteCheers all! Looking forward to a rematch, although we were also spitballing a Harlequins vs Knights match up...
ReplyDeleteAnd it's good knight from me...
Delete40k Handles.
Delete