
Speaking of returning grudge matches, General Hotspur was back for another round last night. His Ultramarines gave me a proper thumping last time they visited. Could I return the favour?
Ultramarines

The Boys in Blue had once more turned up with a powerful armoured line. Sergeant Cronos in his Crusader Land Raider, whose firepower I was still dreading. To add further dread, a Redemptor Dreadnought, a bolter-armed Razorback and then a triple threat of various flavours of marines. Scouts, Intercessors and Tactical Marines (one packing a missile launcher) - at least it looked like a healthy, balanced diet for the 'nids.
Then there was a shiny and new Smash Captain filling out the ranks. Sporting the wings of a Blood Angels Chaplain, this guy was surely going to spell trouble for my list. Hard to pick off and packing a mean punch, I'd have to be careful about where to charge in, or this guy would be counter-charging to plug any gaps. He was also sporting the Sanctic Halo and the trait that lets him regenerate CPs.
Worse, there was some CP spending before the game! Not only was that Smash Captain now a Smash Chapter Master, but there was a Callidus Assassin lurking out in the woods somewhere...
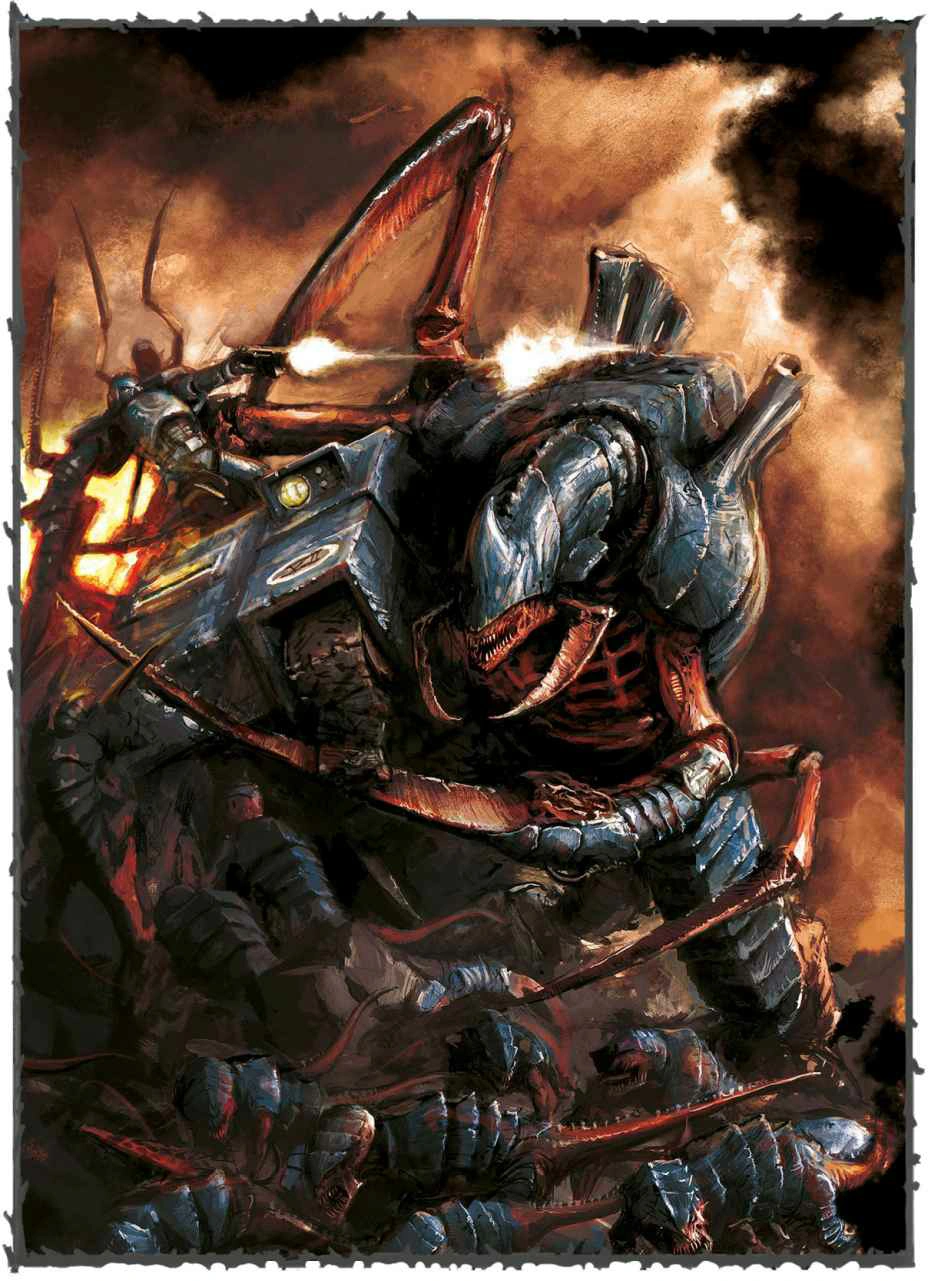
Tyranids

Knowing I was up against a solid gunline, I went with a fairly predictable list of Jormundangr bugs. Then I totally rewrote it, throwing out all the Genestealers. Every time I put Genestealers against bolters, none of them make it into combat, let alone out again. Why even try?
So instead, I took the biggest monsters I could, hoping that toughness alone would see me past the Bolter Drill. Hive Fleet Kraken for the speed and the camoflage relic carried by a Tervigon warlord, then Venomthropes to make it even harder to hit. As many Termagants as I could pack in, two very small Warrior squads to hunt objectives.
And then the tried and tested tag team of Flyrant (here with Maw Claws of Thyrax and Brainleech Devourers) and Acidfex. Nothing that's really going to be an instant answer to armour, perhaps? But Rupture Cannons are too pricey and not reliable enough for a game this size, and these two are certainly enough to worry my foe.
Mission and Deployment
 |
| Snowy ruins! It's a Macragge Showdown, after all. First outing for the flip side of my jungle grass mat. Maybe a bit bland? Certainly looks cold, though! |
Randomly rolling, we got CA2018's Disruptive Signals. A fairly standard Objectives match, but when your opponent draws objectives, you can spend 1 CP to block one of them for a turn. It's an interesting twist - being able to lock off an easy draw for a turn can be a very handy trick to pull, but would you rather keep the points for your strategems?

The field is a crossroads with towers and ruins on all sides. Hotspur gets to pick zones, and sensible chooses Hammer and Anvil, picking the big tower for his gunline to sit on. I deploy first, sitting a Warrior squad on the objective at the back and then plonking everything else in a long line across the front of my zone without quite knowing where the big guns are coming in. The Venomthrope bubble covers a good half of the line, at least, and there's some woods to help out too.

In the event, the heavy firepower goes down on his left flank, the marine squads and Razorback on the other side. I'm relieved to see nobody is hiding up in the fort, at least! It's an imposing sight all the same - it's a long way to run into all that grapeshot.

Given the choice, I decide to go second. No point running forward into range here, I may as well enjoy a turn relatively out of the way and then react to whatever objectives are in play.

Ultramarines Turn 1

Hotspur kicks off with a fairly frustrating hand of objectives. To both seize and defend objective 1, right out in the back of my zone with some Warriors squatting on it, isn't a great start. But Seize 2 is easy enough, and Overwhelming Firepower is pretty certain to happen at some point.
Nothing else to do but shoot, which is how Ultramarines like it. Despite my faith in the long range and the penalties to hit, the entire detachment opens up with everything they've got on the Termagants. More than half the squad goes down! This is not a promising start, but against Cronos and the Redemptor, both of whom are benefitting from the Chapter Master's rerolls, it's not that surprising. Bolter Drill has really made Marines a solid presence on the field these days, it's good to see them in action again.
Wait, whose side am I on here? What I mean is, this disgraceful show of broken firepower is appalling, and I'm at least glad to see that enough of my bugs survive that there aren't many victory points being claimed.
Objectives Claimed: Seize Objective 2 (1)
Tyranids Turn 1

As the Tervigon disgorges some replacement termies, I draw a pretty decent whack of cards for my first haul. Sieze Objective 2 is unlikely, Defend Objective 1 ought to be safe money. Area Denial is a lovely bonus for the first turn (and needs nerfing so you can't score it then, imho, especially when I end up rolling high for it later) and Mission Critical Objective (get number 2) is just a joke, so I discard it as such later on.
Well, best get to it - everything advances apart from the Warriors at the back. The psychic shenanigans I'm packing today are Onslaught and Catalyst, which the Tyrant casts on himself and the Termagants respectively, then The Horror from the Tervigon, which is too far away to help. So I use the Strategem Power of the Hive Mind to fire Smite from the Tyrant as well.
Disaster! The Callidus Assassin's Reign of Confusion is in effect, so this ends up costing me extra points. Luckily, the dice are kind, and I smite three wounds off the nearby Intercessors. The Tyrant shoots down another one, but everything else is out of range or too poor a shot to contribute.

It's a long charge for the Tyrant, but he makes it in, stuffing an Intercessor into the Maw Claws to fuel them up. Bit of a whiff, though, especially when he takes a wound from overwatch as well. Still, he's safe in combat and in a good position to draw the Smash Captain out, I hope - maybe just far enough to not get charged, and tempting enough to take the re-roll bubble off the big tanks! But will Hotspur take the bait?
Objectives Scored - Area Denial (3)
Ultramarines Turn 2

Yes, yes he does take the bait, and I've rather underestimated how far those jump packs go. Yikes. The Intercessors stay in combat to soak overwatch, and everything else stands still and crams bolt rounds into their guns.
The Callidus pops up in my backlines. This is alarming - she could easily take out my Warriors on Objective 1, which is also currently worth points to Hotspur. But he decides he wants to interfere with my screen instead, and she turns up behind the Venomthropes.

And starts murdering them! The Neural Disruptor kills one straight out, then the rest of the team focus fire on the Venomthropes and take them out. There's enough left over to put a fair bit of fire on the Tyrannofex too, and even though it's mostly bolt rounds (and I'm in cover!), it quickly goes four wounds down. A few Termagants bite it as well, although Catalyst keeps that to a bare and replaceable minimum.
The combat phase is pretty ghastly for Hotspur, though. First, the Chapter Master fails his charge. Then the Assassin charges the nearby Warriors, but totally whiffs combat - no wounds off the brutes at all, and the pack hack three wounds back off in return. Frustratingly, the Hive Tyrant fails to finish off the Intercessors, but I'm not too worried there.
Hotspur is up and scoring, though - Overwhelming Firepower has been ditched, but some Space Marine equivalent has turned up, and with the Venomthropes down, he's claiming it. At least I stay ahead with Defend Objective 1.
Objectives Scored: No Mercy, No Respite (1), Defend Objective 1 (2, Tyranids)
Tyranids Turn 2

My new draws are very promising. Kingslayer, which along with Scour the Skies makes that Chapter Master a must-kill, and Sieze Objective 1 (which I'm already on). To work!
Although it'll be hard work - the Callidus Assassin is still causing Reign of Confusion, it turns out, thanks to one of the new assassin strategems. Plus Hotspur is rolling well for his CP regen, and still has a respectable handful.
The Hive Tyrant darts away from his fight to pick on the Chapter Master. Kraken's Fleet trait allows them to fall back and still charge, and seeing as it can fly, it can shoot as well. Hotspur takes it in his stride, though - that Sanctic Halo is going to make it hard work.

The rest of the line continues to advance, although the Warriors fall back from the Assassin.
Onslaught goes on the Tyrannofex, so it can shoot, and the Tervigon Horrifies the Chapter Master, to help me in combat later. Then I waver for ages over whether it's worth putting Catalyst on the Tyrant or smiting the Chapter Master - I could try both again, but the extra points the strategem might need puts me off. In the end I smite a pair of wounds off him and hope for the best.
I don't get the best. The Tervigon, the rear Warriors and the Tyrannofex all pour a godly amount of firepower into the Assassin, and she dodges the lot. The Termagants are just in range of the scouts, and cut them up but can't finish them. Two of them can even fire Fleshborers at the Chapter Master, which ends up doing more than the Hive Tyrant's Devourers! I'm so pleased at this, I give them another round of shooting.

This costs me extra points, thanks to the Callidus, and is a bust, achieving nothing at all. The last Scout chuckles away inside his armour.
Then the Hive Tyrant charges in, getting wounded by a bolt pistol shot on the way in. Combat is pretty whiffy for both of us, and it ends in a draw - the Tyrant takes another three wounds, while the marine is left with just one. But it deprives me of a hefty chunk of VP!
Objectives Scored: Sieze Objective 1 (1)
Ultramarines Turn 3

Realising that losing the fight could cost him the game, Hotspur's Jump Captain jumps away, rushing back to bolster the firing line. Wise! While he's there, he draws another Marine objective card, Honour Your Chapter. Given that the Tyrant is now flapping in the breeze a little, that's a handy card.
So is Defend Objective 5! The lone Intercessor goes to sort that out, and I steel myself for the shooting phase.

Sure enough, as Cronos rumbles forward and the Dreadnought gets his range, the shooting phase is pretty vicious. Most of the Termagants go down, then between Flakk Missiles and a huge storm of Hurricane Bolter fire, the Tyrant is left on one wound.
Remember that lone scout, the one I failed to kill with a full pack of Termagants firing at him? Well, he's only gone and brought a Heavy Bolter, hasn't he. A single Hellfire Shell is enough to finish the Tyrant.

Elsewhere, the Callidus continues to embarrass herself by missing her shot with the Disruptor, taking another wound to Overwatch as she charges the Warriors again and then merely wounding one of them before being eaten.
All the same, it's a steady drip of points to the Ultramarines.
Objectives Scored - Honour Your Chapter (1)
Tyranids Turn 3

More duff objectives appear to replace the ones I've managed. Dominate (cast three powers) is frustrating, as I can't do it now the Tyrant is gone. Swarm is looking more likely, at least, but then Hotspur locks that down with the Mission Strategem. And regenerates the CP as well, the smug bugger.
Everything carries on moving forward. I'm close enough to shoot now, so the Tyrannofex and Termagants don't advance, but the rest do.
Horrify now goes on the Land Raider, I can't afford to let it fire away without trying to nerf it a little. My own shooting is pretty cruddy. The Tyrannofex fails to hurt Cronos's tank at all, as do both Venom Cannons, and the Termagants and Warriors somehow fail to finish the lone Scout! The Tervigon snipes a lone Tac Marine, but that's not going to win me the game any time soon.
This works out okay, though. The Termagants instead charge him, and with a good long roll, I get far enough to swamp him, kill him and overrun into the Land Raider. Phew! That means I'm out of Synapse, but the little bugs are probably on their last hurrah anyway here, so dying all over his windshield is at least productive for the team overall.
Objectives Scored: Defend Objective 5 (Ultramarines, 2)
Ultramarines Turn 4

Is it a spoiler to jump ahead and let you know the Termagants didn't make it through the round?

Cronos pulls back and the Dreadnought murders the little bugs handily. In full auto-show-off mode, it also kills two of the Warriors in the nearest squad. The Tac Marines try and hurt the Tervigon with missiles and bolters, but don't manage it, and the Razorback starts chipping away at the rear-most warriors. A quiet turn, apart from the chatter of bolters.
Tyranids Turn 4

Now I'm getting into range. Not that there's much left, but at least it's a big pair of scary monsters! Both rumble forwards, heading for the Marine lines. I draw Defend Objective 3, so both Warrior units advance into camping range and hope they survive the hail of fire they'll inevitably pull.

Horrify stays on the Land Raider. Hotspur has been steadily failing every Deny roll the Sanctic Halo allows him, and the Chapter Master will be taking it back to the shop later.
But that's all I manage! The Tyrannofex spurts a mere two hits on the Redemptor (I've given up even thinking I'll finish Cronos), the Tervigon of course fails to hurt anything, and I finish the turn without a score and with the nozzles of many guns rotating in my direction. Eep. I can't even score Swarm this round, they've got more Objectives than me!
Objectives Scored: None
Ultramarines Turn 5

Aiming to stop me getting Swarm, Cronos parks his Land Raider on the ice of Objective 6, then the Redemptor and Captain shuffle about at the back as Seize Objective 2 crops up again. High Command has relentlessly been telling Hotspur to go and get Objective 1 in various ways, and he's been resolutely discarding them for a while.
The gunline does what it does best - murders me with ease. Two Warriors go down off the group at the back as the Razorback and Tactical missile launcher open up. Then Cronos and the Dreadnought pile the wounds on to the Tyrannofex until it goes down under a solid Multimelta hit.
I'm running out of time and bugs, but thankfully the shooting wasn't quite enough to cost me my objective.
Objectives Scored: Sieze Objective 1 (1), Defend Objective 3 (Tyranids, 2)
Tyranids Turn 5

I draw some objectives to grab here - Secure 4 and 6. Hotspur promptly blocks 6, and of course gets the CP back as well. Damn you, Ultramarines!
My best hope of winning this game is still to kill the Chapter Master! A d3+2 VPs would really come in handy right about now. Getting past the Land Raider is the big problem, and the best way to do that is to eat it, so the Tervigon braves overwatch to charge in. Despite what the map is telling you there, one of the remaining Warriors advances forward to grab 4, just making it in with a long and jammy Kraken advance.

A couple of wounds later, it bounces off the armoured hull and leaves it none the worse for wear. Cronos even guns the engine and runs over some of the Momma Bug's toes. Still, at least I won't get shot by it next turn. If there is one!
I roll to see if we carry on, and we do. Hang on in there, Momma Bug! Avenge your children!
Objectives Scored: Sieze Objective 4 (1)
Ultramarines Turn 6

Hotspur finally breaks a run of weak draws with Big Game Hunter and Assassinate. These go together well - if he can finish off the Tervigon, he'll get both, and probably win the game as well.
The Chapter Master, however, is held together with spit and hope at the moment. Hotspur is all too well aware that I've been clinging grimly on to Kingslayer and Scour the Skies all this time, and it would just take one decent hit for me to claim them. So the Chapter Master valorously continues to defend Objective 2, and Sergeant Cronos parks his tank in front of him, just in case.

The Redemptor Dreadnought, though, is looking hale and hearty, and fancies a bit of punching. Rumbling forward, it fails to manage much in the shooting phase (although the Missile Marines finish off the Warrior on Objective 4), then charges in.

It's another whiff-tastic fight. The Dreadnought lays into my exposed and quivering flanks, but previous wounds have activated its Adaptive Biology, and a mere couple of wounds is just enough to knock it down a bracket and no more. I'm not expecting much back from the Tervigon, even though in theory a lucky round could kill the Dreadnought. Sure enough, I can't get past the armour, so we both live on.
Objectives Scored: None? Or did the Marines score something on Objective 2 perhaps? I feel like they did but can't remember
Tyranids Turn 6

Must. Kill. Chapter. Master.
The Tervigon pulls out of combat and tries to run past the tank. Not far enough to Smite the captain, so I cast Horrify on him instead. Unstoppably! So I lose a pair of wounds to warp insurgence. Not the best start!
It's a risky charge, I'm wounded and down a bracket by now, but this is make or break. Neither of us have totally our points yet, we both know it's close, so this could be a deciding fight.

I make the charge well enough, and even land a couple of good hits! But the Sanctic Halo preserves the Chapter Master, who then smacks four wounds back off me with his hammer.
Neither of us have fallen, but we're both in bad shape. Another turn will see my army finished off, I'd be willing to bet, so I really need to hope it ends now and I'm somehow ahead on points.
Hotspur rolls...
We're done!
Result: 10-8 to the Tyranids, and a narrow squeak indeed!
Locker Room
That was a hard-fought match indeed. Watching my swarm melt under constant fire pressure made me feel I was on the back foot all the way through. Hotspur had some rotten combat luck, and could easily have wrecked my backlines with the Assassin, but the grinding combination of Chapter Master rerolls and Giant Gun Tanks more than made up for it.

If I had to pinpoint a reason I made it out the other side with victory (apart from the obvious one of lucky objective draws), I'd say it was being able to run about on Objectives in the middle of the table with relative ease. Obviously the Ultramarine gunners worked very well, and another turn would have seen them wipe me out and win. But Hive Fleet Kraken speed on the advance made it possible to hop round the objectives niftily, so I could keep gleaning points when required to.
That feels like a bit of a turnaround for the Tyranids. It's the first time I've beaten Marines in over a year, so I must finally have learned something. There was a point when I was setting up when I went to count Genestealers out of the box, couldn't remember how many I needed and then felt both surprised and anxious on checking the list and finding the answer was zero! But the points on the Venomthropes and the extra big bugs made it worthwhile.
Mind you, Hotspur's list originally had the Dreadnought with the plasma cannon instead of the Gatling gun. That extra anti-armour might have turned the tide at the end, but we'd started rolling with the Gat in turn one and decided to stick with it. Maybe, maybe not - the assault cannons did a lot of fine work in this game, and I still don't really have an answer to Cronos and his Land Raider other than trying to keep it tied up. It was a miracle the Termagants made it in to do just that, in fact. Lucky I didn't kill that scout!
Congratulations on the victory - Tyranids are clearly on a roll. Seems like there was a good combination of board control and punch in the hive, which a gunline army is going to struggle against in Maelstrom missions.
ReplyDeleteCheers! This list did well, I'd rate it for further use. Or expand on it for 1500 points - genestealers and Hive guard would both fit in well, as would a Prime or some fast harrassment gargoyles.
Delete