
We return to the hivesprawls of Vigilus - and the epic conclusion of the Tooth And Claw mini-campaign!

I, Stylus, will continue my insidious infestation. Having enjoyed success in the previous two missions, I am now fully integrated into the Cult of the Thirsting Wyrm, forehead nobbles and everything.
Whereas I, Kraken, am both Wolfy and Spacey. Like Kevin, in fact, but less gropy.
Secure Your Genotype!
Luckily Kraken obliged me by charging in with the only objective that mattered in the game, and allowed me to nick a victory before the bolter shells really started to fly. It turns out that Rending Claws on a Metamorph can be just as effective as those on a Purestrain.
Good use of terrain, too, of course. Bunkered in that tower, I couldn't really concentrate firepower on the cult like I needed to. And those ambushes! Can't I just nuke the site from orbit, it's the only way to be sure, etc etc?
I'm starting to like Metamorphs, once you get your head around all the multiple load-outs they can take. They make pretty good bodyguards for Genestealer Cult characters, given they can soak wounds from their leaders, and counterpunch when killed in melee. Hopeless against small-arms fire, but that seems par for the course with the devotees of the Four-Armed Emperor.
As my third and final campaign bonus, Haldor starts off the epic finale with only three wounds. And since we got through this one in record time, it was straight on to journey's end...

I, Stylus, will continue my insidious infestation. Having enjoyed success in the previous two missions, I am now fully integrated into the Cult of the Thirsting Wyrm, forehead nobbles and everything.
Whereas I, Kraken, am both Wolfy and Spacey. Like Kevin, in fact, but less gropy.
Secure Your Genotype!
It's Fight Night on Skype!
As outlined in our last exciting episode, Genestealer Cults have risen up in Greigan Hollow, and the Space Wolves have come to destroy them. Unfortunately, the Cult was expecting them and detonated explosive charges all over the hivesprawl, killing and scattering the Sons of Fenris.
It's also been snowing since last time (I'm hosting). Or maybe it's just tiny bits of pulverised Space Wolves pattering down across the city (I lost every game so far).

A series of skirmishes follow, as the disparate elements of the Space Wolves try to regroup and destroy this particular tendril of the Cult. In the first two missions, it didn't go so well for the Space Wolf Blackmanes, but now their battle leader Haldor Icepelt takes to the field, and there's still everything to play for!
Echoes of War Mission #3 - Faith And Fire
This is a straight-up 'kill the leader' mission. Primaris Battle Leader Haldor Icepelt is on the field, with three Aggressors (each counting as an individual); while the Genestealers are being directed by Gilgas Vendella, an Acolyte Iconward.
This one will end in just four turns, and whoever kills the opposing leader wins.
We're still using the City of Traps table (for which I still get my bonus from Mission #1) and, even better, the Cult Reinforcements rule is still in play, so I'll get to respawn units. For the first time, however, I'm getting actual 'units' (one of Hybrid Metamorphs, two of Purestrain Genestealers), so Kraken will have to wipe out a whole unit before I can attempt to resurrect them.
For once, I'm playing somewhat defensive, since Gilgas won't stand up to a stiff breeze, much less the full attention of an Aggressor volley. The Iconward and his entourage of Metamorphs bunker down in a ruined tower, while the two packs of Purestrains go into Ambush (I'm counting on them to do the heavy lifting).
Bigger units to shoot at means less wasted firepower, so that's good! Although having most of it off the table to start with is a bit of a bummer. I only get one Aggressor initially, the others appear on turns two and three. All the same, these mini-dreadnoughts ought to be able to both shoot and beat holes into the cultists with glee!
This is the good start I was hoping for.

Well, two wounds off him, actually. And I have to spend a CP for the Aggressor to survive as well. So although I've come out smiling, it's already an uphill struggle. Bloody ambushers!
I need to get moving, so when my time arrives, I bring in the new Aggressor flanking the latest Genestealers. He blows two of them up, too, although my attempt to split his fire and thin out the ranks of degenerates hiding in the bunker is a waste.

As Kraken has thoughtlessly chosen to leave one Purestrain alive, it means I can't recycle the unit. However, the gribblies that died in the previous turn are available to me, and for once I roll badly on my Cult Ambush. Instead of landing anywhere useful, they come down in the bottom corner of the field, ready to threaten the newly-arrived Aggressor. Not optimal, but at least Genestealers can haul ass when required.
My command bunker remains bunkered down. The lone Purestrain attempts a charge on the Aggressor, but falls short (and sadly doesn't get killed to Overwatch, so I'm stuck with the under-strength unit).
You can in Narrative Play. Your conscience is clear.
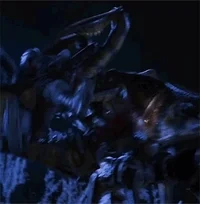
Well, it all works out well, anyway. Haldor dashes heroically in, shooting on the way, but his wounded chum doesn't quite reach combat. Just as well - Haldor hacks apart the nearest three Metamorphs. But their living whips keep on trying to eat him, and it turns out that he doesn't actually have enough wounds to tank the entire unit of Metamorphs lashing at him. Down he goes, and that's three-nil to Stylus!
Well, that was abrupt! After my first strike with the Genestealers whiffed spectacularly, I thought I was in trouble there. My little castle of Metamorphs wasn't going to stand up to the kind of firepower even a couple of Aggressors could pump out and Gilgas himself would follow quickly after.This one will end in just four turns, and whoever kills the opposing leader wins.
We're still using the City of Traps table (for which I still get my bonus from Mission #1) and, even better, the Cult Reinforcements rule is still in play, so I'll get to respawn units. For the first time, however, I'm getting actual 'units' (one of Hybrid Metamorphs, two of Purestrain Genestealers), so Kraken will have to wipe out a whole unit before I can attempt to resurrect them.
Forces
Space Wolves
- Haldor Icepelt, Primaris Battle Leader: power axe, bolt carbine, frag and krak grenades
- 1 x Aggresor Pack leader: auto boltstorm gauntlets, fragstorm grenade launcher
- 1 x Aggresor: auto boltstorm gauntlets, fragstorm grenade launcher
- 1 x Aggresor: auto boltstorm gauntlets, fragstorm grenade launcher
Genestealer Cults
- Gilgas Vendella, Acolytle Iconward: autopistol, rending claw, blasting charges
- 5 x Hybrid Metamorphs: 1 x bonesword, 1 x cult icon, 1 x metamorph claw, rending claws, metamorph whips, hand flamers
- 4 x Purestrain Genestealers: rending claws
- 4 x Purestrain Genestealers: rending claws
Deployment
 |
| Crack open any water tower in Gregian Hollow, you find out what everyone's been drinking lately. Cultist Juice. |
Bigger units to shoot at means less wasted firepower, so that's good! Although having most of it off the table to start with is a bit of a bummer. I only get one Aggressor initially, the others appear on turns two and three. All the same, these mini-dreadnoughts ought to be able to both shoot and beat holes into the cultists with glee!
Turn 1
Before we even begin, I roll for City of Traps and get a booby trap result that allows me to inflict a mortal wound (possibly D3) on an enemy unit of my choice. This could almost end the game before it begins, so I restrain myself from picking on Haldor Icepelt and knock a wound off the Aggressor Pack Leader.
This is the good start I was hoping for.
No movement from the Metamorphs - with just hand flamers, they're not going to get into a firefight with the Blackmanes. But I roll well with the Ambush results and manage to box in the two Sapce Wolves, front and back, with my two Purestrain units.

The front unit fails its charge, but the back unit gets in on both of them, taking a casualty to Overwatch (normally you expect that, but there's 25% of my unit gone!). I may have been over-optimistic about their chances in combat, as I divide my attacks: one on the wounded Aggressor and two on Icepelt. A few whiffs and some good armour saves later, I think all I manage is to scratch a wound off Icepelt. In reply, the rest of the unit gets squashed.
Well, two wounds off him, actually. And I have to spend a CP for the Aggressor to survive as well. So although I've come out smiling, it's already an uphill struggle. Bloody ambushers!
And then, in the Morale Phase, I get all four Genestealers back into Cult Ambush! I bet it's super fun to play against this Cult Reinforcements rule!
Turn 2

As Kraken has thoughtlessly chosen to leave one Purestrain alive, it means I can't recycle the unit. However, the gribblies that died in the previous turn are available to me, and for once I roll badly on my Cult Ambush. Instead of landing anywhere useful, they come down in the bottom corner of the field, ready to threaten the newly-arrived Aggressor. Not optimal, but at least Genestealers can haul ass when required.
My command bunker remains bunkered down. The lone Purestrain attempts a charge on the Aggressor, but falls short (and sadly doesn't get killed to Overwatch, so I'm stuck with the under-strength unit).
Turn 3
Right. Strike first, strike hard. I burn all my remaining command points on the special stratagem for this game, which lets me pick a unit and allow it to advance and charge, as well as fire without penalty. Which actually, now I think of it, is cheating, isn't it? You can't spend the same stratagem twice in a phase. Oops.You can in Narrative Play. Your conscience is clear.
Well, it all works out well, anyway. Haldor dashes heroically in, shooting on the way, but his wounded chum doesn't quite reach combat. Just as well - Haldor hacks apart the nearest three Metamorphs. But their living whips keep on trying to eat him, and it turns out that he doesn't actually have enough wounds to tank the entire unit of Metamorphs lashing at him. Down he goes, and that's three-nil to Stylus!
Back in the Wolves' Lair
Luckily Kraken obliged me by charging in with the only objective that mattered in the game, and allowed me to nick a victory before the bolter shells really started to fly. It turns out that Rending Claws on a Metamorph can be just as effective as those on a Purestrain.
Good use of terrain, too, of course. Bunkered in that tower, I couldn't really concentrate firepower on the cult like I needed to. And those ambushes! Can't I just nuke the site from orbit, it's the only way to be sure, etc etc?
I'm starting to like Metamorphs, once you get your head around all the multiple load-outs they can take. They make pretty good bodyguards for Genestealer Cult characters, given they can soak wounds from their leaders, and counterpunch when killed in melee. Hopeless against small-arms fire, but that seems par for the course with the devotees of the Four-Armed Emperor.
As my third and final campaign bonus, Haldor starts off the epic finale with only three wounds. And since we got through this one in record time, it was straight on to journey's end...
Echoes of War Mission #4 - Cave In
Everything's on the table for the final battle! And this time, the Space Wolves have the initiative: all they need to do is trigger two demolition charges (essentially control two objectives in the Cult's deployment zone, and trigger it in the shooting phase) and the campaign is theirs!
Three wins to zero, which means I go into this final game with every possible advantage: +1 to City of Traps roll; Aberrants re-roll wound rolls of 1 against the Dreadnought; Haldor starts off with one fewer wounds. What could possibly go wrong?
Nothing. Vengeance will be mine.
The battle lasts for five turns, but for a whopping 3CP the Space Wolves can buy one extra turn. For my part, the Genestealer Cults can no longer recycle destroyed units for free (WHAT? Am I expected to play fairly?) but for 1CP I can achieve the same effect (except for the characters: when they're dead, they stay dead).
I would gladly have swapped all my CPs for the entire campaign to have a strategem that killed this ability on turn one, game one, for all time.
For those keeping score at home, the Space Wolves list comes in at 484pts or 25PL. The Genestealer Cults cost 549pts or 28PL. When I said I was going into this with every advantage, I meant it.
Meep.
I suspect that splitting my forces is probably a bad idea, but I have to go down first. If I put everyone on one side, Stylus can camp on the other, making it unlikely I'll be able to push past. So I split the team. The two big dudes, Haldor and Asper, take the left, everyone else splits right. Asper ends up more or less in an alley. This worked out poorly for him last time.

The 'Tower Cower' manoeuvre worked out well for me last time, so I do the same: stuffing Gilgas and the Metamorphs into the ruin next to one of the demolition charges. I'm allowed to put no more than half my units into Cult Ambush, so the Aberrants and Purestrains are sent into hiding. This does mean I'm leaving one of my objectives far away and entirely unguarded, but I'm relying on my Ambush rolls to move around the board.
I also get my first licks in with another big roll on the 'City of Traps' table - one mortal wound as the Redemptor Dreadnought steps on a carefully-placed garden rake.
Damn you, alleys!
Not to be sniffed at, but I'd rather have had the bonus to my Ambush rolls (which I would have got without the bonus from my Mission #1 victory - a victim of my own success here).
My command group doesn't feel like showing so much as a mutated snout to all that Space Wolves firepower, so they stay put and I drop both of my Ambush units.
And sure enough, this is where it all unravels: a roll a 1 for my Aberrants. I really can't have this unit out of place, so I spend one of my precious Command Points (which I need to respawn units, let's not forget) to re-roll the dice and get a more respectable 4, which puts them 9" away from the the Redemptor Dreadnought.
Time for the Purestrains - and it's another 1! I can't afford to re-roll this time, so they're just going to have to lump it at the back of Kraken's now-empty deployment zone. At least I have the good sense to place them out of Aggressor range.

This leaves the Aberrants as the only unit who can make a charge - and they just fall short. I spend the second of my Command Points to re-roll one of the dice - and I'm in! The loss of one wound to Overwatch is drowned out by my sigh of relief
(luckily they dropped close enough to the Iconward to take advantage of his Nexus of Devotion banner - a 6+ FNP - which actually worked!)
And it's straight to the Combat Phase, where all five Aberrants get to dance with their old pal, Asper the Frozen. Though not all of them get a turn, since the Hypermorph immediately takes off six wounds with his improvised weapon (the 'stop sign') and the power hammer Aberrants knock off another six. That's it! The Dreadnought is down!
Well, that's not good. In my turn, Haldor grits his teeth and starts pushing for the objective, running away from the Aberrants. Because he Heroically Intervened into them last round, killing two of them, he won't be shooting or charging anyone as he leaves. But I suspect he won't last long against these freakish mutants, so my plan instead is to lure them out into the open.
For on the other flank, the Aggressors are breaking away from the objective to help out, leaving the Intercessors to deal with the important button pressing jobs!
One objective down already, and there are still too many bolters out there for my taste, so Gilgas and his buddies stay in cover. The Purestrains sprint across the field, relying on the large, central tower to keep them out of gunshot.
Which just leaves the Aberrants to move menacingly towards Haldor Icepelt. It's an easy charge, and they start swinging away at him. He puts up a spirited defence against the Hypermorph, blocking two of the four wounds that land. But with double damage, he's still a gonner, and Kraken considers it not worth spending a Command Point to save him. So it's another early bath for this headstrong pooch.

Maybe this is foolish? But I suspect not - spending a command point to save him from the first combatant, when there's another one with a deadly hammer still to fight, is really not likely to keep him alive. I'd rather save the points in case I need to extent the game later, my team has a long run to make.
Agreed. Haldor deserved no better. He was a bloody liability.
As the Intercessors detonate bomb A, the Aggressors trundle towards the enemy, shooting as they go. I take out about half of the Genestealers, which feels like a good start, but I don't have the firepower to take out any more Aberrants. Foolishly, I also thought I could still use the advance and charge stratagem from the previous turn. But I can't! So my plan of assaulting the Aberrants has to remain a dream for now.
With my two big units still lose on the field, albeit somewhat truncated, I'm feeling pretty good by this stage. The Aberrants and Purestrains both charge into the Aggressors, and even the Iconward and his lads feel confident enough to move out from cover, to lend the aura of his banner to the combat units.
This second wave looks far more than I can take.

Without the bonus I gained against the Dreadnought, my attacks are going a little wild, and I only land two hits on the Aggressors, one of which fails to wound. I spend my last Command Point to generate a second wounding strike - and with the -3AP and D3 of the Power Hammers, that's enough to kill two of the squad.
The remaining guy does his best, holding out and clobbering a last Aberrant even as the Intercessors slog in towards the fray, but he's outnumbered and outgunned. His end is kind of inevitable.
The intercessors make a charge in to help out, and manage to nearly finish off the Genestealers! But this leaves them locked in combat, a mere stone's throw from Bregg and the Metamorphs...
It's looking like a done deal now, but Bregg the Anointed will not be denied! He charges into the fray, swinging his power hammer back and forth to annihilate the last two Intercessors.
The last demolition charge remains intact, which means the Thirsting Wyrm keep control of the reservoirs of Greigan Hollow. I hope the planet Vigilus has plenty of Evian in stock.
Victory for the Genestealer Cult!
Well, we reckoned this campaign was an uphill struggle for the Space Wolves, and I reckon that was borne out!
Not half, pop power-pickers!
Cult Ambush and Cult Reinforcements were a huge advantage to me. If we were to play this again (and maybe when I get the actual models on the table, a rematch could be on), I think limiting the reinforcements, or making them Command Point dependent (as they were in the last mission) would be the way to go.
Ultimately, it does seem like the story of Genestealer Cults is: if you do well in the Ambush rolls, your opponent is screwed. Although that lesson was obvious from Mission 1, so I think Kraken could have been a bit cannier with screening his limited number of troops - certainly the Aberrants should not have been allowed to deepstrike within charge range of the Dreadnought.
That's true. But I felt outmatched by both numbers and quality throughout, really. A single squad of scouts would have been really helpful, for example, or just some more Tac marines. With such small armies, it's really hard to screen against enemies who can appear from any side at any time!
The unfortunate consequence of that would be to turn the Space Wolves force into a cumbersome firebase (probably their best bet, given the firepower of the Redemptor and the Aggressors) rather that trying to fight ... tooth and claw. In a street fight, there was only going to be one winner.
Again true. But playing against this is that in half the battles, you're forced to move to win things. Assault firepower is a Marine strength, but actually Genestealers soak a surprising amount of fire, as do Aberrants. At least Marines go down fighting, they can be surprisingly durable in a fight.
Not so the Dreadnought. Wow, those Aberrants are really tooled to take it out! Getting first turn charged both times meant I never really got to use his firepower, and it was sadly missed. As I said, it seemed very hard to stop that happening!
On balance, this box set did act as a very nice showcase for the Genestealer Cult army. The Abominant and Aberrants are the standout stars, but it made me take a second look at both the Iconward and Metamorphs, which were two units I'd previously dismissed. And everyone loves Purestrains, of course.
Conversely, I don't think it's a great introduction to the Space Wolves. I do like the models, but they don't seem to play into either the character of the chapter or the type of missions here. If we assume they wanted to shift new models, then maybe swap Intercessors for Reivers?
It's shame they seemed married to an all-Primaris theme, because swapping out the Dreadnought for some Wulfen (similar monetary cost and power level to the Redemptor) could have made things very interesting. Putting a Dreadnought against Aberrants just feels like bringing a pair of scissors to a rock fight.
Yup, I heartily agree. A full unit of Intercessors, at least, GW! Scouts, even. It really highlights, for me, the weaknesses of Marines as an army. Yeah, they're elite and tough. But they aren't actually that elite and tough compared to good specialists. Okay, they're able to do well in most roles. But they achieve things too slowly, and you never have the numbers to last in a drawn-out battle. They never quite seem at home in any match I've used them in, and they never match the fluff.
For all that: a fun mini-campaign! (maybe I enjoyed it more) It was nice to play small games of 500pts, so maybe we'll have to homebrew some of our own in future.
Three wins to zero, which means I go into this final game with every possible advantage: +1 to City of Traps roll; Aberrants re-roll wound rolls of 1 against the Dreadnought; Haldor starts off with one fewer wounds. What could possibly go wrong?
Nothing. Vengeance will be mine.
The battle lasts for five turns, but for a whopping 3CP the Space Wolves can buy one extra turn. For my part, the Genestealer Cults can no longer recycle destroyed units for free (WHAT? Am I expected to play fairly?) but for 1CP I can achieve the same effect (except for the characters: when they're dead, they stay dead).
I would gladly have swapped all my CPs for the entire campaign to have a strategem that killed this ability on turn one, game one, for all time.
Forces
Space Wolves
- Haldor Icepelt, Primaris Battle Leader: power axe, bolt carbine, frag and krak grenades
- 3 x Aggresors: auto boltstorm gauntlets, fragstorm grenade launcher
- 5 x Primaris Intercessors : auto-bolt rifles, chainsword (sergeant), 1 x auxilliary grenade launcher,, frag and krak grenades
- Asper the Frozen, Space Wolves Redemptor Dreadnought: heavy onslaught gatling cannon, heavy flamer, two storm bolters, Icarus rocket pod, Redemptor fist.
Genestealer Cults
- Gilgas Vendella, Acolytle Iconward: autopistol, rending claw, blasting charges
- Bregg the Anointed, Abominant: rending claw, power sledgehammer
- 5 x Aberrants: heavy improvised weapon (hypermorph), 2 x power hammers, 2 x power picks rending claws, 1 x hypermorph tail
- 5 x Hybrid Metamorphs: 1 x bonesword, 1 x cult icon, 1 x metamorph claw, rending claws, metamorph whips, hand flamers
- 8 x Purestrain Genestealers: rending claws
For those keeping score at home, the Space Wolves list comes in at 484pts or 25PL. The Genestealer Cults cost 549pts or 28PL. When I said I was going into this with every advantage, I meant it.
Meep.
Deployment

The 'Tower Cower' manoeuvre worked out well for me last time, so I do the same: stuffing Gilgas and the Metamorphs into the ruin next to one of the demolition charges. I'm allowed to put no more than half my units into Cult Ambush, so the Aberrants and Purestrains are sent into hiding. This does mean I'm leaving one of my objectives far away and entirely unguarded, but I'm relying on my Ambush rolls to move around the board.
 |
| Imagine that you can hear the same sound effect as Mutley tiptoeing. This is how they sneak up on you. |
I also get my first licks in with another big roll on the 'City of Traps' table - one mortal wound as the Redemptor Dreadnought steps on a carefully-placed garden rake.
Damn you, alleys!
Not to be sniffed at, but I'd rather have had the bonus to my Ambush rolls (which I would have got without the bonus from my Mission #1 victory - a victim of my own success here).
Turn 1
And sure enough, this is where it all unravels: a roll a 1 for my Aberrants. I really can't have this unit out of place, so I spend one of my precious Command Points (which I need to respawn units, let's not forget) to re-roll the dice and get a more respectable 4, which puts them 9" away from the the Redemptor Dreadnought.
Time for the Purestrains - and it's another 1! I can't afford to re-roll this time, so they're just going to have to lump it at the back of Kraken's now-empty deployment zone. At least I have the good sense to place them out of Aggressor range.

This leaves the Aberrants as the only unit who can make a charge - and they just fall short. I spend the second of my Command Points to re-roll one of the dice - and I'm in! The loss of one wound to Overwatch is drowned out by my sigh of relief
(luckily they dropped close enough to the Iconward to take advantage of his Nexus of Devotion banner - a 6+ FNP - which actually worked!)
And it's straight to the Combat Phase, where all five Aberrants get to dance with their old pal, Asper the Frozen. Though not all of them get a turn, since the Hypermorph immediately takes off six wounds with his improvised weapon (the 'stop sign') and the power hammer Aberrants knock off another six. That's it! The Dreadnought is down!
Well, that's not good. In my turn, Haldor grits his teeth and starts pushing for the objective, running away from the Aberrants. Because he Heroically Intervened into them last round, killing two of them, he won't be shooting or charging anyone as he leaves. But I suspect he won't last long against these freakish mutants, so my plan instead is to lure them out into the open.
For on the other flank, the Aggressors are breaking away from the objective to help out, leaving the Intercessors to deal with the important button pressing jobs!
Turn 2
Which just leaves the Aberrants to move menacingly towards Haldor Icepelt. It's an easy charge, and they start swinging away at him. He puts up a spirited defence against the Hypermorph, blocking two of the four wounds that land. But with double damage, he's still a gonner, and Kraken considers it not worth spending a Command Point to save him. So it's another early bath for this headstrong pooch.

Maybe this is foolish? But I suspect not - spending a command point to save him from the first combatant, when there's another one with a deadly hammer still to fight, is really not likely to keep him alive. I'd rather save the points in case I need to extent the game later, my team has a long run to make.
Agreed. Haldor deserved no better. He was a bloody liability.
As the Intercessors detonate bomb A, the Aggressors trundle towards the enemy, shooting as they go. I take out about half of the Genestealers, which feels like a good start, but I don't have the firepower to take out any more Aberrants. Foolishly, I also thought I could still use the advance and charge stratagem from the previous turn. But I can't! So my plan of assaulting the Aberrants has to remain a dream for now.
Turn 3
This second wave looks far more than I can take.

Without the bonus I gained against the Dreadnought, my attacks are going a little wild, and I only land two hits on the Aggressors, one of which fails to wound. I spend my last Command Point to generate a second wounding strike - and with the -3AP and D3 of the Power Hammers, that's enough to kill two of the squad.
The remaining guy does his best, holding out and clobbering a last Aberrant even as the Intercessors slog in towards the fray, but he's outnumbered and outgunned. His end is kind of inevitable.
Turn 4
It's looking like a done deal now, but Bregg the Anointed will not be denied! He charges into the fray, swinging his power hammer back and forth to annihilate the last two Intercessors.
 |
| I eat marines for Bregg-fast. |
The last demolition charge remains intact, which means the Thirsting Wyrm keep control of the reservoirs of Greigan Hollow. I hope the planet Vigilus has plenty of Evian in stock.
Victory for the Genestealer Cult!
Back in the Wolves' Lair
Not half, pop power-pickers!
Cult Ambush and Cult Reinforcements were a huge advantage to me. If we were to play this again (and maybe when I get the actual models on the table, a rematch could be on), I think limiting the reinforcements, or making them Command Point dependent (as they were in the last mission) would be the way to go.
Ultimately, it does seem like the story of Genestealer Cults is: if you do well in the Ambush rolls, your opponent is screwed. Although that lesson was obvious from Mission 1, so I think Kraken could have been a bit cannier with screening his limited number of troops - certainly the Aberrants should not have been allowed to deepstrike within charge range of the Dreadnought.
That's true. But I felt outmatched by both numbers and quality throughout, really. A single squad of scouts would have been really helpful, for example, or just some more Tac marines. With such small armies, it's really hard to screen against enemies who can appear from any side at any time!
The unfortunate consequence of that would be to turn the Space Wolves force into a cumbersome firebase (probably their best bet, given the firepower of the Redemptor and the Aggressors) rather that trying to fight ... tooth and claw. In a street fight, there was only going to be one winner.
Again true. But playing against this is that in half the battles, you're forced to move to win things. Assault firepower is a Marine strength, but actually Genestealers soak a surprising amount of fire, as do Aberrants. At least Marines go down fighting, they can be surprisingly durable in a fight.
Not so the Dreadnought. Wow, those Aberrants are really tooled to take it out! Getting first turn charged both times meant I never really got to use his firepower, and it was sadly missed. As I said, it seemed very hard to stop that happening!
On balance, this box set did act as a very nice showcase for the Genestealer Cult army. The Abominant and Aberrants are the standout stars, but it made me take a second look at both the Iconward and Metamorphs, which were two units I'd previously dismissed. And everyone loves Purestrains, of course.
Conversely, I don't think it's a great introduction to the Space Wolves. I do like the models, but they don't seem to play into either the character of the chapter or the type of missions here. If we assume they wanted to shift new models, then maybe swap Intercessors for Reivers?
It's shame they seemed married to an all-Primaris theme, because swapping out the Dreadnought for some Wulfen (similar monetary cost and power level to the Redemptor) could have made things very interesting. Putting a Dreadnought against Aberrants just feels like bringing a pair of scissors to a rock fight.
Yup, I heartily agree. A full unit of Intercessors, at least, GW! Scouts, even. It really highlights, for me, the weaknesses of Marines as an army. Yeah, they're elite and tough. But they aren't actually that elite and tough compared to good specialists. Okay, they're able to do well in most roles. But they achieve things too slowly, and you never have the numbers to last in a drawn-out battle. They never quite seem at home in any match I've used them in, and they never match the fluff.
 |
| Like these Navy Seals. They fit the description, but you wouldn't want to command them in battle. |
For all that: a fun mini-campaign! (maybe I enjoyed it more) It was nice to play small games of 500pts, so maybe we'll have to homebrew some of our own in future.
Brilliant stuff. As a newbie to this site, thanks for all the reports. They're a pleasure to read. Takes me back to the early 2000s White Dwarf batreps and Mike Walker articles. Keep it going.
ReplyDeleteBest wishes
Cheers! Old School WD is what we grew up on, so that's much appreciated!
DeleteA good read, even if I was really hoping for the Wolves to pull out at least one win. I think this might be the first time I can recall in one of these boxes where things weren't tilted in the Imperium's favour. Usually at the very least, they're the ones with the 10-15% Points advantage.
ReplyDeleteAlso, I don't have the set, so I can't check, but depending on the wording, it may well be possible to use that Advance and Shoot/Charge Stratagem twice in one Turn, even under Matched Play restrictions. You're definitely good here, because Narrative Play, as mentioned, but just thought I'd toss that out there.
Thanks! I think the all-Primaris restriction was too much of an obstacle for the Space Wolves - and Genestealers can be very good at ambushing!
DeleteRegarding the stratagem: there's nothing in the wording about using it twice, it was narrative mission-specific anyway. I think some of the codex stratagems might have been more useful here (like True Grit).
It's not necessarily about the wording explicitly allowing it, it's about the timing. You can only use a given Stratagem once per Phase in Matched Play, so depending on how it works, you might be able to use it once in the Shooting Phase and once in the Charge Phase. Or not, if it has to be used during the Movement Phase.
Delete