

In the middle of the big battle back in the Drawbridge system, there was still time for a quick sidebar battle. Having rescued all their ammo and come back to the home system of Rylstone, can the Crypt Saints push back against the T'au presence there?
T'aup Gun
Not sure I'm the best person to try and use the T'au as they defend their footing, I've only tried them once or twice before in the previous edition. At least they haven't changed a lot since then! Kas has picked these lists, aiming to try stuff he's not really used much before. This means I've got even less idea, but I thought it would be more fun to try out Team Anime anyway!
A fairly minimal infantry presence (plus drones) pads out a detachment full of armoured suits (and drones), tanks (and drones) and planes (and drones). They're all standard T'au Sept for the extra punchy overwatch rule, and their boss is the nifty Coldstar Commander, the fast one with all the guns.
I have used him before, but the tank and barracuda rarely get a look in.
There's a second detachment to bring a second Commander, as they're too good to only have one of, and that's got a Riptide (a standard one, no Forge World toys today) in it, as well as more drones. I feel vaguely like I miss Pathfinders and their rangefinders in the list, but actually there is a lot of Markerlight support in here, spread out through squad commanders and characters (and drones), which makes it harder to delete. Plus there's a couple of good strategems to help out with this in a pinch.
(There probably should have been pathfinders too - that was an oversight... but our 2000pt game was already 2400!)

T'au Sept Battalion Detachment
- HQ - Coldstar Commander, Warlord, two Fusion Guns and a missile pod, shield generator, Exemplar of the Mont'ka trait, two Gun Drones, Vectored Manouvering Thrusters
- HQ - Darkstrider with Markerlight and Pulse Rifle
- HQ - Commander Longstrike in a Hammerhead with twin T'au Plasma Cannon and twin Seeker Missiles, two Gun Drones
- Troops - 10 Fire Warriors, Shas'ui has a Markerlight, Guardian and Marker drones
- Troops - 5 Fire Warriors, Shas'ui has a Markerlight, Gun and Shield drones
- Troops - 5 Fire Warriors, Shas'ui has a Markerlight, Gun and Shield drones
- Elites - 4 Crisis Battlesuits, sporting a little of everything including 2 Missile Pods, 2 Plasma Rifles, an Ion Fusion gun, a Flamer, a Burst Cannon, two Gun Drones, a Shield Drone, 2 shield generators, an Early Warning Override module and a Drone Controller
- Heavy Support - 3 Sniper Drones
- Heavy Support - 2 Broadside Battlesuits with Heavy Rail Rifles and twin Smart Missile racks, three Shield Drones, a Gun Drone and two Seeker Missiles
- Flyer - a Barracuda with Rail Gun, twin Burst Cannon, twin Missile Pods and Seeker Missiles
T'au Vanguard Detachment
- HQ - Cadre Fireblade with Markerlight
- HQ - Crisis Commander with Iridium armour upgrade, three Missile Pods and a Shield Generator, two Gun Drones
- Elites - Firesight Marksman
- Elites - 2 Technical Drones
- Fast Attack - 4 Tactical Drones, two Guns, one Marker and one Shield
- Elites - Riptide Battlesuit with Heavy Burst Cannon, twin Smart Missiles, a Seeker Missile and two Shielded Missile Drones
- Flyer - Remora Stealth Drone, twin Burst Cannon, twin Remora Seeker missiles, Markerlight
- Flyer - Remora Stealth Drone, as above
Saints Go Marching In
Apologies in advance for the sheer amount of camo-gray. As with the T'au we are putting in as much new stuff as possible. So dropping in all the newer models (2 ATV, 2 servo-turrets, techpriest, chaplain on bike and hammerfall bunker) I added some other elements that I rarely use.
With the three techmarines (although two busy strapped into guns) I went more mech heavy that I had been before, and dropped in both redemptors. The repulsor's gun looks a bit smaller (it's all perspective and not at all the standard carrier masquerading as the version with a bigger weapon!)
With assault intercessors on the boat at the time, my core was limited; so dropped two small units of the more infiltrating phobos and a larger block of the standard intecessors.
With assault intercessors on the boat at the time, my core was limited; so dropped two small units of the more infiltrating phobos and a larger block of the standard intecessors.
Despite the bad press and being the inceptors weaker brethen: I like the suppressors, and the anti-overwatch would work well against any potential T'au targets that may want to be charged. Finally I put eliminators back... yes I have played these several times, they have either died first turn, or been horribly held up in combat and so I am yet to see them on the field proper. Crossing fingers that today against the combat fearing tau: today is the day (or should that tauday is the day!)

Space Marines Battalion Detachment
- HQ - Primaris Chaplain on Bike, Master of Sanctity upgrade, Warlord with Imperium's Sword and Adamantine Mantle relic, Exhortation of Rage, Mantra of Strength, Litany of Hate
- HQ - Primaris Librarian, Tome of Malcador extra relic, Might of the Ancients, Fury of the Ancients and Psychic Scourge powers
- HQ - Primaris Techmarine, Master of the Forge and Hero of the Chapter - Warden of the Ancients trait
- Troops - 5 Incursors with Haywire Mine
- Troops - 5 Infiltrators with Helix Gauntlet
- Troops - 10 Intercessors, Sarge has Power Fist and Plasma Pistol
- Elites - Primaris Apothecary
- Elites - Redemptor Dreadnought with Onslaught Gatling Gun, Heavy Onslaught Gatling Gun, Icarus Pod and twin Fragstorm launchers
- Elites - Redemptor Dreadnought with Macro Plasma Incinerator, Onslaught Gatling Gun, twin Fragburst launchers, Icarus Pod, Heavy Flamer
- Fast Attack - 3 Suppressors
- Fast Attack - 2 Invader ATVs, one with an Onslaught Cannon, one with a Multimelta
- Heavy Support - 3 Eliminators
- Heavy Support - 2 Firestrike Servo-Turrets with Twin Las-talons
- Heavy Support - Repulsor Executioner, literally all the guns ever plus Macro Plasma Incinerator
Space Marines Fortification Detachment
- Fortification - Hammerfall Bunker with Heavy Bolter option (Battlescribe calls it a Hammerfail=)
Mission
Tonight is the Battlelines Incursion mission from the GT pack.
T'au Secondaries:
- Assassination - lots of nice characters to eat out there, plus I have sniper drones and the Coldstar Commander to pick them off with
- While We Stand We Fight - Longstrike, the Riptide and the Barracuda must live
- Domination - I'm a bit wary about claiming I can run up and grab 75% of the field, but the threat of my doing so might lure the marines forward to where I can shoot them away
Marine Secondaries:
- Vital Ground - it's the mission specific one. 2 CP for holding each of the middle two objectives or 3 for the enemy's one.
- Thin Their Ranks - the T'au have fatter ranks, so fair game
- Cut off the Head - Pop that Warlord!
Battlefield and Deployment

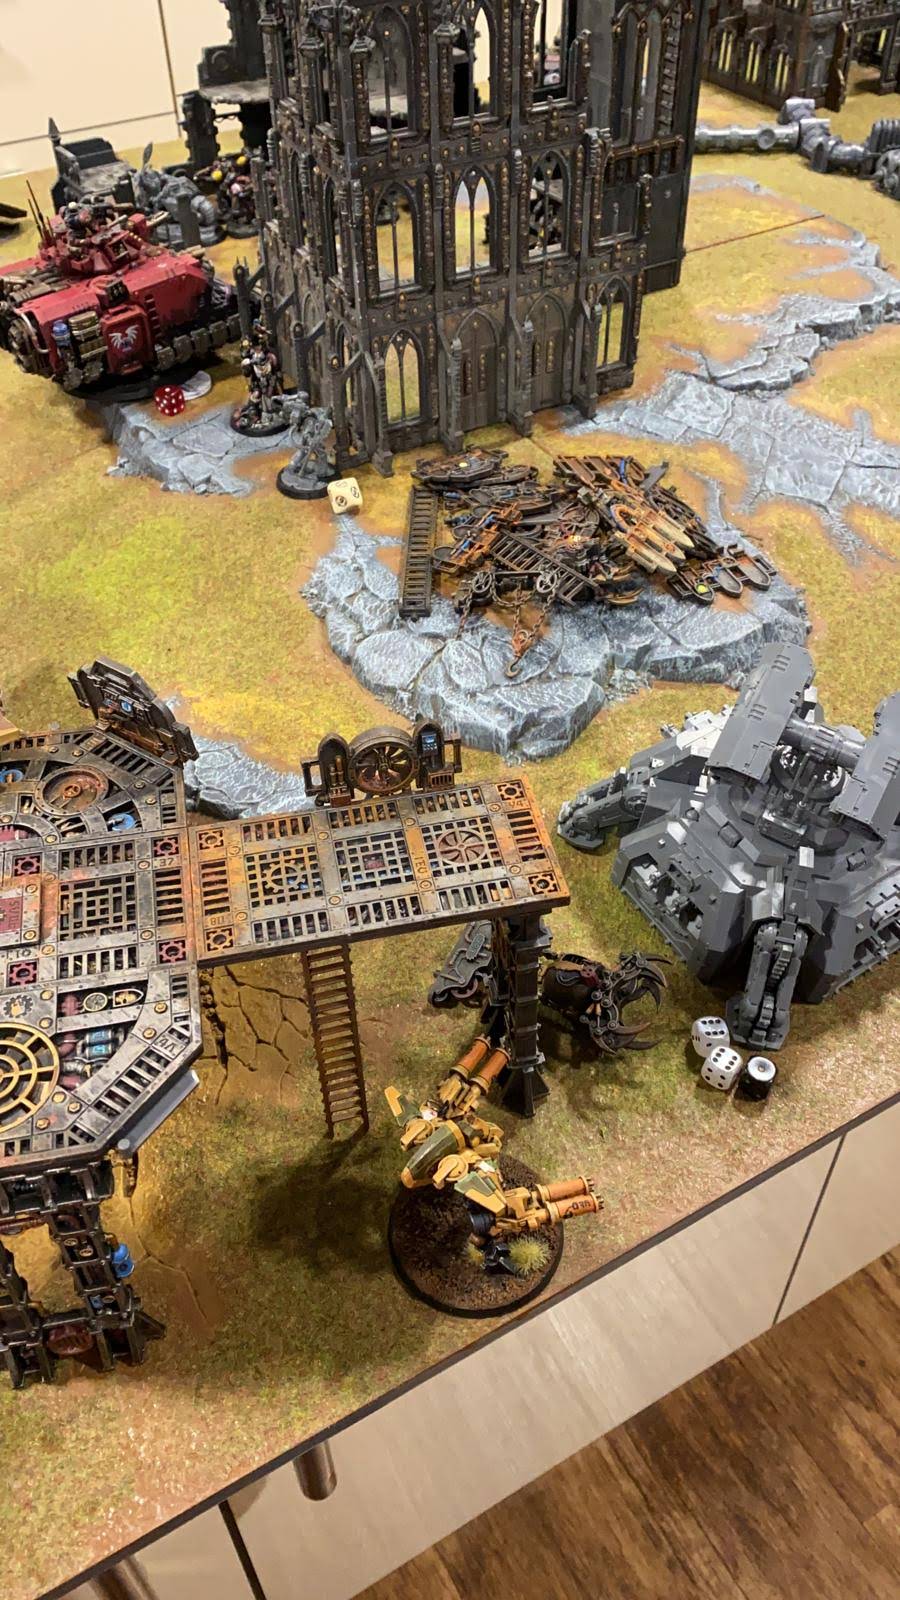
Rylstone's killing fields are a lovely mix of shattered Imperial habitation blocks and industrial equipment, as you'd expect. Some nice long fields of fire, but also plenty of places to hide out there.

I'd got everything setup on the Realm of Battle board, and then remembered as laying the objectives that the board should be smaller. Oops. Well we just have larger deployment zones.
I get to pick the sides, and go with a fat T'au castle of synergies behind the pipe network. Fire Warriors are fairly durable in cover, after all, especially with all the drone backup. Behind them, in the ruin overlooking my objective, are the Sniper drones and their Marksman, with the Crisis Commander and the Broadsides backing the line.
The southern battle group is the heavy stuff - the Riptide and Longstrike with the Coldstar, ready to move forward and pressure the enemy's rear, with the Barracuda at the very back where it can head for any trouble spots. The Remoras and the Crisis suits go into reserve, so I can punish weak spots (if I can find any).
I drop the Hammerfall on the southern flank, whilst less of the battlefield would be in bolter range, it did have a better chance to lock on to more troops. My phobos troops all deployed further forward, with one taking the north flank (hiding behind the tower) and the other cowering in the central obscuring building. The snipers took the roof of that same tall structure.
The ATVs revved off the board waiting to make an appearance some time later.
Redemptors covered each flank with the turrets serving the north and backing up their dread. The tank grabbed the back objective, coupled with a couple of officers (tech priest and apothecary) who planned to ensure they were well hidden when the pulse rifles fired.
That left my blob of intecessors, librarian and chaplain who all looked for safety in the central ruins.

Once we've rolled for it, Kas goes first!
Space Marines Turn 1


It was a cautious start for moving up. The northern Infiltrators snuck behind the northern tower, whilst the redemptor provided cover and claimed the objective. The librarian, chaplain and guard kept to the shadows of the central tower and almost everything stood still. The chaplain had song some paltry songs, but they were halfhearted as there was no expectation of any melee yet; and the librarian joined him in apathy with impatience.
Fighting T'au can be demoralising in the early game: everything can be soaked by drones: which leaves all their firepower still on the board. So my goal was to force as many drones off the board, and or people out of position. Seeing the castle of many units all hiding behind a pipe, the Chaplain called for an Orbital Bombardment on their location. Then the shooting started.
The hammerfall was first, and as it recognised target after target hails of heavy bolter fire emitted from it's turrets. It scratched some of the bigger suits temporarily, but multiple units were harrassed by its fire.
T'au Turn 1

Hey! No fair! I'm supposed to be the static gunline here!
Well, no point in sitting under the airstrike - although if I hadn't taken such a pounding in the last turn, I probably would have. As it is, my remaining infantry scatter back to cover while the Broadsides scoot just out of the blast radius. The suits, tanks and planes all sweep across towards the southern flank, keeping what drones they have with them. That bunker must die!
Except it's a bunker, and built for that sort of punishment. Accordingly I use strats and Markerlights to zero in on the Redemptor with the plasma gun, who can punch me off the bottom objective if I don't deal with him, but keep some scattered fire over to plink away a lone Suppressor from the ruins. Overwatch is my one special rule, and they want to take it away from me!

The Coldstar turns his fusion guns on the Bunker and chops a quarter of its wounds off, but it is still very much functional. Gritting my teeth, I await another batch of bullets.


Run away from the dog collar! The Crisis suits abandon the Chaplain, but the Coldstar Commander bounds in to put the dog down. My trio of jets zoom north, Longstrike stays on his objective and the Riptide heads for the northern one. Everyone else keeps their heads down and their triggers depressed.


No, I think that's probably enough. With my lone Riptide I can clear off that objective, maybe even fast enough to claim it with the new final turn rules. But I'm way way behind on points, too far to catch up, so the remaining T'pau troops head for their Mantas as fast as they can!

Space Marines Turn 2

I am still having a bit of a challenge deciding what to do with a lot of my marines, so the big squad hang about kicking heels in the ruins, as do the incursors. The infiltrators think that the redemptor and walking lascannons will be tempting targets and risk a run into open field.
The depleted suppressors leap behind the northern tower to protect from some shots, and continue harassment of the broadsides.
The depleted suppressors leap behind the northern tower to protect from some shots, and continue harassment of the broadsides.
The techmarine broke cover to repair the dreadnought, although this did put him in risk of a counter attack without protection of nearby tank.
I opt to leave the ATVs off the board.
A lot of drones have dropped, but there are still some left, so whilst I expect to do some damage, I am also expecting most hits on big targets to be ignored this turn. I focus mainly on either barracuda and broadside and manage to take one of the railgun down; but it does cost an explosion in the tank. I think the majority of drones are down, and so will start to make headway on the suits.

T'au Turn 2

That was a lot less damage than I expected, which means I've still got irons in the fire here! The Barracuda zooms over the Marine line, backed by the Coldstar, then I drop the Remoras and Crisis team in to join them. Longstrike and the Riptide muster on the southern objective, the rest of the gunline stay in cover and keep shooting.
The good news is that the shooting goes fairly well. The Redemptor finally keels over after the Remoras markerlight it, and the Hammerfall is down to a single wound. That means it's only hitting on sixes now, and I reckon I can safely ignore it after this.
The bad news is that Kas is very much on point with his armour saves! Other than these hits, I don't do much. The sniper drones and pulse rifles are great guns, but can't get through armour that well. The remaining Broadside puts a hole through a Firestrike turret, at least, but there are just as many troopers sneaking about in those ruins as there were earlier, and I am starting to doubt that I'll be able to get rid of them all.
Still, I've got half the field, and some of those characters at the back are a bit exposed now. And even take a couple of wounds from Crisis suit fire! So I'm still in the game.
Space Marines Turn 3

I mess up movement here, I was so excited about revving the Chaplain to head for the new crisis suits that I moved the tank to clear a path, then blocked the marines as a result. They broke cover though and made a half hearted stomp towards the suits.
Techmarine and his doctor ran back to the ruins, healing themselves and the tank in the process.
Up North the remaining turret sat on the objective letting the Redemptor advance further into enemy territory.
Up North the remaining turret sat on the objective letting the Redemptor advance further into enemy territory.
The ATVs arrive, but missed the T'au's scanners who promptly shot them up a bit as they arrive. In the confusion they forget to fire some of their guns, but wipe out several of the crisis suit drones. Shooting is effective elsewhere and the second broadside falls.
Finally the suppressors jump out from behind their building, shoot the crisis suits and deny their overwatch as the chaplain yells and approaches. It takes a (free) reroll, but he crashes in and takes a couple out. I will have to weather the counter once they jump out, but it seemed the right choice.

T'au Turn 3

The markerlights are rather thinner on the ground now, and as such my shooting efficiency is dropping. Well, for T'au, anyway - the Barracuda and Remoras make instant ash out of the Invaders, dropping both in a hail of missiles and rail shots.
Poor ATVs they really didn't get to shine.
The remaining Dreadnought is just as hard to kill as its buddy was, though, shrugging off most of the hits on armour and only taking a little here and there from small arms and missile pods. Somehow I manage to take out a lone Infiltrator and Eliminator with spare firepower, almost by accident.
That damn Chaplain - the Coldstar lights him up, and he shrugs almost all of it off on his Rosarius save! The Marines might now be surrounded, but I can't say I'm feeling super hopeful right now, there's just too many of them left.


Space Marines Turn 4

The Chaplain tears back to the safety of the centre, and gets patched up by the doc. The incursors decide it is time to join the fight and prepare to take on a tank (they were backed up by a tank, and so feeling brave). In case I can pull the charge off the suppressors jump back to the northern flank and prepare to shoot the commander allowing the redemptor to charge in.
Their shooting is effective and deny him his target; although he still opts to charge the tau in the building (making it). The incursors swear it was down to them, but backed up with other weaponry: Longstrike is removed. Whilst combination of psychic, icarus cannons and a lot of bottle fire the Barracuda is brought down.
It's looking good, but that coldstar is a threat and wants to hunt characters.

T'au Turn 4

There's still enough on the board for some final pain, I'm thinking. The Coldstar jumps into the middle of the character group, with the Crisis team angling for some support. The Riptide (who has been branch charging and healing like a boss throughout the game) piles on to the Firestrike turret, cutting down those wretched Suppressors on the way, and the remaining foot soldiers run away from the Redemptor as fast as their legs can carry them, although keeping a toe on the objective through the ruin walls.
The Remoras, who I'm quite impressed with so far, swoop in to help the Coldstar. One of them drops out of flight mode, the plan being to tie up the Executioner, but it flies right into an absolute hail of overwatch, including two hits from the Plasma turret, more than enough to drop it.
There were a lot of dice to roll needing sixes and not many wounds to strip.
Then the Coldstar melts a Techmarine, but the Chaplain is once more spared by his prayer beads.
Although the Ripstar duffs up the Firestrike turret with spare guns, it doesn't quite kill it, and fails to finish off the last wound in close combat. Aarg!

Space Marines Turn 5

Back away from the scary large mech; and the turrets skuttles off. The infiltrators feel brave enough to stand at the riptide's feet to challenge the objective (forgetting the change in rule, which means if the riptide kills them in the final turn that this was nothing). The incursors go and pick through the remains of the tank and the remaining dreadnought steps back and destroys the troops hiding in the building.
I don't have suppressors anymore, and so have to rely on the rosarius and being hard to hit to allow the charge in: he's good, and infused with prayers and psychic energy and assault doctrine: the priest makes quick work of the T'au warlord.
Looking around the riptide is standing, bracketed but likely about to heal again, and one tau hero is hiding in the tower.

T'au Turn 5


Result: Victory to the Crypt Angels! 62:32
Crypt Angels - 45 on Primaries, 1 for Cut Off the Head, 7 on Thin Their Ranks, 9 on Vital Ground
T'au - 25 on Primaries, 3 on Assassinate, 0 on Dominate, 5 on While We Stand We Fight
Locker Room
Mistakes were made! Clustering up didn't help me at all, and Dominate was a stupid choice given that I was trying to hold a castle anyway. Engage on All Fronts would have been a steady earner for the nippy T'au, I should have gone with that.
There are so many reasons to cluster as t'au though, so I don't think it was a mistake; I agree that if your plan was to stay still with so much that Engage may have been better than Dominate.
I just wasn't expecting the Hammerfall to be as deadly as it was against a castle. Gary Oldman, who did it shoot again?

Should I have run from the bunker, swept away the Marines to the north and taken that side with main force, keeping everyone on the field from turn one? Yes, in hindsight, although the southern sweep wasn't a bad plan. And really only Kas's excellent armour saves kept me from wiping out the Redemptor and Bunker on my first turn, but that's how it goes sometimes!
The Redemptor did deserve to die earlier, I had to profusely apologise when it made the another save and rotate the camera to show the dice clearly as it was too lucky. That coupled with their extra resilience to high damage weaponry, they are quite a sturdy.
Some very interesting intel gathered in that fight. A Hammerfall Bunker is absolutely great against T'au, would be my first takeaway - all that free anti-drone fire is fantastic (agreed). The Invaders are clearly pretty decent but died before they could impress (I reserve judgement until they do more than turn up and then get cratered), the Firestrikes are hard-hitting but surprisingly frail (and short range) and if there's anything T'au hate more than Suppressors, I don't want to meet it.
Remoras are my pick of the day. Fast and now very tough to remove with their additional wounds and perpetual cover save, they have recently lost the Drone ability that once made them a great Coldstar bodyguard. But a unit of four could still screen whilst keeping up, they're cheaper and pretty damn shooty now. Lucky some more have just arrived for Kas's army!
Yes, they have a very different use to how I have been using, but it's an adjustment not a downgrade. Nice sturdy harassers with a couple of extra tricks with seekers and markerlights.
Good fight - that has certainly weakened the T'pau's holdings on Rylstone, I'd reckon, but I'm sure they're not quite out of the system yet. Expect more in the future!
Nice game, I can't help but feel that T'au have a big disadvantage against Marines in 9th as Marines can play the shooting game just as well but outperform in almost all other areas. I'm sure there's a way of playing a mobile list that doesn't have to castle up, and it might be fun trying.
ReplyDeleteI agree, Marines outperform Tau generally just now, they shoot more accurately, have better armour, etc etc.
DeleteTau need a bit of work, imho. Drones could be simpler, for example, made part of the squad they're taken with unless they're a separate squad. Markerlights are a fun idea but seem to take a lot of work to pull off. And their line infantry shooting could use a little more ap to stand out against bolters, perhaps? They do run cheaper these days, Crisis suits for example dropped in price a lot. Be very interesting to see what changes with the codex.