

A test bed for massive monsters? Count me in!
Eat the World, Make it a Better Place
New toys have arrived to the war-tern world of Rylstone. Namely the hulking centrepiece model for today, the Great Brass Scorpion!
Favoured of Khorne, this is coming out to play with a World Eaters list. And several more new toys in there, too - the Lord Discordant is a great buddy for the massive Daemon Engine, as is the tiny baby version, the Venomcrawler. Building on this, Kas is paying for the Soulforged Pack specialist detachment, which lets the Disco Lord take a trait that boosts Daemon Engine movement. Yikes.
Backing this lot up is a bunch of vicious melee troops, just as you'd hope - Red Butcher Terminators are particularly terrifying, they can fight twice like Berserkers do. There are also some standard Berserkers, of course, plus a Terminator Lord, a winged Daemon Prince and a bunch of cultists to hide from all the bloodshed at the back.
Finishing off with a Rhino, some Warp Talons and a Hellblade, and you've got an incredibly fast, hard-hitting list that I'm unreasonably scared of. At least it's shorter on CPs than I am, there's a lot of juiced-up characters in there!

World Eaters Battalion Detachment, 5 CPs, 1472 points, Specialist Detachment - Soulforged Pack
- HQ - Terminator Lord with Combi-Plas and Power Fist, Mark of Khorne
- HQ - Winged Daemon Prince of Khorne with twin Malefic Talons, Warlord with Violent Urgency and the Talisman of Burning Blood (assault and charge)
- HQ - Lord Discordant with Helstalker and Baleflamer, Mark of Khorne, Techno-virus Injector, Field Commander - Master of the Soul Forges
- Troops - 10 x Cultists
- Troops - 10 x Cultists
- Troops - 10 x Khorne Berserkers, Champion has a Lighting Claw and Power Sword, everyone else has Chainsword and Chainaxe, Icon of Wrath
- Elites - 6 x Red Butcher Terminators with Combi-plasma and Lightning Claw, one power fist and one chainfist in there too
- Fast Attack - 5 Warp Talons
- Heavy Support - Venomcrawler
- Flyer - Hellblade with twin Lascannons
- Dedicated Transport - Chaos Rhino with twin combi-bolters
Superheavy Auxiliary Detachment, 525 points, Specialist Detachment - Soulforged Pack
- LoW - Great Brass Scorpion with Demolisher Cannon, Scorpion Cannon, twin Hellmaw Flame Cannons and Hellcrusher Claws
It was expensive... only 5 CPs to play with, having spent:
- 1 for the faction-matching LOW
- 2 to make both detachments soulforged
- 2 to make the Terminators butchers
- 2 for extra warlord trait, and an extra relic.
Send in the T'auns
Luckily, I'm playing T'au today, and there's an obvious approach to dealing with crazed melee experts - shoot them!
The classic T'au Sept ability is better Overwatch, so I'm hunkering down on a fairly standard list. A small trio of troops to fill out the detachment, then tons of big battlesuits with heavy guns. Ghostkeel, Riptide, Coldstar - the gang is all here. On top of this is a bunch of flyers - the heavy Barracuda with tons of Ion firepower and a quartet of Remora Drones (which I'm a big fan of), so I should be able to bring pain from a distance as well as hunt down any hidey cultists.
I need a Lord of War myself, of course, so the Stormsurge is coming out. I'm not the biggest fan of this lumbering brute, although it certainly does bring a lot of firepower. Thing is, most of its shots are best against lightly armoured hordes, which I'm not facing today. Hopefully the big gun and its Destroyer Missiles will leave some holes, though.
Pathfinders, an Ethereal, a Cadre Fireblade, all topped off with plenty of drones. Time to harvest the Khorne.

T'au Sept Battalion, 1619 points, 11 CPs
- HQ - Coldstar Commander with twin Fusion Blasters, Missile Pod and Target Lock, 2 Shield Drones, Warlord with Precision of the Hunter trait (reroll wounds against monsters and vehicles)
- HQ - Ethereal
- HQ - Cadre Fireblade with Markerlight and Pulse Rifle
- Troops - 5 x Breacher Squad with 2 gun drones
- Troops - 5 x Strike Team with 2 markerlight drones
- Troops - 5 x Strike Team with 1 markerlight and 1 gun drone
- Elites - 2 x DX4 Technical Drones
- Elites - XV104 Riptide Battlesuit with Amplified Ion Accelerator, Drone Controller, Amplified Ion Accelerator system, 2 Smart Missile Pods and 2 Shielded Missile Drones
- Elites - XV95 Ghostkeel Battlesuit with 2 stealth drones, 2 flamers and a Fusion Collider
- Fast Attack - 5 x Pathfinders with Markerlights
- Heavy Support - 1 x XV88 Broadside Battlesuit with Heavy Rail Rifle, 2 smart missile systems and a single shield drone
- Flyer - AX-5-2 Barracuda with Ion Cannon, 2 Cyclic Ion Blasters and 2 Smart Missile Systems
- Flyer - 4 x Remora Stealth Drones with Markerlights, Remora seeker missiles and twin Long-barrelled Burst Cannons
T'au Sept Superheavy Auxiliary Detachment, 381 points
- LoW - KV128 Stormsurge, twin Airbursting Frag Projectors, twin Smart Missile Systems, Cluster Rocket system, 4 Destroyer Missiles, Pulse Driver Cannon and Shield Projector
Mission and Terrain

The familiar ruins of Rylstone beckon, and we're playing Open War. The cards suggest a set of deployment zone that actually touch in the middle, which we both suspect might be a little one-sided! So we settle for the short edges and vanguard arrowhead zones instead.
We're fighting over three objectives, one in the middle and one at each end. 1 VP for holding your own, 2 for the middle and 3 for the Enemy's. Straightforward and simple, and stops me sitting back and shooting too much!
Deployment
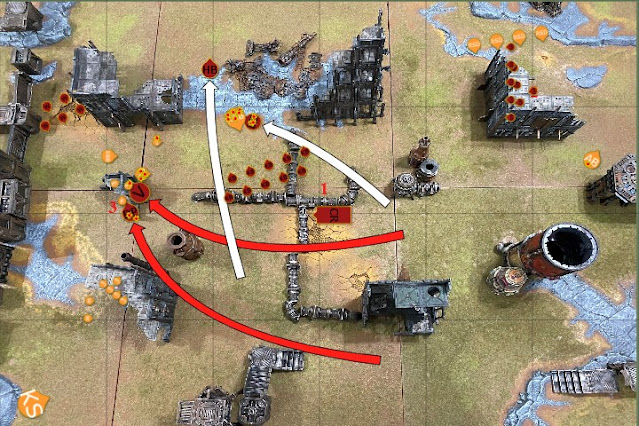
Kas takes Defence, and opts for placing his objective in a tall ruin full of hidden cultists. Terminators in deepstrike, Beserkers in the Rhino, and then two teams of Daemon Engines, one heading down the side, one clustered around the enormous Scorpion in the middle.

My counterplay is an infantry castle facing the Scorpion at range, backed by the two largest Battlesuits on each wing. Pathfinders in a tower, one group of flyers also on each wing, and the Ghostkeel tempting fate by sneaking forward a bit, ready to threaten the centre if I can pacify those nutters by shooting enough of them first!

First turn looks to be a big one here, with both of us hoping to take it and smack down some of the enemy's toys before they smack us first. In the event, it's me that gets it. Game on!
It was a choice that I am in some ways glad I did not have to make. Whilst going first gave the best chance to alpha strike and remove something; the scoring in the mission happened at the end of the battle round; so there was an offset advantage to going second.
T'au Turn 1

Usually, I forget about the Tau warlord command abilities, but not today - I need to push the centre a bit, or the naturally faster and more aggressive World Eaters are going to swarm me. So the Coldstar calls Mont'ka, letting all the nearby castle advance but still fire as though they kept still. The Ethereal boosts this further with Storm of Fire, letting them reroll 1s for shooting.
In all the times I play tau, I nearly always forget too, and have never used in that way. That's one I will remember; worked well ignoring the advance.

The flyers all scream forward to the midline, with the Riptide and Ghostkeel pushing centrally a bit, mostly so they can see Big Pinchy through the ruins, but the Ghostkeel can't quite get the range and has to shoot the Rhino instead (it duly coughs smoke).
Shooting is the T'au specialty, and I get off to a grand start as the Pathfinders get two targeting lasers on the Brass Scorpion, boosted to five by Networked Markerlights. Kas braces, and in fairness, he's right to. After the Remora seeker missiles, Barracuda, Riptide, and Broadsides have opened up, there's about two thirds of his wounds missing.
For some reason, I wonder if some previous edition memory, or may just be Mandela effect: I normally don't fire multiple seekers from one hull in one turn. I wonder why I thought that, as there is no rule that says it, and makes more sense to hit hard once a target is well and truly markerlit.
Now, I probably ought to have doubled down here, but the whole point of this match is to see the Scorpion in action. It's bracketed and much slower, so I decide to let it live a while longer rather than pouring more fire in. The Stormsurge could probably have finished it off, but I decide to try and hurt some of the support characters instead, and spray a few wounds off the Rhino and Disco Lord, but it's less accurate and not nearly as deadly.

The Riptide uses his Nova Reactor to jump backwards again, then I can pat myself on the back for being sporting!
Yes, thank you. Although he would have soaked a lot of fire, it would have been a shame to miss out on what he was going to do.
World Eaters Turn 1

The Brass Scorpion and Disco Lord scuttle forward for the Ghostkeel, the Daemon Prince leaps at the Barracuda and the Rhino grabs the centre point. Both Venomcrawler and Hellblade go forwards too.
Shooting proves nastier than I hoped when the Scorpion Cannon blows through my precious Pathfinders in a second, but the bigger guns on pretty much everything bounce off drones or shields. Only the Disco Lord is able to flame about half the wounds off the Ghostkeel with his Baleflamer. But the World Eaters didn't come here for shooting.

The Brass Scorpion makes his charge, taking another couple of wounds from the Ghostkeel's flamers, and then levels its opponent with little ado. Alas, it now faces a row of Remoras which it can't charge, so it's sort of where I want it to be.
Nice blocking.

The Daemon Prince takes a whipping from the Barracuda's overwatch (although I have to pay a CP for this, the plane can't do the free one), and only just makes it through on two wounds. He repays the favour, of course, but can't quite finish the bomber off. And even manages to get his tail stuck in a jet intake, nearly (but not quite) losing his last wounds to it in melee!

Kas is not looking hopeful at this point. I, however, am. He might be pulling ahead on VPs a little, but his army is damaged and exposed, and I've still all the big guns very much in play.
Yep, I brace as this next turn is going to be messy.
T'au Turn 2

The Riptide leaps forward for the kill, boosting the reactor for the extra ward save. The Stormsurge has planted its anchors, everyone else is in pretty decent shooting range, so I hunker down and prepare to fire. Only the Remoras and Barracuda keep moving, the drones screaming up to bully the Cultists, the Barracuda limping away from the Daemon Prince.

And then it's all guns. Lots of Cultists die as I split fire across them, with one Remora even lighting the Brass Scorpion up with its markerlight. Before I can do much more, the Riptide gets some good hits in with its experimental Ion gun, and the Brass Scorpion is down.
But oh, boy, does it explode.
Kas rolls high - an 11" fireball doing d6 mortal wounds nukes both of our central lines. His characters and Daemon Engines take a bit of a hiding, but the real damage is felt by the T'au. Lots of small infantry units? Plenty of Drones? Not any more - I lose a huge chunk of my castle, and I'm very lucky that all my characters just about scrape through, although they're all missing ears, fingers, etc.
Well that's not how I expected the scorpion to do damage, but I'll take it.
After that, I don't have as much shooting left! Various dents are put into the Disco Lord, Rhino and Venomcrawler, but it's pretty weak sauce that they can regenerate easily enough. My remaining guys settle into the vast smoking crater, a couple of Cultists flee, then I await the second wave anxiously.

With the rhino surviving on one wound, the central objective is also going to be safe. I might be losing my toys quickly, but will be holding the objectives.
World Eaters Turn 2
Sure enough, the Warp Talons pop up in my backline, but fail their charge. The Berserkers pour out of their wrecked Rhino, the Lord Discordant heads for the Riptide and the Venomcrawler and Daemon Prince go for what's left of the Tau Infantry line as the Hellblade screams past overhead.

Shooting is again iffy. The Cultists and Hellblade scrape the last of the paint off the Barracuda but can't finish it off, and again it's really only the Disco Lord who connects, killing the wounded Coldstar Commander with his beastly flamer.

Charging is of course a different story, and the Disco Lord urges his mount into the Riptide in a full-on spider pounce as the Daemon Prince and Venomcrawler pile into the ruined Tau characters. A few wounds from overwatch, but not anything that's going to save me. At least the Lord Discordant goes first, reducing the Riptide to a single wound in very short order, but that gives me the opportunity to let the Cadre Fireblade interrupt against the badly wounded Daemon Prince.
Who he manages to gut with his knife, against all odds! The Venomcrawler makes heavy work of the lone surviving Shield Drone, and follows up, but it's not the finishing blow it could have been by any means. More points for control to Khorne, of course, but I could really clean up in the next turn.
The surprise fireblade stab, and talon's lethargy, keeps T'au on their home objective but it is now 6:2.
T'au Turn 3

And I do my best! Stimulant Injectors and Auto-Repair puts the Riptide back up to a functioning level. Which I do my best to undo immediately, by spending a Nova Charge to let him boost away later on (We aren't totally sure if this can take him out of combat, where he's staying so he can shoot, but nothing seems to suggest he can't- and seems characterful, so I urge that that is allowed).

The T'au Fireblade lobs an EMP grenade at the Venomcrawler, which then eats several Destroyer missiles from the Stormsurge and dies. I have to play various other strats to get the markerlights I need after the nearby drones don't help as much as I wanted, and I'm running dry now. But the Barracuda manages to kill the Rhino, and I even shoot down a few Berserkers, although nothing like enough to make a difference.
Finally, the Remoras switch to hover, then shoot and charge the Cultists, murdering the few who survived. Good! Although I can't actually hold the objective with them, they're aircraft even when hovering. But denying points is still going to be handy.
World Eaters Turn 3

Alas, the third wave now teleports in. The Terminator Lord grabs the centre as the Berserkers plough into by survivors (and he even manages to shoot down the Barracuda with his plasma gun, the bugger), then the Red Butchers arrive, cleanse off the nearby Strike Team and Drone and charge the Stormsurge.
Between the Berserkers and the Warp Talons, what is left of my backline is chopped into mince in seconds, and the Berserkers can go round again, charge into the Riptide and bring it down as well.
(In hindsight, I don't think they should have done this.. yes engage, but not actually swing as he was not originally charged, even though that was originally discussed as potential.
I'm not sure - I thought if you (for example) overrun Genestealers through one combat, kill everything and tag something else in consolidation, then pay for the strat to fight again, you can fight the new unit even if you hadn't charged it this turn. But I'd have been happy to be wrong!)
Anyway, the Stormsurge shrugs off most of one round of damage from the Red Butchers, but the second round leaves a nasty dent.

Without the Riptide, who could perhaps have boosted forwards and stolen the back line with some good movement rolls, I really have no way of getting back in the game - the aircraft I have left can't score anything, and the limited firepower and models I have aren't going to swing the tide. GG!
Riptide should maybe have still be there, but would have had to fall back and so probably not making a material change in turn 4.
Result: 11-2 to the World Eaters!
Locker Room
If there's a lesson in here, it's possibly to not show mercy in the grim dark future of the forty-first millennium!
But I regret nothing. Even if I'd killed the Scorpion in turn one, and even if that huge explosion hadn't ruined me, I rather suspect the late chargers from the World Eaters would have swung the tide.
As you said afterwards, he was such a fire magnet and would have taken all your shots and a number of CPs. But I am glad I got to try him, although he really just killed some squishy troops, and finished off a weakened target and then blew up. Wonder if that is all destined to do, and is a mega-distraction-carnifex?
I do wonder how the scoreline would have looked if you had elected to go second. The ability to shoot me off objectives before scoring them might have been beneficial; and I needed to close before being too effective. That said, I appreciate how hard it is to give up first turn when you win the roll off given, historically, how beneficial first turn is.
Very true, and probably a good plan for T'au - shoot away your opponent and then move into the gap. Increasingly, I really like playing them (especially the flyers! and the Riptide!), but it's strange - they do struggle against armoured troopers rather, and once you lose markerlight support you don't make as much headway as you want to.
You make effective use of them, and had previously used other things over the riptide; but that relic gun of his is nice.
Blimey, though, that World Eaters list is quite a goer! I'd happily fight it again (or as it), possible with Imperial Knight soup, and see the glory of the Brass Scorpion once more.
Yes I would like to try it again. I wonder (given it has a 3d6 charge) bringing it in as reserves and not suffering the initial plethora of shots as it tries to close.
Hopefully painted next time, of course!
Sounds like a fun game, and always good to see the minions of Khorne on the table.
ReplyDeleteIt was a hoot! Hadn't faced World Eaters before, they're vicious.
DeleteNice to see that the T'au are quite fun to play. I really thought you might pull that one off for a bit, but once they got in close...
ReplyDeleteOh, I think I've have my alloted wins for this edition!
Delete