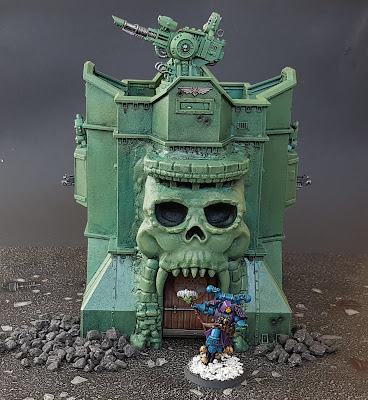
My Masters of the Universe / Warhammer 40k mash-up is about to conclude with a flourish!
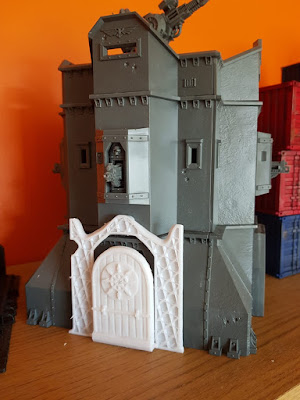
The build started off as a humble Imperial Bastion, nothing special, nothing extra. The one in the picture above is a test Imperial Bastion I assembled, I decided to leave the door off the final one as it wasn't needed.
The Bastion was measured, and a very rough sketch was made to get an idea of the scale that the elements would need to be printed out in. You can see that each element needed to be printed in an upscaled factor of 1423.49%. There's maths in there you know!
In order to get the classic Grayskull flavour some 3D printed parts were used. For those interested you can get the files from Thingiverse.
The Castle itself is a desk toy of sorts and is a fan-made proxy of the original in a smaller scale, credit to the original author above. It took some slight 3D editing (a hack job in all honesty) but it broke down into a few basic elements, the skull, the archway and the door.
The door had a generic coat of arms on there so as the original brief was an Imperial stronghold slowly succumbing to Chaos, I found a vector image of the chaos star and extruded that onto a crudely placed circle to cover the coat of arms.
The picture above gives an idea of the scale and also shows the first and only failed part of the total print. 3D printing can be notoriously fussy so I took this as a win.
WARNING - THE FOLLOWING VIDEO IS NOT FOR GENTLE OR TIDY HOBBYISTS!!!
The video may seem a bit graphic but I used an oscillating saw to make some 'precision' cuts, I roughly drew out the size of hole needed and hoped for the best. Holding a saw and filming on your phone is not recommended, but thanks the Emperor no fingers were lost in the making of this castle.
With the holes cut out, the parts were hot glued in place to get a quick and firm seal. The gaps were too big for plastic cement or superglue so I made sure to overlap the hot glue around the edges to frame the parts in place. Some Milliput Superfine was used to fill in the remaining gaps and go over the hot glue.
The aim was to get a feel that the Skull had "grown" out of the Bastion due to nefarious influences and so it allowed me to be free on the joins. I did however smooth out the joins as much as possible by using plenty of water on tools and fingers to make sure that they didn't stick and pull apart my hard work.
The basecoat was applied using a rattle can, interestingly, it was something that I found in the shed - a £1.99 can of garden Sage Green! This was liberally doused with a homemade Nuln Oil mix (thanks B1llyb0b) and left to dry.
To get the depth of colour built up the model was heavily dry brushed with some Citadel paints, namely Loren Forest, Straken Green and then a light drybrush of Ogryn Camo on the highest spots. A big makeup brush was used and helped avoid the gritty areas usually a telltale sign of drybrushing.
Some final detailing was added and some select use of Balthasar Gold was applied to the Aquilas and the Chaos icon on the door. These were weathered with more Nuln Oil and then weathered further with Nikalakh Oxide but wiping away the excess from the highest spots.
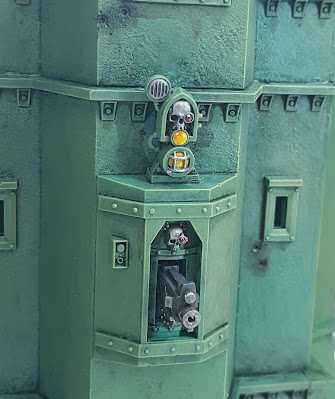
Some final touches were added by painting the lenses and giving it a shiny gloss coat of varnish to set the piece off.


I think Sorceress looks rather good as a lascannon.
ReplyDeleteThe toy actually came with a laser turret. That's attention to detail right there.
DeleteThis is awesome. It's literally just several of my favourite things rolled into one, and it's bloody brilliant.
ReplyDeleteThanks!
DeleteWell done both of you! Words fail me expressing quite how cool the whole project is. I remember being amused when I saw Hei-mann vs Winters some time ago, but Stylus has taken it to a whole new level!
ReplyDeleteWhat's this hobby for if you can't have a little fun with it?
DeleteWait, 40K is for fun?
DeleteNo! Get back to work painting!
Delete