Release the Neverborn!
It's new army time all round - I finally get to take my Chaos Daemons for a spin, and they'll be pitted against local opponent Rapid's shiny new Necrons (only sixty million years on the clock).
The Nurgle troops are the anvil - they're tough enough to absorb the hits, while the more fragile units, like the Bloodletters, wait to strike. The Screamers seem fast and potent, and the Flamers should impress, as I've given the Fluxmaster a trait and psychic powers to help him buff them.
For all that, it's the strangest 40k army I've put together (which is saying something, considering I started with Thousand Sons). Can't wait to give them a run-out!
Points: 998 | Level: 61 | Battle-forged + Battalion: 8 CPs
The Lord's trait is Immortal Pride, which makes nearby units immune to morale, and gives him a Deny the Witch ability (useful that). Added to the buffs he and the Cryptek bring, plus reanimation protocols, then there's a lot of synergy in the army.
The Triarch Stalker is probably the only unit not suited to taking on swarms of daemons, though its ability does make the rest of the army's shots count for more. And maybe the Destroyers are too much of an anti-armour unit for the invulnerable saves of daemon swarms, but they never seem to underperform.
The Sautekh trait does allow units with rapid-fire weapons to advance and fire like assault weapons, so the army could be quicker than I expect - and the Veil of Darkness relic makes it especially mobile.
Points: 999 | Level: 66 | Battle-forged + Battalion: 8 CPs
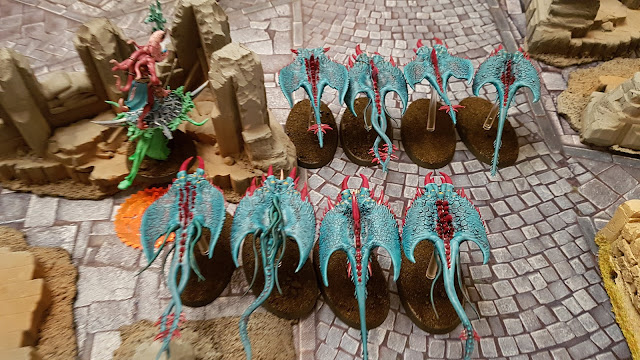
On the left flank, with the clearest avenue of attack, goes the Nurgle stuff: Plague Drones, Plaguebearers and Poxbringer. On the right flank goes the faster fliers: both Screamer units and the Fluxmaster. The cheeky Nurglings set up 9” outside the Necron deployment zone, ready to tie things up on Turn 1.
The Necrons castled around the ruins on their right flank – both units of Warriors, the Destroyers and the Immortals went in or around there, with the Lord and Cryptek skulking at the back to provide their buffs. In the centre went the Triarch Stalker, screened by the troops.
The Wraiths went up on the left flank (another fast-moving unit to counter mine) and the Scarabs went all the way at the back to push out a deepstrike.
I elect to go first … and then the Necrons seize the initiative!
A tough draw to start with – Defend Objective 4 is easily achievable, but it pulls units out of the Necron castle towards me. Reclaim and Recapture gives D3 points of holding all the odd-numbered objectives, which is a push. Dust and Ashes gives VP if a Necron character survives until the end of the battle, which means it’s going to sit there all game.
Still cagey about deepstrike, the Necrons adjust their lines. The front unit of Necron Warriors advances onto Objective 4, and the Wraiths float forward to engage the Nurglings. In terms of shooting, there’s not much in range or visibility, so a few wounds are plinked off a Nurgling Swarm, a Plague Drone, and a couple of Plaguebearers (which at least removes Cloud of Flies for future turns).
Only one charge – the Wraiths into the Nurglings. I was fearing the worst for these squishy little critters, but the Wraiths rolled poorly for their hits, and my deamon save held up – I only lost two and half bases, so the unit inexplicably survived!
Objectives scored – none (Reclaim and Recapture was discarded)
Necrons 0 : 0 Chaos Daemons
These aren’t terrible cards to score, but I’d prefer to have more assets on the table to kill stuff. Still, with the Wraiths around Objective 3, and my two units of Screamers within an easy charge, all I need to do is kill them for a easy haul of points.
I fall the Nurglings back out of combat onto Objective 3 (they’ve done enough, poor things) and race the Screamers and Fluxmaster towards the Wraiths. The Plaguebearers and Poxbringer advance up the table, and the Plague Drones buzz towards Objective 4 – I can’t contest it, but at least I can tie up the guns.
In the Psychic Phase, I case Miasma of Pestilence on the Plaguebearers, and Smite the Wraiths – I elect to use a Command Point to improve the single mortal wound I inflict (I’m really nervous about getting past that 3++ invulnerable save with conventional attacks) but it still comes out as 1.
In Assault, the Plague Drones charge the Necron Warriors, taking no damage and flittering their wings ineffectually at them. Both Screamers hit the Wraiths, but their armour-piercing lamprey bite counts for nothing against the invulnerable save and I only take one of them down, losing three Screamers in return.
So I end the turn with nothing to show for it, though my Nurglings have started to defend Objective 3, and will hopefully get overlooked. In return, the Necrons claim 2VPs for Defend Objective 4, and they’re off the mark!
Objectives scored (Necrons): Defend Objective 4 (2)
Necrons 2 : 0 Chaos Daemons
Objective 2 is deep within Daemon lines, and Objective 3 is currently swarming with Nurglings and Screamers.
Although the Wraiths are also fighting over Objective 3 – and with Repair Subroutines stratagem played, the destroyed Wraith reanimates and the unit is back to full strength!
The Necron Warriors fall back out of combat with the Plague Drones, and the rest of the line readies their weapons. The Wraiths also fall back out of combat, because they can charge right back in, allowing the lone Screamer to be picked off.
The rest of the shots from the Immortals, Destroyers and Triarch goes into the Nurgle daemons – two of the Plague Drones are downed to Destroyer fire, and a few more Plaguebearers gunned down. With their invulnerable saves and disgustingly resilient, the pestilent half of my army is pleasingly robust at taking hits.

The Wraiths fly back into the second unit of Screamers, and I spend 2CP on Warp Surge (because if they’ve got a 3++ save, I want one too!). It pays off, and not only do I only lose one Screamer, but the remaining three rip down two more Wraiths in return.
The turn ends with no points for the Necrons, but I claim 2VP for Defend Objective 3. Honours even.
Objectives scored (Daemons): Defend Objective 3 (2)
Necrons 2 : 2 Chaos Daemons
My new hidden objective - The Dominion of Chaos - gives me D3VP if I control more objective markers by the end of the turn. It’s a really good card for going second, since all I need to do is jump on objectives in my round. The Necrons are heavily camped on two objectives, so I need to be on three.
Deepstrike time – and I need to drop the hammer. Unfortunately, the Wraiths are drawing my attention, and I don’t want to send my Fluxmaster over to support the incoming Flamers when he could be sending mortal wounds against that Canoptek monster.
I accept the compromise and fly my warlord back to hold Objective 2, so at least he can Smite the Wraith and play for Dominion of Chaos at the cost of abandoning the Flamers.
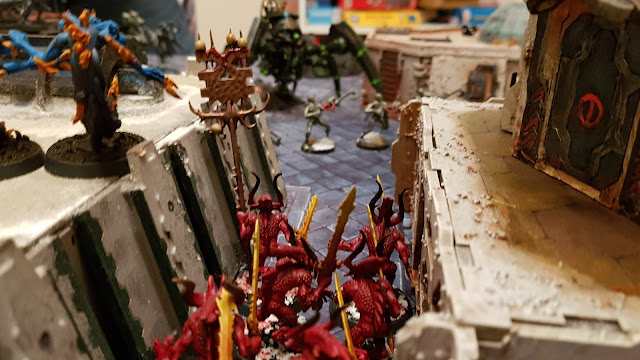
The Plaguebearers continue to march forward on the Necrons, backed up by the lone Plague Drone and cheered from the back by the Poxbringer. Then come the deepstrikes: the Flamers land on the central building, taking aim on the Necron Warriors. One unit of Bloodletters land in the central alleyway, ready to charge forwards (and also on Objective 1, so if they fail the charge, the can still be useful). The second unit of Bloodletters stay in the Warp, since the Necrons are still doing a good job of screening.
The Psychic phase is a trial: the Poxbringer fails his cast of Miasma, and I have to use a CP reroll to get off the Fluxmaster’s Smite – for which I am rewarded by a single mortal wound on the Wraith.
And finally I can do some shooting (the Plague Drones have been attempting some ineffectual shooting attack). I had grand plans for the Flamers, with the Daemonspark warlord trait, Flickering Flames psychic power and Fluxmaster buff – but I don’t have any of these, so they just take aim on the Necron Warriors and burn away half a dozen of them.
Wisely, Rapid removes all these casualties from directly in front of the Bloodletters, so their charge is now impossible.
What can make the charge are the Plaguebearers and Plague Drone, who pile in once against the other Necron Warriors and slap each other about. The Nurglings also jump into the Wraiths, because I need every foetid hand to the pumps here (spoiler: they do nothing).
The real action is when the Screamers fight: I manage to wound the Wraith three times, and he only needs to fail one of them to fall. So rolling triple ones does nicely, and the unit is finally gone!
That gives me a big rack of points, although for all my fussing over Dominion of Chaos, I only roll 1VP for it.
Objectives scored - No Prisoners (1), Blood and Guts (1), The Dominion of Chaos (1)
Necrons 2 : 5 Chaos Daemons
No new objectives, but it’s time for the Necrons to run some deepstrike shenanigans of their own. They start off by reanimating half of their slain Warriors, then pulling back out of combat with the Plaguebearers. The whole Necron line then contracts to form a new fire base.
To finish off, the Lord then uses his artefact The Veil of Darkness, to jump himself and a unit of Warriors across to the right-hand corner of my deployment – right next to my Fluxmaster. Ulp!
Wasting no time in Shooting, all the Warriors rapid-fire into the Fluxmaster. With his Impossible Robe invulnerable save, he does okay – but not enough to withstand the barrage of gauss, and my warlord is gone.
On the other side of the battle, the other Necron Warriors take off half my Bloodletters, and the Destroyers remove the rest of the Screamers. The Triarch blasts the Plague Drone, who clings on to his last few wounds, and the Immortals continue to pump shots into the Plaguebearers, knocking away a few leaves in the forest.
With no Fluxmaster to charge, the Necron Warriors can’t get onto Objective 2 this turn, and also ditch Defend Objective 3 as unworkable.
Objectives scored – Slay the Warlord (1)
Necrons 3 : 5 Chaos Daemons
My warlord! In fairness, I knew about the Veil of Darkness and that I’d left him hanging in the wind, but I’m now banking on that Lord and his Warriors being too far from the action to have any more effect on the battle (other than Linebreaker). If I push forward against what’s in front of me, I should be able to split the Necron forces.
Although my cards aren’t great – Delight In Despair requires the Ld10 Necrons failing Morale (and the Lord has a Fearless aura), Big Game Hunter requires me to take down the Triarch. At least Objective 1 is an easy point – I jump my Poxbringer down into the alley to grab it (although he’s so preoccupied doing so, he whiff his Psychic phase).
In the Necron deployment zone, the net closes: the Plaguebearers and Plague Drone close up on the Immortals and Warriors, the remaining Bloodletters, Nurglings and Flamers also face off on the front line. And now that the Necrons have obligingly teleported off their right flank, the way is clear to drop in my second unit of Bloodletters.
The Flamers warm up, and I don’t shoot the Warriors this time, having learned my lesson about shortening the charge range. Instead they target the Triach Stalker, although I may have been over-optimistic about what their weapons could do, since they only scratch off a wound (I don’t see Big Game Hunter happening this turn).
In the Charge phase, the Nurgle boys are sent in first to eat the Overwatch: Nurglings against Warriors and Plaguebearers against Immortals. When it’s safe, the Plague Drone buzzes into the Immortals, and the Bloodletters into the Warriors. The Flamers were also going to add their attacks to the effort, but they roll a double-one and decide to stay put. Worse, the newly-arrived unit of Bloodletters fails their charge, which robs me of my best melee unit.
When the fighting starts, the original unit of Bloodletters experience a bit of a whiff (probably because there’s no actual blood to rile them up) and only cut down a few Necron Warriors. The combined efforts of everyone else manages almost nothing.
I did cause just enough casualties for the Necron Warriors to take a morale check – but they pass it easily, so I ditch Delight In Despair as a lost cause.
So it’s a failed hammer blow for me, and the best I can do is claim Secure Objective 1 and cling to my lead.
Objectives scored – Secure Objective 1 (1)
Necrons 3 : 6 Chaos Daemons
The cards aren’t kind – even if the army could move fast enough, there’s no way past the oncoming deamons for the Necron army to advance out of their deployment zone.
Only a couple of Warriors reanimate this time, and the rest fall out of combat with everyone (the Immortals practically toppling off the ruins to get away) to dress the lines and take aim once more. Now there’s no deepstrike to prevent, the unit of Scarabs scoots in front to screen the big guns.
On the other end of the table, the Lord advances his Warriors onto Objective 2.
Shooting continues to whittle away the encroachers – all-but two of the original Daemon unit are removed by the Destroyers, the Cryptek bags a Flamer, though the Triarch’s continued grudge against the Plague Drone fails against its daemon save.
And that’s it for the Necrons, only one more point secured, and Advance is discarded.
Objectives scored – Secure Objective 2 (1)
Necrons 4 : 6 Chaos Daemons
Ohh, some points to be had here, and this is where the hidden objective mechanic comes into itself. I advance the Nurglings back onto Objective 3 (they’re really putting in a shift in this battle), and keep the Poxbringer on Objective 1.
This means I can fly the sole Plague Drone onto Objective 5 to nominally claim Supremacy, but he’s also there to secure Defend Objective 5 next turn, and since Rapid can’t see that objective card, he might think there are better targets than a wounded Plague Drone.
The rest of the turn is simple: all the deamons move in closer to the new firing lines and prepare to charge. The Flamers burn away some more Necron Warriors, and I unwisely fire off an optimistic shot from the Plague Drone – which actually works this time and kills an Immortal, making the Bloodletters charge longer!
Sure enough, the big pack of Bloodletters fail their charge for the second turn in a row. But the Plaguebearers do weather the overwatch from the Immortals and Warriors, allowing the remnants of the other Bloodletters into the fray. The Flamers also jump into battle, flying over the heads of the Warriors, so one of them can consolidate into the Triarch and shut it down.
Again, half the Necron Warriors are cut down, their return attacks killing the penultimate Bloodletter. The Triarch fails to damage anything, but a lot of the shooting is once again closed off.
I complete a promising turn by rolling the maximum score for Supremacy, and finally ditch Big Game Hunter.
Objectives scored – Supremacy (3)
Necrons 4 : 9 Chaos Daemons
Secure Objective 1 is probably out of reach, but there’s a big unit of Bloodletters just waiting to fail a morale check.
The Necron Lord and Warriors – who really have struggled to get back into the game – move to get firing positions on the Poxbringer and Nurglings. The other Warrior unit – who finally get tired of regenerating and only manage two back – fall out of combat, moving forward towards the centre and Objective 1. Everyone else draws back, except for the Scarabs, who seem up for the scrap.
The Warrior firepower does take out the penultimate base of Nurglings (bullies!). The remainder of the firepower picks off a Flamer, while Destroyers take out half the Bloodletters.
There’s some action in the Charge phase as the Scarabs charge into the Flamers! Possibly unwisely, as they get soaked in warpflame and two-thirds of them die. The final swarm doesn’t even start fighting, but activates the Self-Destruction stratagem to take down one of the Flamers with them.
Having taken such losses, the second unit of Bloodletters fails their morale, and all-but one of them fade into instability, so there’s a point for Psychological Warfare. But the Plague Drone survived untouched, so I get Defend Objective 5.
Objectives scored – Psychological Warfare (1)
Objectives scored (Deamons) – Defend Objective 5 (2)
Necrons 5 : 11 Chaos Daemons
Another good draw – damn-near my whole army (what’s left of it) is behind enemy lines, which is also where Objective 6 can be found.
The Poxbringer faces the four-strong unit of Necron Warriors. His Smite fails, and when he charges in, he can only chop down two of them with his balesword (will they never die?)
The Flamers can fly over the top of the Necrons to get comfortably next to the Cryptek. He is washed in flame and melts into a puddle of necrodermis (sadly no CP left to resurrect him).
The Charge phase has the Plaguebearers (now below half-strength, but still doing fine work) tie up the Immortals, and the rest of my army are down to single-model units that I keep in the Necron deployment to claim D3 VPs (only getting 1, as it happened).
Objectives scored – Behind Enemy Lines (1), Secure Objective 6 (1), Assassinate (1)
Necrons 5 : 14 Chaos Daemons
With midnight approaching in the real world, we call the game there. The lead in VPs was probably too great for the Necrons to overturn, despite having so much of their army remaining.
We both get Linebreaker and the Necrons (after a very long wait – but they’re good at that) claim Dust and Ashes.
In terms of the battle, for what could have been a standard ‘gunline vs melee’, there was a lot going on all over the table. I’m not sure I should have exposed my warlord like that, although it did do a job, and there wasn’t a huge amount of safe places to put him. He did cost me the effectiveness of my Flamers – but even at half-power, they were impressive. Likewise, the Screamers provided me with my best melee threat, which is good when most of your army is just a relentless blob.
Not that I’d disparage the blob – those Plaguebearers were brilliant at shutting down the gunline, turn after turn. And the improbably-heroic Nurglings brought me half my victory points.
The Bloodletters disappointed, but I’m going to have to get into the habit of not shooting things I want to charge (let's see some inter-deamon cooperation please). I think they would have benefited from their specific Locus, but the rest of the army seemed to cope fine as a mixed-arms force – the Nurgle stuff absorbing the hits so the rest of the army could do the damage.
It proved an interesting challenge for the Necrons, who ended up with three-quarters of their army still on the field (compared to my ragged remnants), but lost out on Victory Points.
One of the problems – which becomes evident in hindsight – was playing the Dust and Ashes card too early. It would have been a great late-game bonus, but for most of the turns, it just sat there taking up the place of a potential scoring card.
But I think the other issue was mobility. Once the Wraiths were gone, there was little in the army that could move quickly to contest board control, or mix it up in melee. As soon as the lines were hit, it became a case of falling back, and ceding more of the table to the daemons.
So a really interesting challenge. Rapid and I were both learning our new armies as we played, and there’s a lot of mileage to be had from both of them. Onwards to victory!
It's new army time all round - I finally get to take my Chaos Daemons for a spin, and they'll be pitted against local opponent Rapid's shiny new Necrons (only sixty million years on the clock).
The Imperfect Speakers - Chaos Daemons
An easy enough army build, since this is most of what I have painted. It appears the perceived wisdom is to run these detachments as mono-faction, to gain extra benefits, but I've got enough to think about, and I quite like the circus of colour that comes from fielding a diverse host from the Warp.The Nurgle troops are the anvil - they're tough enough to absorb the hits, while the more fragile units, like the Bloodletters, wait to strike. The Screamers seem fast and potent, and the Flamers should impress, as I've given the Fluxmaster a trait and psychic powers to help him buff them.
For all that, it's the strangest 40k army I've put together (which is saying something, considering I started with Thousand Sons). Can't wait to give them a run-out!
- Fluxmaster (HQ) (Warlord)
Ritual Dagger
Flickering Flames, Gaze of Fate
Trait: Daemonspark
Relic: The Impossible Robe - Poxbringer (HQ)
Balesword
Miasma of Pestilence - 10 x Bloodletters (Troop)
Instrument of Chaos, Hellblades - 10 x Bloodletters (Troop)
Instrument of Chaos, Hellblades - 20 x Plaguebearers (Troop)
Plagueswords, Daemonic Icon, Instrument of Chaos - 4 x Nurglings (Troop)
Diseased teeth and claws - 6 x Flamers (Elite)
Flickering Flames - 3 x Plague Drones (Fast)
Death’s Heads, Plagueswords, Prehensile proboscis - 4 x Screamers (Fast)
Lamprey bite - 4 x Screamers (Fast)
Lamprey bite
Points: 998 | Level: 61 | Battle-forged + Battalion: 8 CPs
Sautekh Dynasty - Necrons
A decent all-round list, as far I can tell. Slightly limited by availability (or I suspect we'd be seeing a lot more Tesla Carbines and Wraiths), but there's threats all over the place here: from the sheer volume of fire from the infantry, to the horrifying Wraiths.The Lord's trait is Immortal Pride, which makes nearby units immune to morale, and gives him a Deny the Witch ability (useful that). Added to the buffs he and the Cryptek bring, plus reanimation protocols, then there's a lot of synergy in the army.
The Triarch Stalker is probably the only unit not suited to taking on swarms of daemons, though its ability does make the rest of the army's shots count for more. And maybe the Destroyers are too much of an anti-armour unit for the invulnerable saves of daemon swarms, but they never seem to underperform.
The Sautekh trait does allow units with rapid-fire weapons to advance and fire like assault weapons, so the army could be quicker than I expect - and the Veil of Darkness relic makes it especially mobile.
- Lord (HQ) (Warlord)
Staff of Light
Trait: Immortal Pride
Relic: Resurrection Orb - Cryptek (HQ)
Chronometron, Staff of Light
Relic: Lightning Field - 14 x Necron Warriors (Troop)
Gauss Flayer - 14 x Necron Warriors (Troop)
Gauss Flayer - 5 x Immortals (Troop)
Tesla Carbine - Triarch Stalker (Elite)
Heat Ray - 3 x Canoptek Scarabs (Fast)
Feeder Mandibles - 3 x Canoptek Wraiths (Fast)
2 x Particle Caster, 1 x Whip Coils - 3 x Destroyers (Fast)
Gauss Cannon
Points: 999 | Level: 66 | Battle-forged + Battalion: 8 CPs
Deployment and Mission
We're going for the Schemes of War Maelstrom mission - no refinements, other than the usual house rules (ditch any unachieveable cards, no Domination, no Priority Orders, no Area Denial on Turn 1). We're also playing on 4x4 table, as we're only fielding 1000pts each.
I will the roll to set up first. Wanting to protect my weakest units from that fusillade of Necron gunfire, I immediately spent 3CP on Denizens of the Warp (three times over) to put both units of Bloodletters and the Flamers into deepstrike.On the left flank, with the clearest avenue of attack, goes the Nurgle stuff: Plague Drones, Plaguebearers and Poxbringer. On the right flank goes the faster fliers: both Screamer units and the Fluxmaster. The cheeky Nurglings set up 9” outside the Necron deployment zone, ready to tie things up on Turn 1.
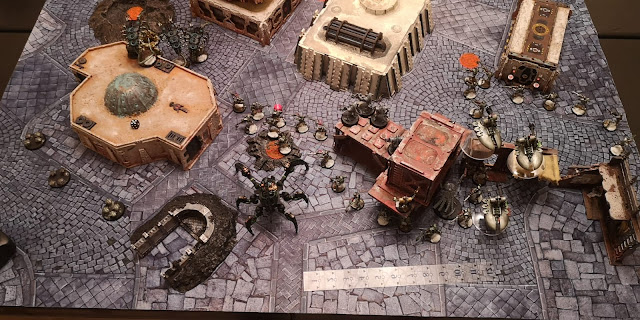
The Necrons castled around the ruins on their right flank – both units of Warriors, the Destroyers and the Immortals went in or around there, with the Lord and Cryptek skulking at the back to provide their buffs. In the centre went the Triarch Stalker, screened by the troops.
The Wraiths went up on the left flank (another fast-moving unit to counter mine) and the Scarabs went all the way at the back to push out a deepstrike.
I elect to go first … and then the Necrons seize the initiative!
Necrons – Turn 1
Objectives drawn – Defend Objective 4, Reclaim and Recapture, Dust and Ashes (hidden)A tough draw to start with – Defend Objective 4 is easily achievable, but it pulls units out of the Necron castle towards me. Reclaim and Recapture gives D3 points of holding all the odd-numbered objectives, which is a push. Dust and Ashes gives VP if a Necron character survives until the end of the battle, which means it’s going to sit there all game.
Still cagey about deepstrike, the Necrons adjust their lines. The front unit of Necron Warriors advances onto Objective 4, and the Wraiths float forward to engage the Nurglings. In terms of shooting, there’s not much in range or visibility, so a few wounds are plinked off a Nurgling Swarm, a Plague Drone, and a couple of Plaguebearers (which at least removes Cloud of Flies for future turns).
Only one charge – the Wraiths into the Nurglings. I was fearing the worst for these squishy little critters, but the Wraiths rolled poorly for their hits, and my deamon save held up – I only lost two and half bases, so the unit inexplicably survived!
Objectives scored – none (Reclaim and Recapture was discarded)
Necrons 0 : 0 Chaos Daemons
Chaos Daemons – Turn 1
Objectives drawn – No Prisoners, Blood and Guts, Defend Objective 3 (hidden)These aren’t terrible cards to score, but I’d prefer to have more assets on the table to kill stuff. Still, with the Wraiths around Objective 3, and my two units of Screamers within an easy charge, all I need to do is kill them for a easy haul of points.
I fall the Nurglings back out of combat onto Objective 3 (they’ve done enough, poor things) and race the Screamers and Fluxmaster towards the Wraiths. The Plaguebearers and Poxbringer advance up the table, and the Plague Drones buzz towards Objective 4 – I can’t contest it, but at least I can tie up the guns.
In the Psychic Phase, I case Miasma of Pestilence on the Plaguebearers, and Smite the Wraiths – I elect to use a Command Point to improve the single mortal wound I inflict (I’m really nervous about getting past that 3++ invulnerable save with conventional attacks) but it still comes out as 1.
In Assault, the Plague Drones charge the Necron Warriors, taking no damage and flittering their wings ineffectually at them. Both Screamers hit the Wraiths, but their armour-piercing lamprey bite counts for nothing against the invulnerable save and I only take one of them down, losing three Screamers in return.
So I end the turn with nothing to show for it, though my Nurglings have started to defend Objective 3, and will hopefully get overlooked. In return, the Necrons claim 2VPs for Defend Objective 4, and they’re off the mark!
Objectives scored (Necrons): Defend Objective 4 (2)
Necrons 2 : 0 Chaos Daemons
Necrons – Turn 2
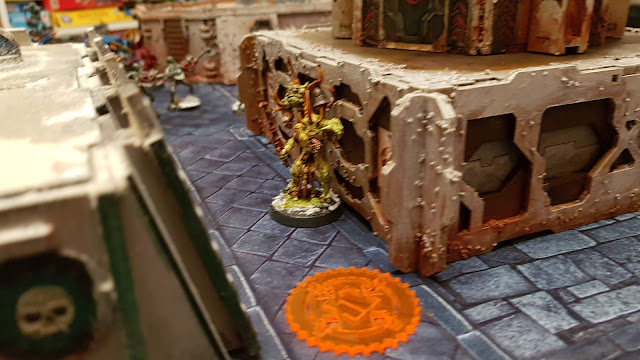
Objectives drawn – Defend Objective 3 and Secure Objective 2, Dust and Ashes (hidden)Objective 2 is deep within Daemon lines, and Objective 3 is currently swarming with Nurglings and Screamers.
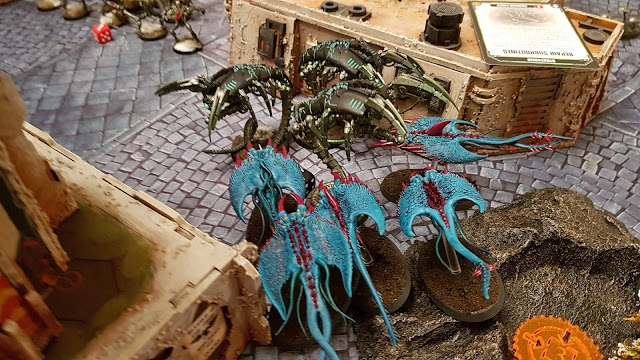
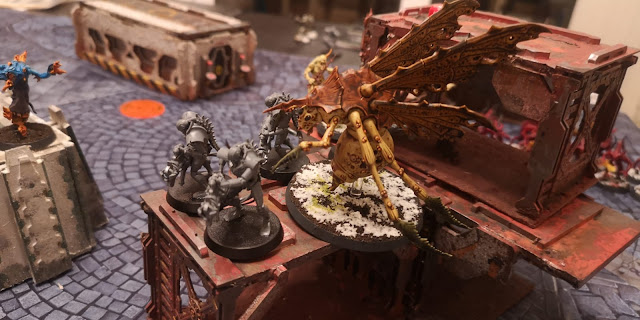
Although the Wraiths are also fighting over Objective 3 – and with Repair Subroutines stratagem played, the destroyed Wraith reanimates and the unit is back to full strength!
The Necron Warriors fall back out of combat with the Plague Drones, and the rest of the line readies their weapons. The Wraiths also fall back out of combat, because they can charge right back in, allowing the lone Screamer to be picked off.
The rest of the shots from the Immortals, Destroyers and Triarch goes into the Nurgle daemons – two of the Plague Drones are downed to Destroyer fire, and a few more Plaguebearers gunned down. With their invulnerable saves and disgustingly resilient, the pestilent half of my army is pleasingly robust at taking hits.

The Wraiths fly back into the second unit of Screamers, and I spend 2CP on Warp Surge (because if they’ve got a 3++ save, I want one too!). It pays off, and not only do I only lose one Screamer, but the remaining three rip down two more Wraiths in return.
Objectives scored (Daemons): Defend Objective 3 (2)
Necrons 2 : 2 Chaos Daemons
Chaos Daemons – Turn 2
Objectives drawn – No Prisoners, Blood and Guts, The Dominion of Chaos (hidden)My new hidden objective - The Dominion of Chaos - gives me D3VP if I control more objective markers by the end of the turn. It’s a really good card for going second, since all I need to do is jump on objectives in my round. The Necrons are heavily camped on two objectives, so I need to be on three.
Deepstrike time – and I need to drop the hammer. Unfortunately, the Wraiths are drawing my attention, and I don’t want to send my Fluxmaster over to support the incoming Flamers when he could be sending mortal wounds against that Canoptek monster.
I accept the compromise and fly my warlord back to hold Objective 2, so at least he can Smite the Wraith and play for Dominion of Chaos at the cost of abandoning the Flamers.
The Plaguebearers continue to march forward on the Necrons, backed up by the lone Plague Drone and cheered from the back by the Poxbringer. Then come the deepstrikes: the Flamers land on the central building, taking aim on the Necron Warriors. One unit of Bloodletters land in the central alleyway, ready to charge forwards (and also on Objective 1, so if they fail the charge, the can still be useful). The second unit of Bloodletters stay in the Warp, since the Necrons are still doing a good job of screening.
The Psychic phase is a trial: the Poxbringer fails his cast of Miasma, and I have to use a CP reroll to get off the Fluxmaster’s Smite – for which I am rewarded by a single mortal wound on the Wraith.
And finally I can do some shooting (the Plague Drones have been attempting some ineffectual shooting attack). I had grand plans for the Flamers, with the Daemonspark warlord trait, Flickering Flames psychic power and Fluxmaster buff – but I don’t have any of these, so they just take aim on the Necron Warriors and burn away half a dozen of them.
Wisely, Rapid removes all these casualties from directly in front of the Bloodletters, so their charge is now impossible.
What can make the charge are the Plaguebearers and Plague Drone, who pile in once against the other Necron Warriors and slap each other about. The Nurglings also jump into the Wraiths, because I need every foetid hand to the pumps here (spoiler: they do nothing).
The real action is when the Screamers fight: I manage to wound the Wraith three times, and he only needs to fail one of them to fall. So rolling triple ones does nicely, and the unit is finally gone!
That gives me a big rack of points, although for all my fussing over Dominion of Chaos, I only roll 1VP for it.
Objectives scored - No Prisoners (1), Blood and Guts (1), The Dominion of Chaos (1)
Necrons 2 : 5 Chaos Daemons
Necrons – Turn 3
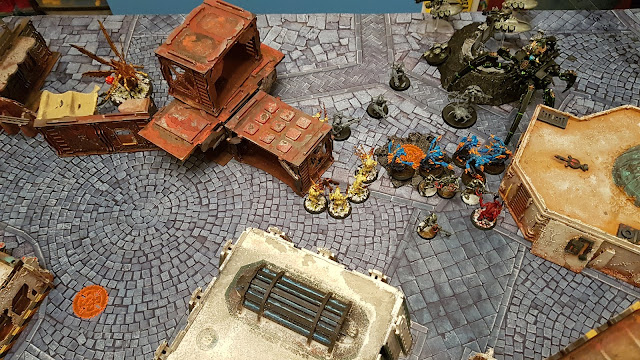
Objectives drawn – Defend Objective 3, Secure Objective 2, Dust and Ashes (hidden)No new objectives, but it’s time for the Necrons to run some deepstrike shenanigans of their own. They start off by reanimating half of their slain Warriors, then pulling back out of combat with the Plaguebearers. The whole Necron line then contracts to form a new fire base.
To finish off, the Lord then uses his artefact The Veil of Darkness, to jump himself and a unit of Warriors across to the right-hand corner of my deployment – right next to my Fluxmaster. Ulp!
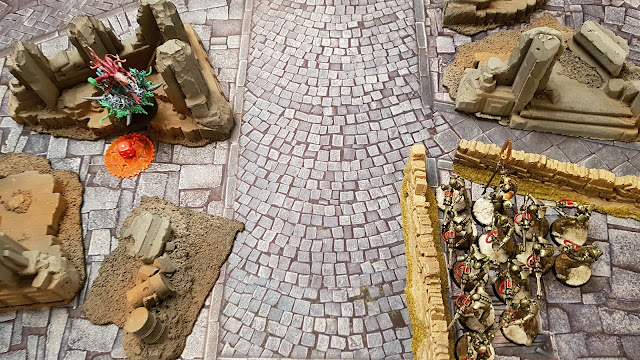 |
| "Ulp" indeed... |
Wasting no time in Shooting, all the Warriors rapid-fire into the Fluxmaster. With his Impossible Robe invulnerable save, he does okay – but not enough to withstand the barrage of gauss, and my warlord is gone.
On the other side of the battle, the other Necron Warriors take off half my Bloodletters, and the Destroyers remove the rest of the Screamers. The Triarch blasts the Plague Drone, who clings on to his last few wounds, and the Immortals continue to pump shots into the Plaguebearers, knocking away a few leaves in the forest.
With no Fluxmaster to charge, the Necron Warriors can’t get onto Objective 2 this turn, and also ditch Defend Objective 3 as unworkable.
Objectives scored – Slay the Warlord (1)
Necrons 3 : 5 Chaos Daemons
Chaos Daemons – Turn 3
Objectives drawn – Delight In Despair, Big Game Hunter, Secure Objective 1 (hidden)My warlord! In fairness, I knew about the Veil of Darkness and that I’d left him hanging in the wind, but I’m now banking on that Lord and his Warriors being too far from the action to have any more effect on the battle (other than Linebreaker). If I push forward against what’s in front of me, I should be able to split the Necron forces.
Although my cards aren’t great – Delight In Despair requires the Ld10 Necrons failing Morale (and the Lord has a Fearless aura), Big Game Hunter requires me to take down the Triarch. At least Objective 1 is an easy point – I jump my Poxbringer down into the alley to grab it (although he’s so preoccupied doing so, he whiff his Psychic phase).
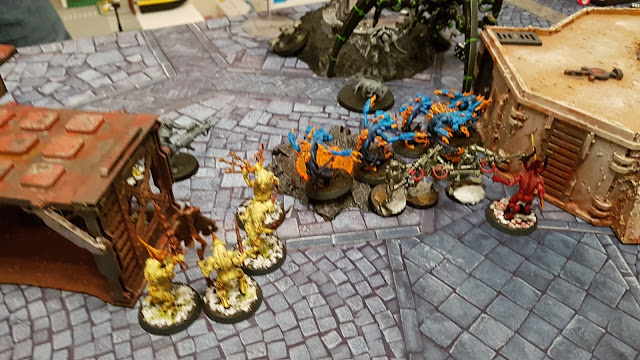
In the Necron deployment zone, the net closes: the Plaguebearers and Plague Drone close up on the Immortals and Warriors, the remaining Bloodletters, Nurglings and Flamers also face off on the front line. And now that the Necrons have obligingly teleported off their right flank, the way is clear to drop in my second unit of Bloodletters.
The Flamers warm up, and I don’t shoot the Warriors this time, having learned my lesson about shortening the charge range. Instead they target the Triach Stalker, although I may have been over-optimistic about what their weapons could do, since they only scratch off a wound (I don’t see Big Game Hunter happening this turn).
In the Charge phase, the Nurgle boys are sent in first to eat the Overwatch: Nurglings against Warriors and Plaguebearers against Immortals. When it’s safe, the Plague Drone buzzes into the Immortals, and the Bloodletters into the Warriors. The Flamers were also going to add their attacks to the effort, but they roll a double-one and decide to stay put. Worse, the newly-arrived unit of Bloodletters fails their charge, which robs me of my best melee unit.
When the fighting starts, the original unit of Bloodletters experience a bit of a whiff (probably because there’s no actual blood to rile them up) and only cut down a few Necron Warriors. The combined efforts of everyone else manages almost nothing.
I did cause just enough casualties for the Necron Warriors to take a morale check – but they pass it easily, so I ditch Delight In Despair as a lost cause.
So it’s a failed hammer blow for me, and the best I can do is claim Secure Objective 1 and cling to my lead.
Objectives scored – Secure Objective 1 (1)
Necrons 3 : 6 Chaos Daemons
Necrons – Turn 4
Objectives drawn – Advance, Secure Objective 2, Dust and Ashes (hidden)The cards aren’t kind – even if the army could move fast enough, there’s no way past the oncoming deamons for the Necron army to advance out of their deployment zone.
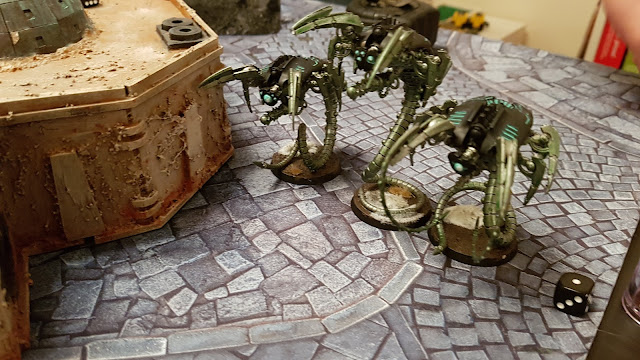
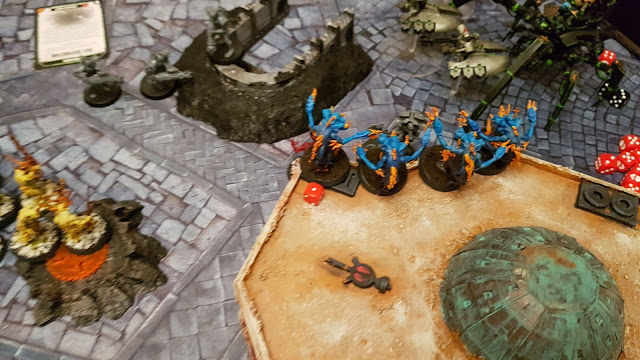
Only a couple of Warriors reanimate this time, and the rest fall out of combat with everyone (the Immortals practically toppling off the ruins to get away) to dress the lines and take aim once more. Now there’s no deepstrike to prevent, the unit of Scarabs scoots in front to screen the big guns.
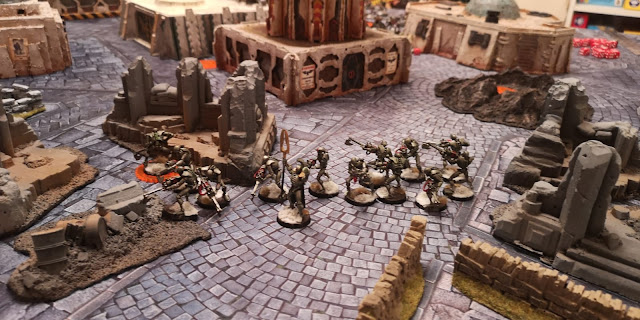 |
| "Where did everyone go?" |
On the other end of the table, the Lord advances his Warriors onto Objective 2.
Shooting continues to whittle away the encroachers – all-but two of the original Daemon unit are removed by the Destroyers, the Cryptek bags a Flamer, though the Triarch’s continued grudge against the Plague Drone fails against its daemon save.
And that’s it for the Necrons, only one more point secured, and Advance is discarded.
Objectives scored – Secure Objective 2 (1)
Necrons 4 : 6 Chaos Daemons
Chaos Daemons – Turn 4
Objectives drawn – Supremacy, Big Game Hunter, Defend Objective 5 (hidden)Ohh, some points to be had here, and this is where the hidden objective mechanic comes into itself. I advance the Nurglings back onto Objective 3 (they’re really putting in a shift in this battle), and keep the Poxbringer on Objective 1.
This means I can fly the sole Plague Drone onto Objective 5 to nominally claim Supremacy, but he’s also there to secure Defend Objective 5 next turn, and since Rapid can’t see that objective card, he might think there are better targets than a wounded Plague Drone.
The rest of the turn is simple: all the deamons move in closer to the new firing lines and prepare to charge. The Flamers burn away some more Necron Warriors, and I unwisely fire off an optimistic shot from the Plague Drone – which actually works this time and kills an Immortal, making the Bloodletters charge longer!
Sure enough, the big pack of Bloodletters fail their charge for the second turn in a row. But the Plaguebearers do weather the overwatch from the Immortals and Warriors, allowing the remnants of the other Bloodletters into the fray. The Flamers also jump into battle, flying over the heads of the Warriors, so one of them can consolidate into the Triarch and shut it down.
Again, half the Necron Warriors are cut down, their return attacks killing the penultimate Bloodletter. The Triarch fails to damage anything, but a lot of the shooting is once again closed off.
I complete a promising turn by rolling the maximum score for Supremacy, and finally ditch Big Game Hunter.
Objectives scored – Supremacy (3)
Necrons 4 : 9 Chaos Daemons
Necrons – Turn 5
Objectives drawn – Psychological Warfare, Secure Objective 1, Dust and Ashes (hidden)Secure Objective 1 is probably out of reach, but there’s a big unit of Bloodletters just waiting to fail a morale check.
The Necron Lord and Warriors – who really have struggled to get back into the game – move to get firing positions on the Poxbringer and Nurglings. The other Warrior unit – who finally get tired of regenerating and only manage two back – fall out of combat, moving forward towards the centre and Objective 1. Everyone else draws back, except for the Scarabs, who seem up for the scrap.
The Warrior firepower does take out the penultimate base of Nurglings (bullies!). The remainder of the firepower picks off a Flamer, while Destroyers take out half the Bloodletters.
There’s some action in the Charge phase as the Scarabs charge into the Flamers! Possibly unwisely, as they get soaked in warpflame and two-thirds of them die. The final swarm doesn’t even start fighting, but activates the Self-Destruction stratagem to take down one of the Flamers with them.
Having taken such losses, the second unit of Bloodletters fails their morale, and all-but one of them fade into instability, so there’s a point for Psychological Warfare. But the Plague Drone survived untouched, so I get Defend Objective 5.
Objectives scored – Psychological Warfare (1)
Objectives scored (Deamons) – Defend Objective 5 (2)
Necrons 5 : 11 Chaos Daemons
Chaos Daemons – Turn 5
Objectives drawn – Behind Enemy Lines, Secure Objective 6, Assassinate (hidden)Another good draw – damn-near my whole army (what’s left of it) is behind enemy lines, which is also where Objective 6 can be found.
The Poxbringer faces the four-strong unit of Necron Warriors. His Smite fails, and when he charges in, he can only chop down two of them with his balesword (will they never die?)
The Flamers can fly over the top of the Necrons to get comfortably next to the Cryptek. He is washed in flame and melts into a puddle of necrodermis (sadly no CP left to resurrect him).
The Charge phase has the Plaguebearers (now below half-strength, but still doing fine work) tie up the Immortals, and the rest of my army are down to single-model units that I keep in the Necron deployment to claim D3 VPs (only getting 1, as it happened).
Objectives scored – Behind Enemy Lines (1), Secure Objective 6 (1), Assassinate (1)
Necrons 5 : 14 Chaos Daemons
With midnight approaching in the real world, we call the game there. The lead in VPs was probably too great for the Necrons to overturn, despite having so much of their army remaining.
We both get Linebreaker and the Necrons (after a very long wait – but they’re good at that) claim Dust and Ashes.
Result: 5 : 15 - Victory to the Chaos Daemons!
Locker Room
That was immense fun. I mostly picked daemons because I wanted to paint them, but they’re an absolute blast to play. It was great facing off against the Necrons too – such a good army, with so many cool units, I’m drawing up reserves of willpower not to get drawn into the dynasties.In terms of the battle, for what could have been a standard ‘gunline vs melee’, there was a lot going on all over the table. I’m not sure I should have exposed my warlord like that, although it did do a job, and there wasn’t a huge amount of safe places to put him. He did cost me the effectiveness of my Flamers – but even at half-power, they were impressive. Likewise, the Screamers provided me with my best melee threat, which is good when most of your army is just a relentless blob.
Not that I’d disparage the blob – those Plaguebearers were brilliant at shutting down the gunline, turn after turn. And the improbably-heroic Nurglings brought me half my victory points.
The Bloodletters disappointed, but I’m going to have to get into the habit of not shooting things I want to charge (let's see some inter-deamon cooperation please). I think they would have benefited from their specific Locus, but the rest of the army seemed to cope fine as a mixed-arms force – the Nurgle stuff absorbing the hits so the rest of the army could do the damage.
It proved an interesting challenge for the Necrons, who ended up with three-quarters of their army still on the field (compared to my ragged remnants), but lost out on Victory Points.
One of the problems – which becomes evident in hindsight – was playing the Dust and Ashes card too early. It would have been a great late-game bonus, but for most of the turns, it just sat there taking up the place of a potential scoring card.
But I think the other issue was mobility. Once the Wraiths were gone, there was little in the army that could move quickly to contest board control, or mix it up in melee. As soon as the lines were hit, it became a case of falling back, and ceding more of the table to the daemons.
So a really interesting challenge. Rapid and I were both learning our new armies as we played, and there’s a lot of mileage to be had from both of them. Onwards to victory!


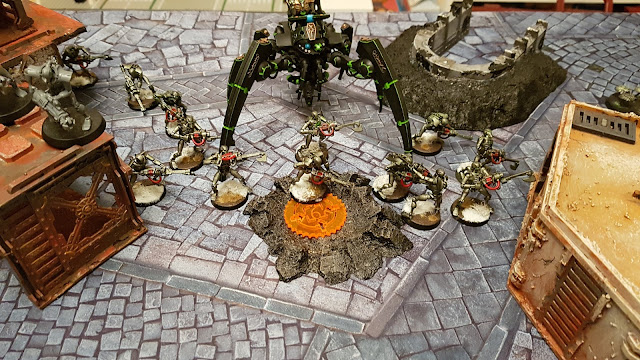

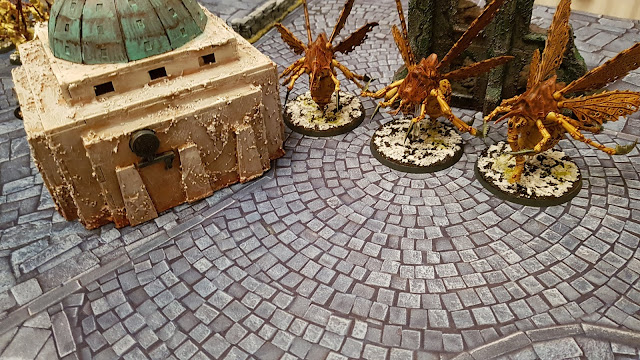







Very good! I'm amused to see that the Thousand Sons claimed the win after all the hard work that the daemons put in ;-)
ReplyDeleteWe have the power to Change.
DeleteFantastic batrep. Very enjoyable and great to look at too.
ReplyDeleteThanks, glad you enjoyed it!
DeleteNecrons really tempt me, too! One day, once I've managed to get some orks...
ReplyDeleteYou know you want to. It's basically the last blank space on our 40k map.
DeleteGoddammit, now I'm plotting colour schemes.
DeleteGreat batrep, I really enjoyed reading it.
ReplyDeleteThank you, it was a lot of fun.
Delete