The Beastmen have entered the fray!
We're dragging a new supplicant to The Old World tonight: Warsmith Chris is working on a Beastmen Brayherd horde, and so I, Stylus, offered the use of my own army so he can get a taste for it.
The Vicar of Bray
Ironically, I think my beastman have seen the most use when I've dabbled my toes into Age of Sigmar. Ironic because they're almost certain to be the first army I retro-fit back into square bases.
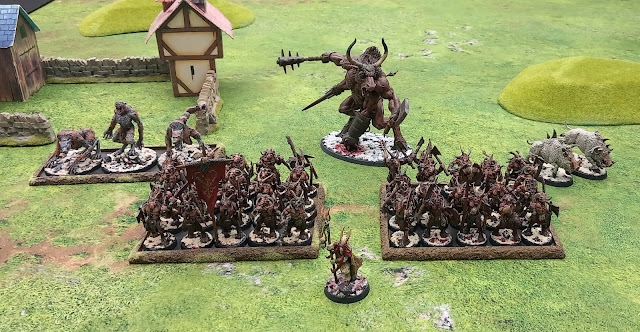
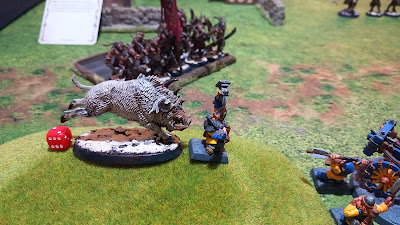
However, they shape up well enough for a friendly game: two solid units of Gors, a couple of lone Razorgor to run interference, a small unit of Minotaurs (shown by the Skinwolves) for a little punch, and a Ghorgon for a large punch.
And leading them all: a Great Bray Shaman, calling on the powers of daemonology.
- Great Bray-Shaman (General)
Braystaff
Level 4 Wizard: Steed of Shadows, Daemonic Familiars, Daemonic Vigour, The Summoning - 20 x Gor Herds
Command group. Additional hand weapons, Great weapon on True-horn - 20 x Gor Herds
Command group. Additional hand weapons, Great weapon on True-horn - 1 x Razorgor
Tusks, Calloused hide - 1 x Razorgor
Tusks, Calloused hide - 3 x Minotaur Herds
Bloodkine. Additional hand weapon, light armour. - Ghorgon
Cleaver-limbs, Calloused hide
Half-pints of Stout and Bitter
My first time commanding Dwarfs in The Old World, so I'm taking a nice spread of things. Warriors and Thunderers for the backbone, Bolt Thrower and Grudge Thrower to pound the Beastmen on the way in, Miners and Rangers to give myself some mobility.
And leading them is my beloved shieldborne dwarf, Kargrim Browbeater. I haven't overburdened him with runes, but I have enough to give him the Rune of Luck, for that all-important re-roll.
- Kargrim Browbeater - Thane (General)
Great weapon, Full plate armour, Shield, Shieldbearers
Rune of Luck - Edgar Wrought - Engineer
Hand weapon, Pistol, Heavy armour - 18 x Dwarf Warriors
Command group. Hand weapons, Heavy armour and Shields - 10 x Thunderers
Command group. Hand weapons, Handguns, Heavy armour and Shields - 10 x Rangers
Command group. Great weapons, Crossbows, Heavy armour and Shields - 10 x Miners
Command group. Great weapons, Heavy armour, Blasting Charges - Bolt Thrower
Hand weapons, Light armour
Rune of Skewering - Grudge Thrower
Hand weapons, Light armour
Rune of Forging
Mission and deployment
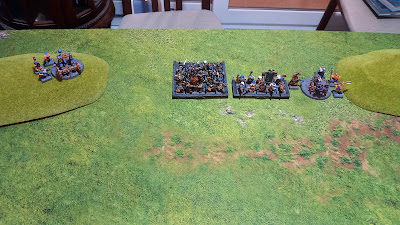
As this is Chris' first game, we're playing the standard pitched battle. The Dwarves form their lines between two hills: Grudge Thrower, Warriors, Thunderers, Bolt Thrower and Engineer.
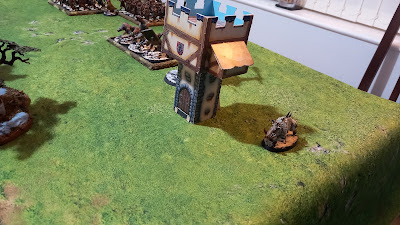
The Miners remain in ambush, burrowing their way under the battlefield. The Rangers scout ahead to the deserted village, keeping an eye on the Beastmen.
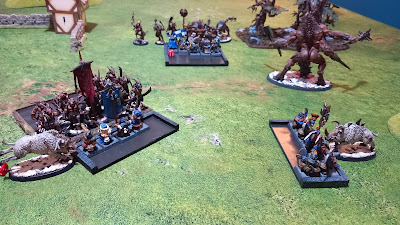
As for the Beastmen, the two units of Gors go in the centre, slight staggered and supervised by the Bray Shaman. The Minotaurs and Ghorgon go to their left side.
Each of the Razorgor occupy the extreme flanks, ready to race forward.
Chris wins the roll-off and we're away!
Turn 1 - Beastmen
A straightforward enough turn for the Beastmen - everything marches forward.
The two Razogors race along their respective flanks, the Ghorgon uses the nearby copse to screen his move, while the Minoaturs and one unit of Gors are urged directly forwards by the Bray Shaman.
The other unit of Gors detour and head for the Dwarf Rangers, having been handily buffed by the Daemonic Vigour spell (making them even faster and tougher than they already were).
Turn 1 - Dwarfs
Facing these supercharged Gors, the Dwarf Rangers don't really feel up for the fight, and back away to their own lines (moving at half the pace of their pursuers, so their odds aren't great).
Everyone else in the main Dwarf line targets the other unit of Gors and has some notable success. After some peppering with the Thunderers and skewering with the Both Thrower, the Grudge Thrower hands a direct hit and flattens more than half the unit.
Only five Gors stagger out of the carnage, but are unmoved and keen to crack on.
Turn 2 - Beastmen
More manoeuvring for the Beastment, although it's ominously looking like the jaws of a trap closing.
The Minotaurs and surviving Gors press directly ahead, the Ghorgon and Razorgor come in on the Grudge Thrower flank, and the other Razogor on the Bolt Thrower flank.
I should also mention that, each turn, the Bray Shaman is taking advantage of the Gaze of the Gods table. This could end disastrously (gods are fickle), but for the moment, he's racking up extra attacks and initiative on his profile.
The Bray Shaman has less luck with his spellcasting, and miscasts his Summoning magic missile (but is tough enough to survive the backlash).
He also casts Daemonic Vigour on the flanking Gors, who smash into the Rangers, gaining extra strength for Bestial Charge and rerolling 1s for Primal Fury (maybe I shouldn't have let them charge after all).
My Ol' Deadeye challenges the True-horn (thinking that I can remove a crucial pip of leadership from them) and cuts the beastman down!
The good news ends there. My Rangers weather most of the damage, and cut down a few in return, but are overwhelmed by the ranks pressing on them and then roll horrendously for their Break test.
Their stumpy little legs can't carry them very far, and they are cut down by the pursing Beastmen, who capture their standard for good measure.
Turn 2 - Dwarfs
Gearing up for what might be their last full round of shooting, the war machines swivel to face the flanking Gors and the Thunders pivot to line them up.
The Engineer also runs forward to face the Razorgor, hoping to buy his precious machines some more time.
Kargrim makes a characteristically aggressive move, and charges his warriors directly into the Minotaurs.
And, as if sensing the urgency, the Miners tunnel up to reinforce their brothers. They don't attempt to arrive on a flank, since there's no way they're outmanoeuvring the Beastmen, but they appear to the rear of the Dwarf lines, covering the Warriors if they get caught in a flank charge.
The shooting phase is ... less than a complete success. The Bolt Thrower and Thunderers bring down a handful of Gors, but that seems to throw off the Grudge Thrower's aim, whose stone goes wildly off target and flattens more than half the Thunderer unit!
In combat, Kargrim challenges the Bloodkine, who inflicts a couple of wounds before being cut down by the outraged dwarf.
The rest of the warriors are unable to damage the Minotaurs, but the weight of numbers wins the combat. The last two Minotaurs are give ground, but hold fast, aware of their larger cousin looming on the flank.
Turn 3 - Beastmen
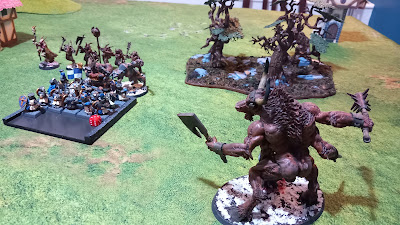
In this turn, the beasts hit like a thunderclap. One Razorgor hits the Dwarf Engineer (who manages to put a bullet in his flank with a quick-drawn pistol), the flanking Gors charge the Bolt Thrower. The other Razorgor hits the Grudge Thrower and the Ghorgon slams into the flank of the Dwarf Warriors.
And then we learned exactly what Razorgor can do when they pass their Primal Fury test and slam into a unit with D3 Impact Hits (Chris never rolled fewer than the maximum every time).
The poor Engineer is bowled over before he can even strike back, and the Razorgor overruns into the Bolt Thrower, which is already engaged with the Gors, so that means the Razorgor gets to do it all over again.
Unsurprisingly, the Bolt Thrower crew fare no better and the machine is overturned as everyone piles into the reduced unit of Thunderers.
On the other side of the line, the Grudge Thrower crew is similarly guzzled down by the second Razorgor, who then overruns into the flank of the Miners. He can do no harm this turn, but my reinforcing unit is now locked in place.
The central combat at least demonstrates how durable the Dwarfs can be. The Ghorgon mashes up a couple of them, taking a wound for his trouble, but the Minotaurs don't manage to tear down Kargrim, and one is reduced to a single wound in the process.
Because the dwarfs are heavy infantry (I like this new granular troop type), it would take a unit bigger even than a Ghorgon to remove their rank bonus, and the doughty warriors manage to win the combat, forcing both beasts to give ground.
Turn 3 - Dwarfs
The back of the Dwarf lines is a massacre: the Gors and Razorgor smash through the Thunderers, before overrunning into the Miners.
That combat is then activated and most of the Miners are cut down by Impact Hits from the front and back. Even their two-handed mattocks aren't enough to wound the Razorgor (they are tough!) and they end up losing the combat badly, breaking and being run down, their standard captured.
Turn 4 - Beastmen
Kargrim and his band ignore the beast to their rear and continue to press forward against last two Minotaurs. Both those beasts decide to ignore all the other dwarfs in favour of cutting down the Thane and they inflict two hits on him.
Kargrim has two wounds remaining, and with the Primal Fury test activating the armour-piercing Foe Render ability (everything cascades in the Beastmen army), Kargrim has two dice rolls and needs just one 6 to stay alive and fight back. He fails them both.
But then the Rune of Luck glows bright, offering him a one-off armour save reroll. It's a 6!
Flushed with success, the Dwarf Thane swings his great axe and brings down both Minotaurs. Even the Ghorgon is forced to back off and digest.
Turn 4 - Dwarfs
It's desperate last stand time, and Kargrim charge into the Ghorgon to try and force the beast into flight. They win the combat, but the behemoth is unafraid and passes his break test faster than you could say 'next time, bring a cannon'.
Turn 5 - Beastmen
Racking up another Gaze of the Gods, the Bray Shaman hits the flank of the shrinking Dwarf Warriors, with the Gors piling in for good measure.
The two enemy generals face off, and of course there is a challenge!
In fairness to Warsmith Chris, he could have used his combat spell Daemonic Familiars to kill off the Thane immediately. But where's the sport in that? And with both combatants wielding great weapons, they will strike simultaneously last and may even take each other out.
The Thane is a more skilled warrior, but only has one wound remaining. The Bray Shaman is fresh to the fight, and powered up by the gods.
Before they can strike blows, the Shieldbearers leap to the defence of their lord, cutting down all but one of the Bray Shaman's wounds. So the final blow will be winner takes all.
The Bray Shaman swings his staff ... and misses!
Kargrim Browbeater chops down with his great axe, and cleaves the beast in two.
While the remains of his Dwarf Warriors are being dragged away for sacrifice at the herdstone, the Dwarf Thane limps away from the field, composing a new page for his book of grudges.
Result - 909 : 593
Victory to the Beastmen!
Locker Room
What a fantastic game! Despite my lines getting completely overrun, and some very uncharacteristic nerves from my fearless Dwarfs, there were a lot of thrills and spills in that one.
I've never faced Beastmen before and they play as you'd expect them to - a fast moving horde of savage fury. I love that the statline of a Gor can be quite mediocre, but once they get the scent of blood, they can just explode into murder machines. Again, as you'd expect them to.
I clearly need to build a better castle for my ranged weapons, although my Rangers deciding to give ground was not their wisest move. Their job was to hold up the advance on the Beastmen's side of the field, not lead them forward to dine. That said, a unit of Gors with Daemonic Vigour is intimidating and that spell is frighteningly good for them.
I was almost embarrassed by the damage my ranged fire did to the Gors, although in retrospect, target priority should probably have been the roaming monsters, since I reckon the Dwarf Warriors were a match for anything in combat.
That was a bright spot in my army - the sheer amount of punishment the Dwarfs were able to absorb. Having the Thane in front to kick out some damage helped with that, and I'll have to get his Hammerers ready to escort him soon. And as for that Rune of Luck, what a time to make a clutch roll!
As for the Razorgor ... I'm not ready to deal with it yet. Suffice to say, if I have them in my sights again, they're not reaching my lines unscathed.











Sounded like a ripping game! Great to see more of the cupboard-dwelling armies coming out to play again, too.
ReplyDeleteBlinking, they step into the light, wondering if their long ordeal is over.
DeletePerfect ending with Kargrim surviving and cleaving the enemy general in two. Feels like a win there!
ReplyDeleteBetween that and the Rune of Luck saving his skin, I has a lot of fun with him.
DeleteFantastic battle as always with Stylus, I think we saw a bit of everything unfold in one small game, which is perhaps the real beauty of the Old World.
ReplyDeleteWhilst the pigs were maybe a bit too effective in this particular battle we can put that down to the Dwarves not yet knowing the power of angry pork, a mistake they won't make twice. Gors are a fantastically balanced unit, fairly normal stat lines that just get better and better if you play to their strengths and try to get them stuck into a fight! They of course die in droves, but who needs armour saves when you are brimming with primal energy and a hunger for man-flesh?
My initial thoughts on Old World are that it is truly a game written with narrative fun in mind, nothing is a foregone conclusion, any clash of units can have the most unexpected outcomes and heroes really get a chance to shine. My personal herd is assembling and I think there is a Thane out there with a serious score waiting to be settled.
Agree with all of this (especially the grudge bit) - glad you enjoyed!
Delete