The Scourged are out on their first solo mission - taking on the heroes of Fenris!
 |
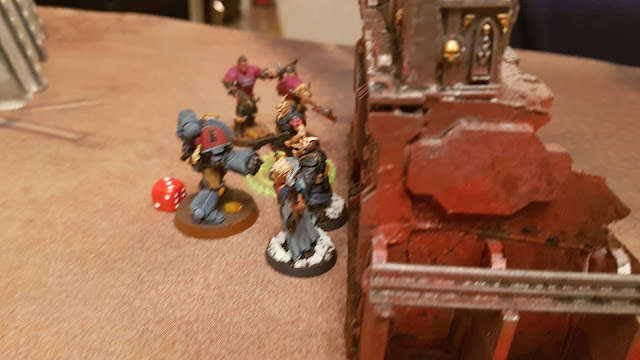
| "He's over there! Between the Jenga and the Guess Who!" |
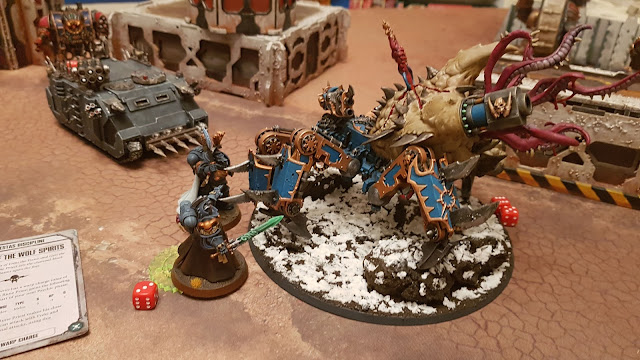
Good thing Space Wolves don't have much experience in fighting Tzeentch-aligned heretics, eh?
Space Wolves
Stylus has enough to give me some choice, but I'm definitely going almost all Primaris. That's OK though as there's some good stuff I'd like to try out. A Wolf Lord with a Power Fist (to make use of that lovely +1 to hit on the charge and negate the -1 for the Fist), and the Wolfen Stone to give me another attack to really try to murder some heretics.
I misread this to be the Gravis Captain (because, why wouldn't you?), so he is representing here.
He'd be accompanied by a (non-Primaris) Rune Priest with Fury of the Wolf Spirits (which could make him pretty handy in combat) and Storm Caller (to try to help some of the Fenrisian boys survive to get into combat). I decided to pay a CP to give him the Armour of Russ (4+ invuln), although I completely forgot to use this later in the game when he was being targeted by lascannon. D'oh!
Three units of Intercessors (one of whose pack leaders carried a Power Fist), two units of Boltstorm Aggressors and a unit of Hellblasters were next on the list. I initially went for a unit of Inceptors to finish the army off (and gave the other two Intercessor pack leaders power fists), but I decided that I needed something with a bit more punch so went with a Redemptor dread, which can kick out a similar amount of S5 firepower as Inceptors, but is more durable and better in combat. But much less mobile of course.
- Primaris Wolf Lord (HQ)
Plasma pistol, Power fist
Warlord Trait: Saga of the Hunter
Relic: The Wulfen Stone - Rune Priest (HQ)
Runic Axe, Storm Bolter. Fury of the Wolf Spirits; Storm Caller. Relic: The Armour of Russ - 5 x Intercessor Squad (Troops)
Auxiliary Grenade Launcher, Bolt rifle. Intercessor Pack Leader: Power fist - 5 x Intercessor Squad (Troops)
Auxiliary Grenade Launcher, Bolt rifle - 5 x Intercessor Squad (Troops)
Auxiliary Grenade Launcher, Bolt rifle - Redemptor Dreadnought (Elite)
Heavy Onslaught Gatling Cannon, Onslaught Gatling Cannon, 2 x Storm Bolters - 3 x Aggressors (Elite)
Auto Boltstorm Gauntlets/Fragstorm Grenade Launcher - 3 x Aggressors (Elite)
Auto Boltstorm Gauntlets/Fragstorm Grenade Launcher - 5 x Hellblaster Squad (Heavy)
Plasma Incinerator
Points: 1000 | Level: 57 | Battle-forged + Battalion - Extra Relic: 7 CPs
The Infinite Jest - The Scourged
Away with inter-chaos cooperation! I'm going all-Scourged with this list.
With my limited collection, choosing the list was pretty straightforward: Sorcerer, Chosen, a pair of shooty Helbrutes and Havocs.
Thanks to the points drops in CA19, I also have enough for a Defiler, Rhino and three squads of Cultists (the latter are included more for their CP yield than battlefield virtue).
To round off the battalion, my latest Dark Apostle and his Disciples. I gave him Benediction of Darkness, since a penalty to hit is always useful. And, for being, such a good follower of Tzeentch, he gets a bonus prayer! (which is a bit more situational, healing wounds on himself, but never turn down a freebie).
I made the Dark Apostle my warlord, then gave him the Scourged-centric warlord trait and relic. Neither are that great, but when else would I get the chance to use them again?
- Octavian - Dark Apostle (HQ)
Accursed crozius, Bolt pistol
Prayers: Dark Zealotry, Benediction of Darkness, Mutating Invocation
Warlord Trait: Shattering Truth
Relic: Book of Untruth - Artemidorus - Sorcerer (HQ)
Bolt pistol, Force Axe, Frag & Krak Grenades, Mark of Tzeentch
Psychic powers: Prescience, Warptime - 10 x Chaos Cultists (Troops)
Autoguns, Heavy Stubber - 10 x Chaos Cultists (Troops)
Autoguns, Heavy Stubber - 10 x Chaos Cultists (Troops)
Autoguns - 5 x Chaos Chosen (Elite)
3 x Combi-bolter, 5 x chainswords, Combi-plasma, Missile Launcher, Mark of Tzeentch - Helbrute (Elite)
Twin Lascannon, Missile Launcher, Mark of Tzeentch - Helbrute (Elite)
Twin Lascannon, Missile Launcher, Mark of Tzeentch - 5 x Havocs (Heavy)
Bolter & Chainsword, 2 x Lascannons, 2 x Autocannons, Mark of Tzeentch - Defiler (Heavy)
Defiler claws, Battle cannon, Combi-plasma, Defiler scourge, Twin heavy bolter, Mark of Tzeentch - Rhino (Transport)
Combi-bolter), Mark of Tzeentch
Points: 1000 | Level: 59 | Battle-forged + Battalion: 8 CPs
Mission
We played the homebrew mission that's evolved as a standard 'standard' game for us (I say 'evolved' - we actually assigned lower point scores to the objectives for the whole game - so let's say that evolved a bit more!).
Essentially, four objectives (not visible on the map, but 6" in from the edge, at the four compass points respectively) - for which you score one for claiming at the end of your turn, or double points if it is in your enemy's 'home' objective. Plus all the Maelstrom cards in play (discarding Objective 5 and 6 cards, because they don't exist, plus Domination and Priority Orders Received, because they're both a bit daft).
Deployment
I lost the roll-off for choice of set-up and table edge, which I was very happy with as it meant that I would be going first, subject to stealing. I decided to tuck my Redemptor behind as much LoS-blocking scenery as possible in the North East corner, accompanied by the Power Fist-armed Intercessor squad (I thought that the extra cover here might make that squad more likely to see combat).
A unit of Intercessors held my home objective and then I put a unit of Aggressors and the Rune Priest opposite the two towers and open terrain, where it seemed obvious that Stylus would be putting his Havocs and Helbrutes. The second unit of Aggressors, the Wolf Lord and the Hellblasters all went "On the Hunt" for a rather expensive 3CPs.
I knew that with three units of Cultists and a 4'x4' board, it would be pretty easy for Stylus to screen his entire table edge, so I was gambling on being able to shoot a hole in the Cultists with the assets on the table to start with (also getting First Strike) and then pouring my Wolves in through the gap.
I picked the side with the tower, but didn't feel like abandoning my Havocs up there all game. So I put Havocs and Chosen into the Rhino on the extreme right flank, accompanied by two Helbrutes and the Sorcerer.
In the centre was the Defiler, because there was really only one avenue of advance he could manage with his pie-plate base. Behind him was the Apostle, and the three squads of Cultists cowered behind buildings in the back (preventing deepstrike, but mostly cowering).
Space Wolves - Turn 1
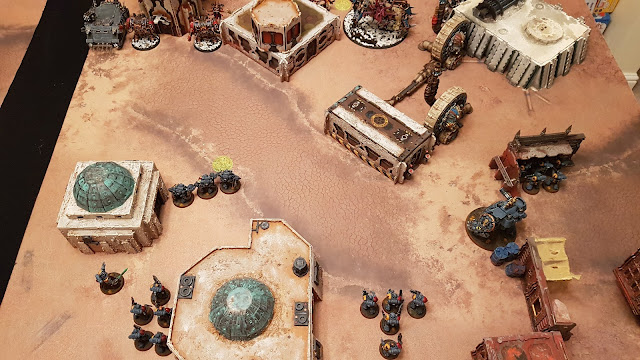
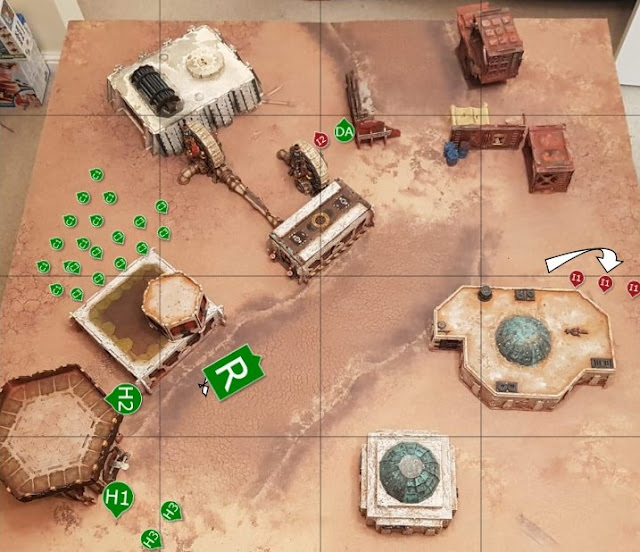
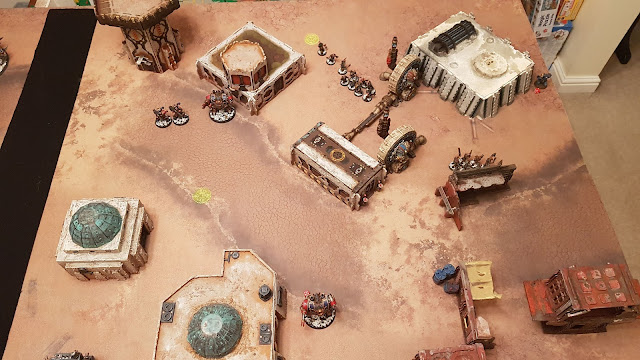
Stylus doesn't roll a 6 to steal the initiative, but I feel that he has metaphorically got the first blow in already because none of my troops can actually see any cultists to shoot at (the map above doesn't reflect their cowardice/tactical astuteness).I was requested - and it's just good sense in 40k - to place lots of line-of-sight blocking terrain (because with all my long range artillery, it would have been a dull game otherwise). Accordingly, the top half of the table is pretty much a warren of dead ends and corridors - the only way to get clear shots is to move aggressively.
My first objectives are Area Denial (that'll be D3 VPs straight of the bat as clearly Stylus isn't within 12" of the centre - I kind of thing we should consider a house rule to make this not achievable on turn 1 like Hold the Line), Secure Objective 2 (in no-man's land to the North) and Supremacy. That's a really good start as I should be able to get onto the two objectives between the armies with a couple of good advances.

I start off by advancing the Northern Intercessors onto objective 2. Except I have to spend a CP to reroll my very first dice roll of the game (so now I've only got 4 left!). I really have to do this though as there's lots of VPs riding on getting all these objectives.
The Aggressors successfully dash onto objective 3 to the South, whilst the Redemptor and Southern Intercessors stroll forwards to try to draw a bead on, respectively, the Cultists holding Stylus's home objective and a Helbrute, which, lacking squishy Cultists, I'd quite like to start taking wounds off if I can.
My Rune Priest kicks of the psychic phase with a double six cast of Storm Caller, which will give cover to the Aggressors and Intercessors near him. I decide not to spend one of my precious CPs to reroll and luckily only take one wound.
My shooting isn't as lucky as my objective drawing. The Redemptor only manages to kill three Cultists and the combined fire from the Aggressors and Intercessors put three wounds onto the Helbrute.

Despite having two D3s to roll for VPs I roll 1s for both so "only" get 6 VPs this turn. I hope that doesn't turn out to be important.
Objectives scored: Objectives held (3), Area Denial (1), Supremacy (1), Secure 2 (1)
The Scourged - Turn 1
Objectives drawn: Rise To Glory, Psychological Warfare, Defend Objective 3 |
| The damage shown to the Sourged here is actually from next turn's shooting - I forgot to move to the next turn in BattleScribe |
Only three Cultists lost - I got away with that! Although I already have a mountain of VPs to climb, which isn't great.
Defend Objective 3 is the only card I have a chance at scoring, and it's also filled with things I want to kill, so that's good.
I disembark the Havocs, then trundle the Rhino forward. The Defiler also moves obliquely towards Objective 3, followed by the Apostle and Sorcerer. The shot-up squad of Cultists scamper out of sight, keeping hold of my home objective, and the rest just spread out, pushing the Deepstrike bubble.
In the Psychic Phase, I cast Prescience and, crucially, Warptime on the Defiler, who races forward to Objective 3.
That confirms my actions in the Shooting Phase, and I go for broke on the Defiler's guns (rarely a wise move). I spend a CP on Infernal Machines to remove the -1 penalty for moving with heavy weapons, and another on Daemonforge to reroll hits and wounds. I then spend another CP when I only roll 1 for my battle cannon shots - but I get a 6! Worth it.
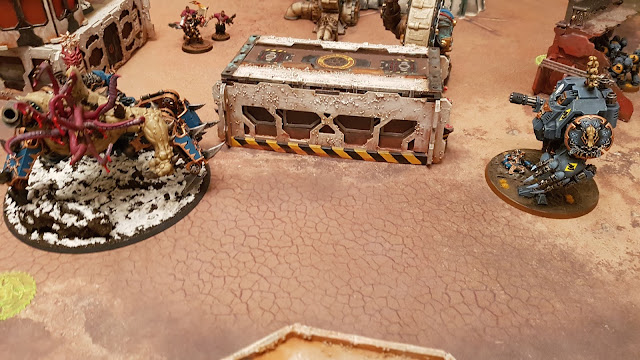
This vast outlay of CP is all directed at the Redemptor Dreadnought, which is promptly destroyed. I then turn the lascannons of the Helbrutes and Havocs on the Aggressors - who are also wiped out (even with the Rhino and Defiler available to soak wounds, I know how much firepower they can kick out and didn't fancy taking wounds if I didn't have to).
Two deadly units gone - not a bad turn! I've started to defend Objective 3 and I ditch Psychological Warfare.
Objectives scored: Objectives held (2), First Strike (1)
6-3 to the Space Wolves
Space Wolves - Turn 2
My new objectives are Oath of Vengeance (1 VP for killing the Chaos Sorcerer), Heroes of Fenris (1 VP if a character is within 1" of the enemy in the fight phase or D3 VPs if 2 characters are) and Mission Critical Objective - 3, which is the Southern one currently occupied by a Defiler.Already I can see a narrative starting to evolve around this objective, something like what happened with our last battle. My Intercessors are Troops, so can take objective 3, but aren't likely to survive the response. I really need to cause some damage this turn otherwise my army will be annihilated in the open.

I grit my teeth and move the Southern Intercessors forwards to grab objective 3 off the Rhino and Defiler. Their Northern brothers move further forwards as there was a vista down towards the Havocs (though keeping one foot on objective 2).
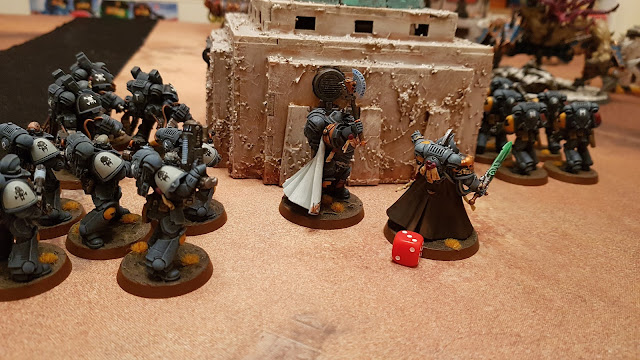
My reinforcements rock up only about six inches outside my deployment zone, so that probably wasn't the best use of CP, but there's no choice about where to put them: I have to start causing damage to the nasties to the South.

The psychic phase is a bust, with Storm Caller failing and a smite on the Defiler being denied (I think that's what happened anyway!).
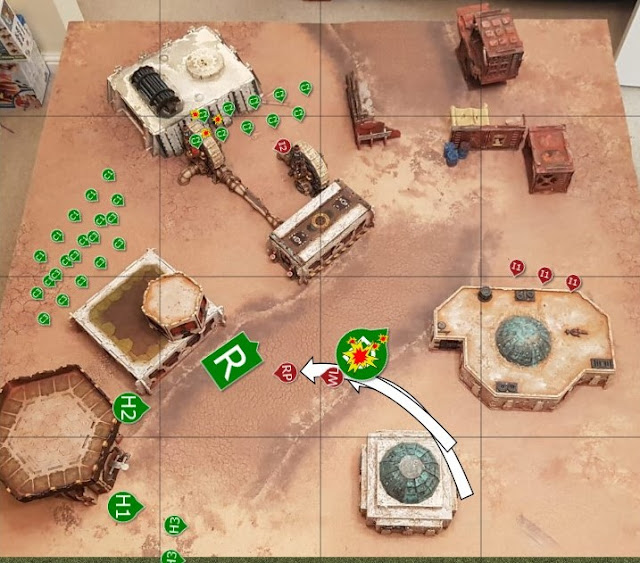
As shown in the map from turn 1, I manage to kill three Havocs with combined fire from the Northern and Southern Intercessors. My Hellblasters couldn't see the damaged Helbrute so opened up on the other one, unfortunately only taking it down to half wounds. Disappointingly the Aggressors only take one more wound off it. This is beginning to look bleak as I've hardly dented the Tzeentchian firepower and I'm about to get a Defiler in the face.

The Aggressors and Intercessors charge into the Rhino in an attempt to crack it open, but I only manage to cause half a dozen wounds. This is not looking good.
I discard Oath of Vengeance at the end of the turn as the Sorcerer is buried in the middle of his lines.
Objectives scored: Objectives held (3); Mission critical objective (1)
10-3 to the Space Wolves
The Scourged - Turn 2
Objectives drawn: Defend Objective 2Only one fresh draw - Defend Objective 2 in my back lines. I've also got to clear away these pesky marines and start defending Objective 3 all over again.
Moreover, my left flank is looking a bit thin, with only Cultists to stop that Primaris squad, so I race my warlord over to deal with it. The smart play would be to screen out with Cultists, but I thought it would be more fun to get his crozuis wet.
The Rhino can't move, but its passengers squeeze out. The Chosen are now at cross-purposes with the Defiler - they want to charge the Intercessors, it wants the Aggressors - but by taking it in turns, they should get there.
With no more deepstrikes to worry about, one unit of Cultists runs after the Apostle, one stays on Objective 2 and another runs to join then on it.
In Psychic, Prescience fails, but Warptime sends the Apostle even closer to the Intercessors, so I guess he's committed now. He even clips one of the Space Wolves with his bolt pistol.
The wounded Intercessor, and one more, fall from Havoc firepower, making the Apostle's task easier. The Helbrutes fire into the Hellblasters, taking out all-but their pack leader.
In the assault phase, the Apostle makes his charge, and do do the Defiler and Chosen, neatly criss-crossing each other to fight the Aggressors and Intercessors respectively.

I have a choice when it comes to my first combat, knowing Pootle has CPs to interrupt - Apostle first and risk the Defiler getting punched by Aggressors, or Defiler first and risk my warlord against those Intercessors?
Happily, my Shattering Truth warlord trait comes into play, forcing the Intercessors to strike last. So I use the Daemonforge stratagem (unnecessarily, as it turned out) to pummel the Aggressors into pulp, before my Chosen completely whiff against the Intercessors (I miss having access to Veterans of the Long War) and take a couple of casualties in return.
Lots of damage, but this is not the best turn for me - I failed to drive the Intercessors off those central objectives and now my warlord is hanging by a thread.
I also fail to make any headway in the VP deficit - clawing only a single point for my home objective.
Objectives scored: Objectives held (1)
10-4 to the Space Wolves
Space Wolves - Turn 3
The turn starts with a quick prayer to Tzeentch - I get Mutating Invocation on my Dark Apostle, who recovers most of his wounds! (he'll need them).
I take a leaf from the Cultist's book and drop the Intercessors on objective 1 back to get as far out of sight as possible. It's not cowardice; it's tactics! The Hellblaster pack leader moves to get within rapid fire range and the Rune Priest moves so he can see and smite the Chosen. I decide to keep my Wolf Lord hidden as I think that there are too many intervening bodies to get him into combat with the Defiler. I'm also nervous about exposing him to a counter-stroke from the Defiler or, in the event that I do kill it, all those Lascannons.
I'm also building up a very healthy VP lead despite running out of assets. That's therefore another reason to keep my Wolf Lord hidden - if I commit him now I could be tabled next turn if I'm unlucky.
The Rune Priest smites a couple of Chosen but (I think) fails to cast Storm Caller.
Shooting is pretty quick as I'm rapidly running out of guns: the Hellblaster misses or fails to wound with his shots. I played True Grit so that the Southern Intercessors were able to use their Bolt Rifles against the Chosen despite being in combat, killing a couple more.

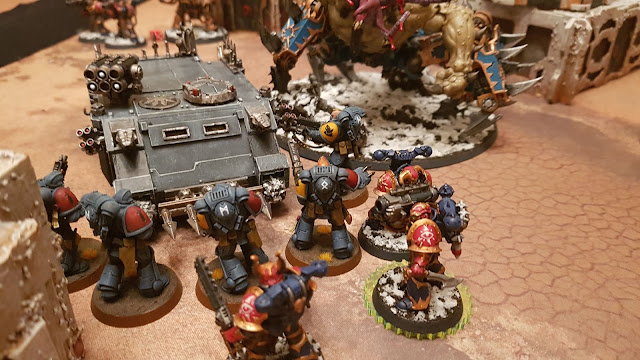
In the fight phase the Northern Intercessors finish off the Dark Apostle (despite a CP reroll for of a failed invuln save) and then the other unit make short work of the remaining Chosen.
So despite the good news from the North, Stylus's most destructive assets are pretty much intact down South. I need a big dose of luck to ride this one out.
Objectives scored: Objectives held (3), Slay the Warlord (1), Hunt with Cunning (1)
Objectives scored: (Scourged): Defend Objective 2 (2)
15-6 to the Space Wolves
The Scourged - Turn 3
Objectives drawn: Supremacy, For the Dark Gods!Supremacy - finally, I have a chance of scoring big points, if I can finally get my tentacled mitts on some objectives.
But I also need to make inroads into the Space Wolves deployment zone, since grabbing their home objective is my best shot at pulling back this VP avalanche.
So I move a unit of Cultists to double-claim my back objective and pull the Defiler out of combat and move him towards the east (luckily his pie-plate base is enough to keep a toe on Objective 3).
In the Physic phase, I put a Smite on the Intercessors, but only score one wound, and Prescience on the Cultists (you never know).
Shooting is, once again, predictably brutal: everything my lascannons can see, they kill. The southern Intercessors and final Hellblaster go down, so that's 1VP For the Dark Gods!
In the Assault Phase, the Sorcerer makes his charge against the remnants of the Intercessor squad, followed by the Cultists, who are keen to see how it's done.
With a point to prove against his late warlord, the Dark Apostle, the Sorcerer swings for the fences, clocking up four hits and three wounds (which will translate into D3 apiece). And then Pootle rolls a double-six for his armour saves and the Pack Leader is left standing.
This doesn't look good - and the Cultists scratching a wound off him doesn't improve the Space Wolf's temper. He punches back with his power fist and decks my Sorcerer. That's both characters gone, and with it, my psychic powers. Oh Chaos, why so reckless?
As a consolation, the mass of Cultists can secure that objective, even if the Space Wolf is still alive on it, so I score Supremacy (rolling a big three), plus the points for holding the objectives. I'm closing the gap!
Objectives scored: Objectives held (3), Supremacy (3), For the Dark Gods! (1).
Objectives scored (Space Wolves): Defend 1 (2)
17-13 to the Space Wolves
Space Wolves - Turn 4
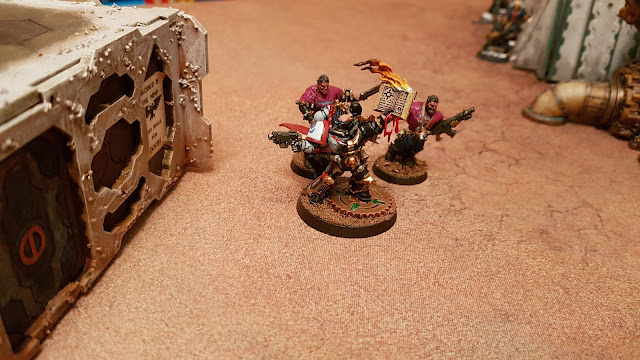
My new objectives are secure objectives 1 (my home objective) and 3 (the one in the middle we've been fighting over all game). That pretty much decides me: I have to commit my Wolf Lord and go down fighting.The first thing I do is to spend a CP to make my Power Fist-armed Intercessor pack leader a Lone Wolf (+2 wounds and he can now reroll hit and wound rolls). The only movement is the two characters who stroll round the corner, somewhat in the manner of Butch and Sundance at the end of that movie.
The Rune Priest starts well by smiting three wounds off the Defiler and follows that up by casting Fury of the Wolf Spirits, so he'll get a load more S5 attacks from the ghosts of Freki and Geri.
 |
| I forgot to put icons on the map for the Dark Disciples, assuming that I'd kill them before the Dark Apostle. However they are still around and fighting the Northern Intercessors. |
In the combat phase the Wolf Lord rolls well and takes down the Defiler in one go! I don't even get to make use of Freki and Geri. I wish now that I'd moved the Rune Priest to take on the Havocs or Helbrute, but I think they were still too far away.
The Defiler didn't last long! Despite Pootle's reservations, I didn't think he would. Wolf Lords can be monsters in close combat.
What really hurts is that I've been pushed off defending Objective 3 AGAIN.
Meanwhile my Lone Wolf makes use of his rerolls to crunch through three Cultists.
Because two characters end up within an inch of the enemy I will get D3 VPs for that from Heroes of Fenris and I roll maximum (which balances out some poor D3 rolling for previous objectives). This is getting really tense now. Can Stylus table me and get enough VPs to catch up?
Objectives scored: Objectives held (2), Secure 1 (1), Secure 3 (1), Heroes of Fenris (3)
24-13 to the Space Wolves
The Scourged - Turn 4
Objectives drawn: The Will of Chaos, Claim and Despoil |
| The DA icon now represents the Dark Disciples |
Good news and bad news with the Objectives: The Will of Chaos randomises each turn, and for this one, it's my home objective, so that's in the bag.
Claim and Despoil I can't manage, because the Space Wolves are only securing their home one at the moment, so there's nothing for me to take from them. I do drive the Rhino onto objective 3, avoiding the Wolf Lord, so I can start defending it all over again.
There's some dancing around the northern objective - I fumbled it a bit, pulling both units out of combat. I should have left the Dark Disciples in combat, and withdrawn the Cultists, so he could only kill two, then consolidate into me. As it was, the newly-minted Lone Wolf just heroically-intervened and regained all his first-round buffs, beating the Cultists up some more, who then melt under Morale.
It's better news in the south, as both Space Wolves HQs face my firing squad of lascannons, and disappear in a puff of smoke.
That's effectively drawn the teeth out of this Space Wolves army - but the VP gap has actually increased, and time is running out to close it!
Objectives scored: Objectives held (3), The Will of Chaos (1), Slay the Warlord (1)
24-18 to the Space Wolves
Space Wolves - Turn 5
A good objective draw here could give me enough of a cushion that I could survive another turn, but I'm really hoping that the game ends. However I get Assassinate (too late), Master the Warp (also too late) and Defend objective 3 (the powers that be REALLY want us to dig up whatever treasure's been buried over there, but that's now beyond me too).The 'large' (three-strong) Intercessor squad move even closer the the cantina, peering in through the windows to see if drinks are being served, whilst the Lone Wolf slugs it out with the Dark Disciples. I think he killed one of them.
He did, but as they're not Troops, no number of them is going to stop him claiming that objective.
At the end of my turn I'm leading by an apparently comfortable 6 VPs, despite Stylus's Rhino finally unearthing the treasure under objective 3 (the map above doesn't show that it was closer to the objective).
Objectives scored: Objectives held (2)Objectives scored: (Scourged): Defend Objective 3 (2) - FINALLY!
26-20 to the Space Wolves
The Scourged - Turn 5
Objectives drawn: Defend Objective 4, Behind Enemy LinesHigh Command wants me to get off my ass - the Defend Objective is the Space Wolves' home one, and I also need to get Behind Enemy Lines (and Linebreaker, and Claim and Despoil)
To compound matters - my remaining units can't see anything - the Lone Wolf is tucked behind a generator, and the remaining Intercessor squad cowers behind the cantina, so there's nothing for my lethal lascannons to shoot.
I need to position for a Turn 6 and hope the game continues: everything advances. The Rhino zooms to the edge of the deployment zone, one Helbrute jogs towards the enemy objective. The other Helbrute and Havocs run to a more central position, ready to shoot anything that pokes a snout out of cover.
Objectives scored: Objectives held (2)
26-22 to the Space Wolves
Space Wolves - Turn 6
I draw Big Game Hunter, but that's not my focus. It's a bit late, but my Lone Wolf sprints into hiding and to try and secure Linebreaker. Despite rolling boxcars, he's still just outside the Scourged deployment zone, but most importantly nothing useful can see him.No, the Lone Wolf breached the enemy lines. Nothing's going to stop his saga!
I toy with leaving the other Intercessors on objective 1, but decide to see if I can stop the Rhino getting Behind Enemy Lines and Linebreaker whilst scoring Big Game Hunter myself. It's something of a forlorn hope, and I only put one wound on in close combat.
Objectives scored: Linebreaker (1)
26-22 to the Space Wolves
The Scourged - Turn 6
Objectives drawn: Master the Warp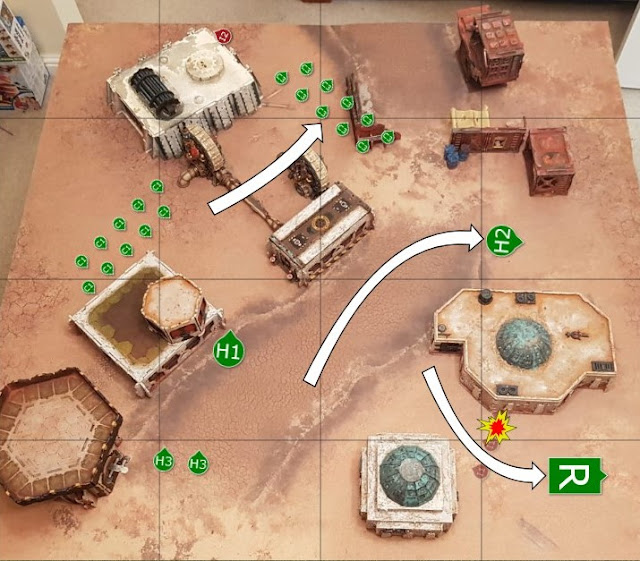 |
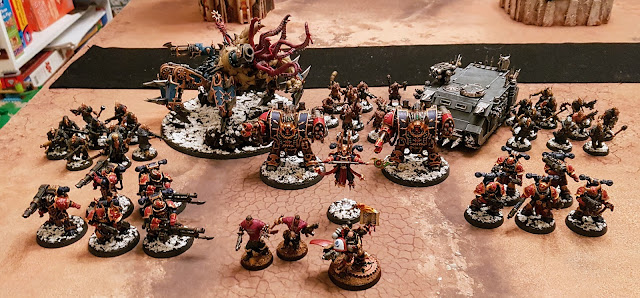
| Where's Wolfy? |
The new objective card doesn't help me, but I can still make things happen! One unit of Cultists run onto the northern objective, while the Helbrute advances to the Space Wolves backline (but doesn't quite make it).
More miraculously, the Rhino heals a wound! (these never succeed - even when I do remember them!) This crucially raises his damage bracket and gives him enough horsepower to disengage combat and get behind enemy lines.
The remaining three Intercessors are left at the mercy of my lascannons which, as we have learned by now, have no mercy. They are wiped out in short order, leaving the Lone Wolf in a very literal sense.
It's only when we're counting up the point that I realise my mistake: I abandoned Objective 3 with my Helbrute, but forgot to move the Havocs onto it.
What is it with Objective 3? I worked so hard to secure the damn thing, and now I leave it behind like an umbrella on the bus!
Still, it was only one VP. I'm sure it wasn't decisive or anything...
Objectives scored: Objectives held (2), Behind Enemy Lines (1), Linebreaker (1)
Result: 26 : 26 - draw!
Locker Room
Well, I held the field, but couldn't win the battle. Whatever that Lone Wolf was up to in my backfield, clearly was all they came here for. That last slip with Objective 3 was an obvious one, but I'm sure there were a few other missed VPs here and there. If it had ended in Turn 5, the Space Wolves have won it; if it had gone to Turn 7, I would have won it. A draw in Turn 6 seems a fair result.
I was very impressed with The Scourged as a solo army. With some big and tough war engines to run forward, it does allow my gunline to wreak havoc (no pun). The drawback is lacking any objective secured units (other than lowly Cultists), so I tend to get pushed off objectives in games like this.
We talked after the game that we'd both previously assumed that the Purge's re-roll all hits ability was better than the Scourged single re-roll, however it worked beautifully with multiple small units. I don't think your Lascannons missed all game! It felt like facing a T'au gunline at times.
We talked after the game that we'd both previously assumed that the Purge's re-roll all hits ability was better than the Scourged single re-roll, however it worked beautifully with multiple small units. I don't think your Lascannons missed all game! It felt like facing a T'au gunline at times.
I also like the Dark Apostle (until he whiffed himself to death) - those prayers (and a bonus one for worshipping a faction), come in handy.
That was extremely exciting! If I'd had a less tired head I might have made some better decisions in turn 6 that could have unlocked the VP needed to win, but you were in the same boat as you forgot to move something onto objective 3 (having already dug up the treasure) so lost a potential point there. As expected, you played a very good game and frankly deserved to win.
I think my biggest mistake was that I definitely should have charged the Wolf Lord into the Defiler a turn earlier. If I'd appreciated how good the Wolf Lord was, I may have split the charges and put the Rune Priest into the Havocs or Helbrutes, however I seem to remember rolling quite well for the Lord, so probably best to make absolutely sure that the Defiler was toast.
I also wish I'd remembered that the Rune Priest had a the Armour of Russ, giving him a 4+ invulnerable save, but I think you actually had lots of lascannons to spare that round...
If I'd had a calmer head and counted the VPs I might have spotted that it was a better idea to leave my Intercessors on objective 1 and get another VP for that, given that you were always going to get behind my lines with the Rhino. However that might have given the Helbrute something to charge, and is balanced by you forgetting to claim objective 3.
If I'd had a calmer head and counted the VPs I might have spotted that it was a better idea to leave my Intercessors on objective 1 and get another VP for that, given that you were always going to get behind my lines with the Rhino. However that might have given the Helbrute something to charge, and is balanced by you forgetting to claim objective 3.












Fantastic Battle! Great to see lone wolf in action, and also to see actual cultists survive a game (if only because they weren't worth the effort of killing)!
ReplyDeleteI almost forgot to make him a Lone Wolf - I remembered partway through my turn and Stylus was happy for me to do it then.
DeleteI think those extra wounds saved his bacon - shame he had nothing more saga-worthy to fight than Cultists after he ascended, but he already had two HQ scalps hanging from his belt by then!
Delete