


You guessed it - more ash wastes terrain. Pretty much done now, I think - having a modular road system finishes off my current spurt of action. It also clogs my cupboard beyond reasonable tolerances. Better not get any more inspirations.

This is cardboard and pumice paste, basically, but I wanted the road to have a bit of a camber to it. So I got some polystyrene and the cutter and did some basic shaping.
Once that was in place, I used road tape. This is a new thing to me, a model railway or diorama tool. It's a big roll of the stuff, black asphalt in colour and texture, and amazingly satisfying to use. Rubbery, easy to tear, great to peel the backing off and very simple to stick to whatever surface you're using it on, but not too unforgiving to try again if it goes on squint. Love it.

Having it over the polystyrene let me hack at it with a broken scalpel to make cracks and pitting. Then I cut myself a stencil and sponged the yellow markings on. White would be a bit too similar to the edges, I decided, although that lost me points from my youngest ("It looks really messy and it should have been white, sorry daddy.").

It was done quickly and with my usual complete lack of finesse, so they don't fit together very neatly. It's all close enough! And I've got lots of corners, dead ends and T junctions for plenty of layouts, although I now realise I don't have a crossroads. Ah well - a job for later, and not a priority.
With this, I also made a quick parking lot:

And improvised a petrol pump with some cardboard offcuts, the lid of an old dice box, some plastic odds and ends and a discarded drug cannister. Thanks, local yoofs.


Finally, a modular trench system to go with it. Wow, did I make heavy weather of this.
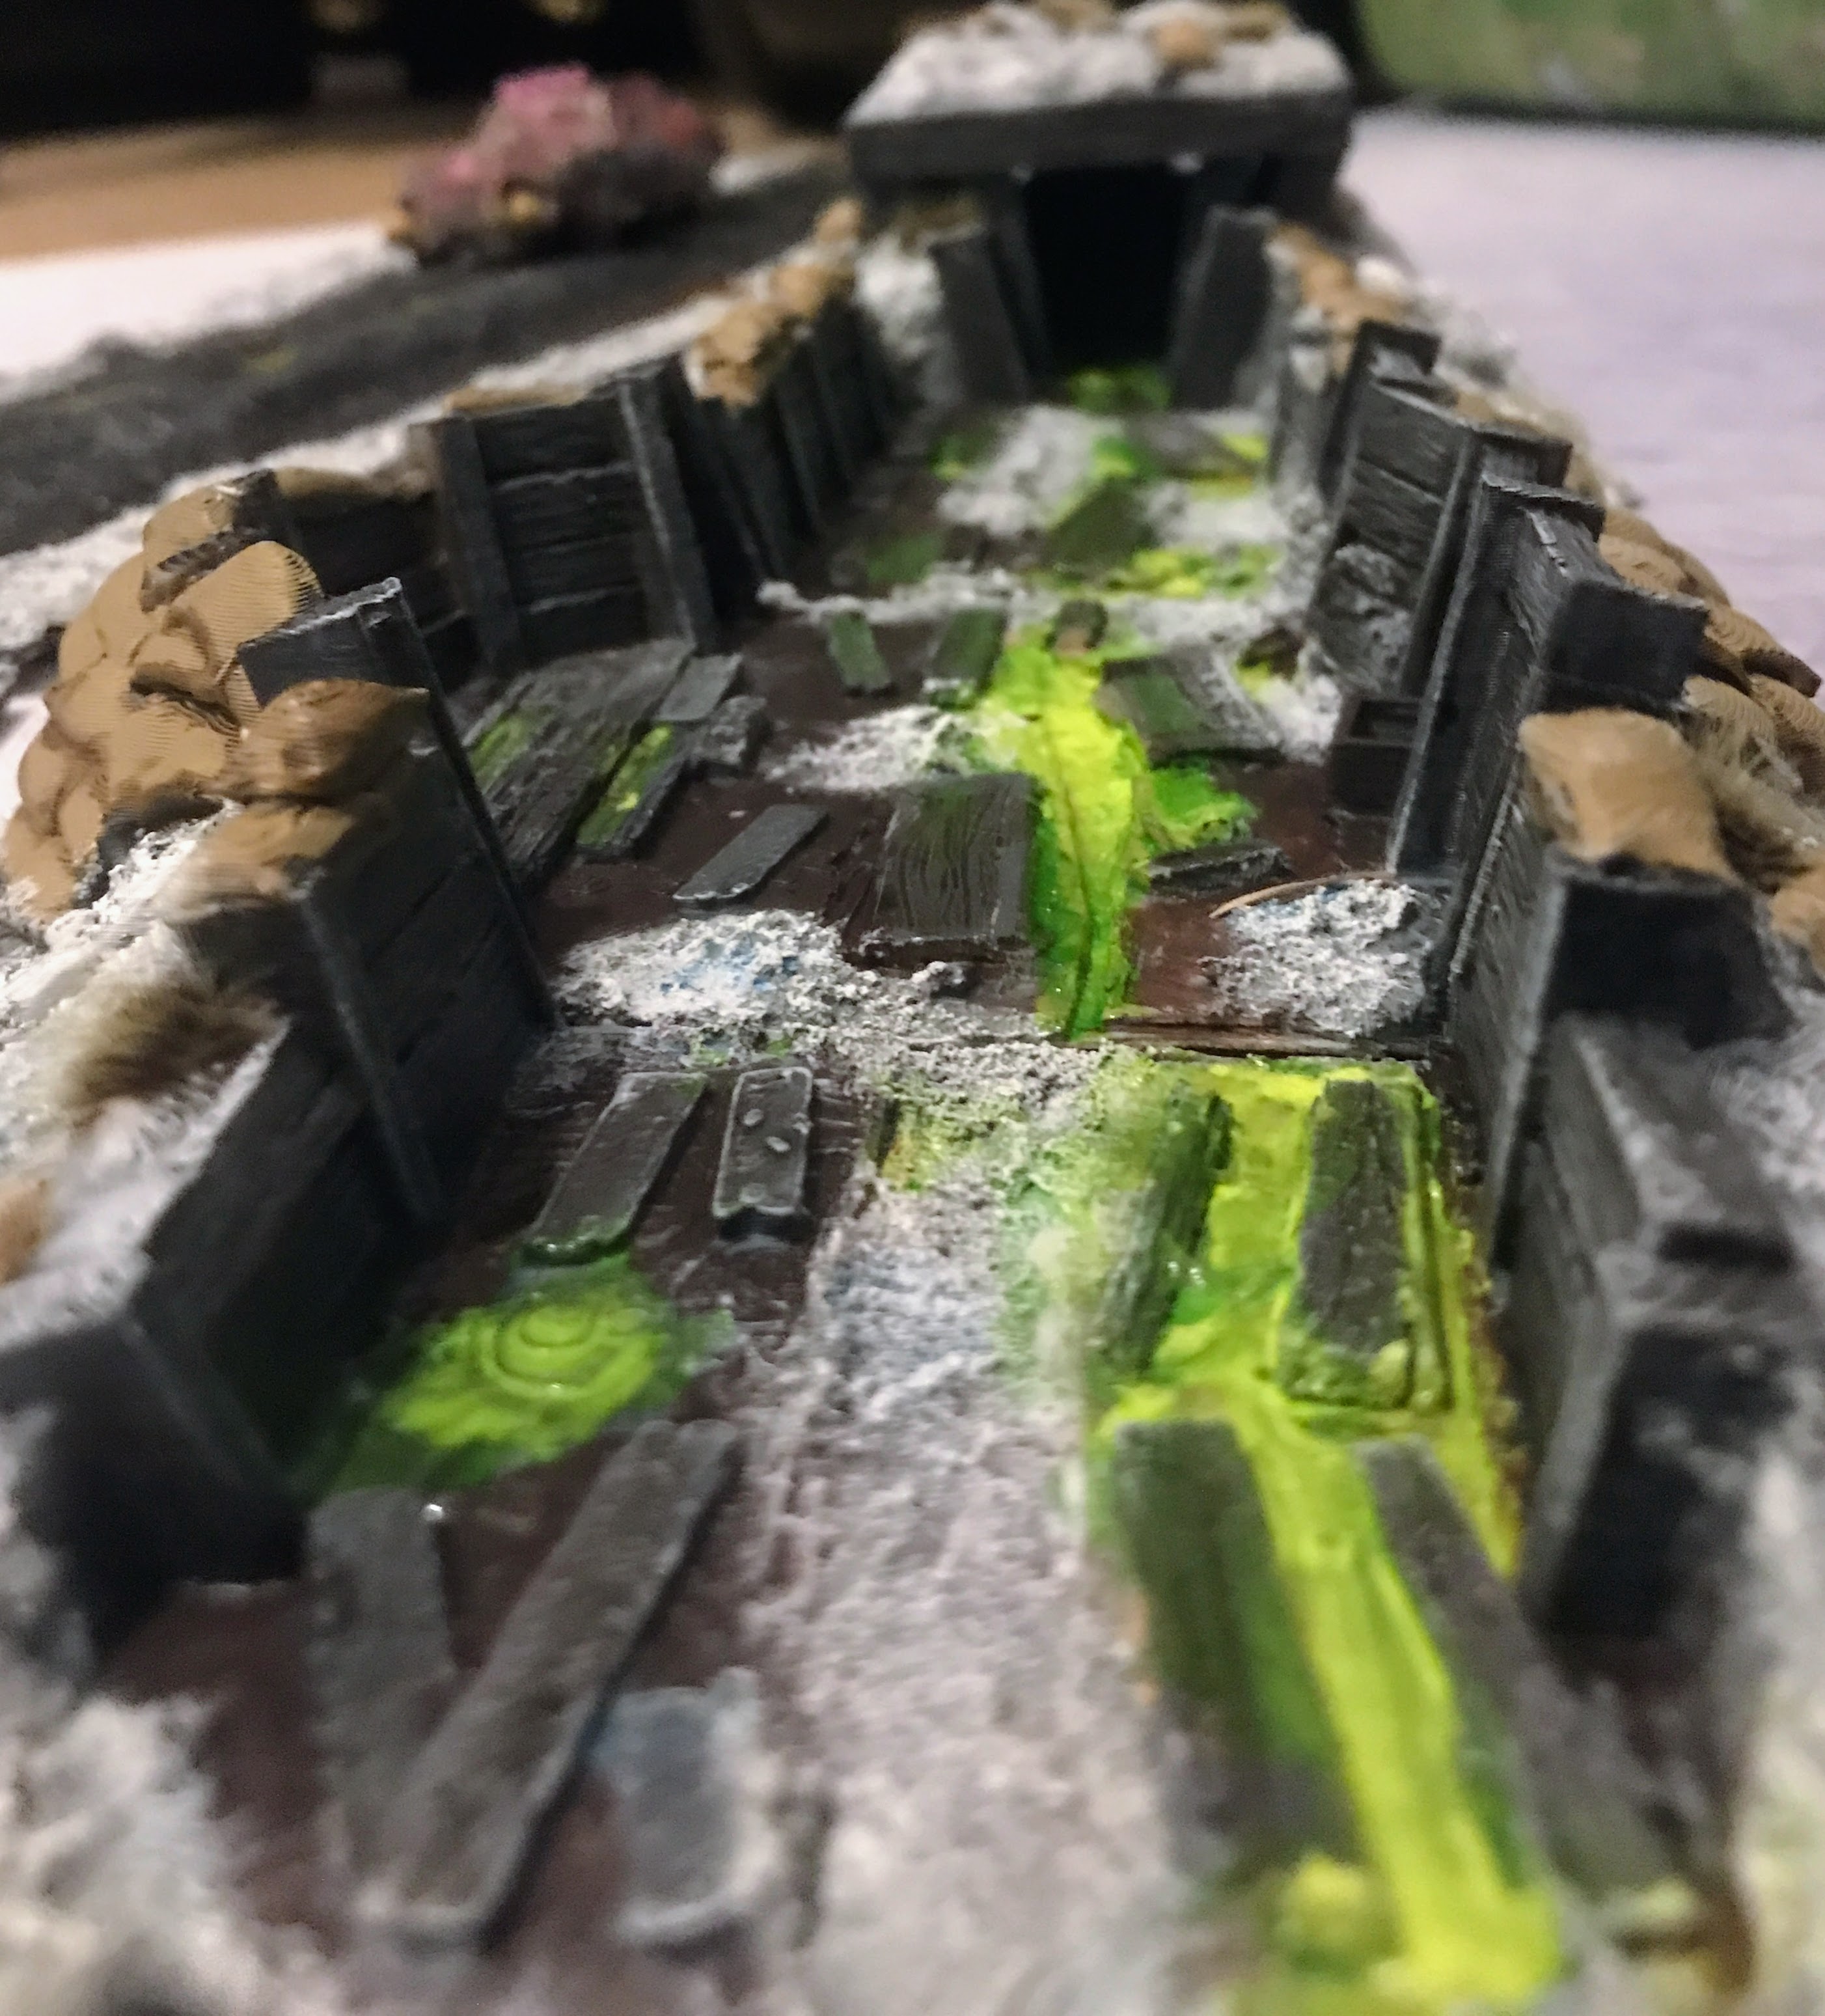
It's another cheapy resin bit from Temu. Lovely, even if a bit stripy, so I decided I would take a bit of time and magnetise it.
This was a bad call, I'm rubbish at magnetising. First of all, I'd got the magnets all the right way round, but only if I had all the bits in the same orientation as when I'd done them. No putting the bunker at the other end, for example. Well, that wouldn't do, so I took half the magnets out again, reversed the polarity down one side so they'd make a circuit, and checked it again.
Good! Except my drilling was sloppy, and some weren't very good matches, so the section would snap slightly out of true in one direction or the other depending on which magnet was feeling strongest. At this point, I also discovered the trenches were too small to fit a 25mm base into.

Right, that wouldn't do, so I cut all the trenches in half along one inner edge and reglued them to card bases, expanding them to fit larger bases and adding in some etched lolly stick bits to cover the bit holes in the floor. At the same time, I could also adjust them to match the holes!
Except I hadn't realised this would totally bugger the corner segment, which was now too short along the outside edge.

Okay. Wearily, I got the milliput and filled in the missing bits. Luckily I realised the bunker (which I hadn't cut open or expanded) would also need some work to make it the right size before I put the putty away again. I could have remagnetised it all at this point too, but quite frankly I couldn't be effed. Enough was enough, I slopped on more pumice paste to cover the new bits and smooth out some of the 3D printing lines, painted it all, took photos and then buried it all at the back of the cupboard, heartily sick of the whole thing.
That's a decent table's worth of ash waste terrain sorted, I reckon! Here's the obligatory vanity shots, and a vague but ominous promise that it will see action soonish.


Looks great; love the pics at the end in particular
ReplyDelete